Showing posts with label pie. Show all posts

Friday, September 18, 2015

Apple Season

It's apple season!    Here are a few things we are doing and have done with apples.   I hope you get a chance to try a few of them.

Apple Pie Filling
Apple Pear Pie Filling
Apple Slices - canned
Apple Dumplings
Apple Tart
April's Apple Slices [Slab Pie]
Green Tomato/Apple Crisp 
Apple Pear Maple Jam
Autumn Berry [Autumn Olive/Elaeagnus] Apple Jam


One bushel of apples makes about 21 quarts of apple pie filling or canned apple slices.   I've got one bushel done [pie filling] and one more coming [canned apple slices].   Our pantry is overloaded this year, which is both a blessing and a curse.   I'm focusing on the blessing part. 


Wednesday, November 6, 2013

Apple Slices

A couple of weeks ago, a friend of mine posted this divine recipe for Apple Slices on her blog.   Here's the link: http://www.ala-murphala.com/blog/2013/10/cheating/.    I was excited to try them, but had a hard time convincing my family that we needed to move this recipe up in the queue.  [We always have a long line of recipes we're wanting to try.] 

I eventually won out, and it was a quick job to make these up with three of us mixing, cutting and rolling.    We made half a batch in a 9x13 pan.

Then we went out and moved a lot of gravel.

I took a quick break to come in and glaze the cooled pastry so they'd be ready to snack on when we were done.

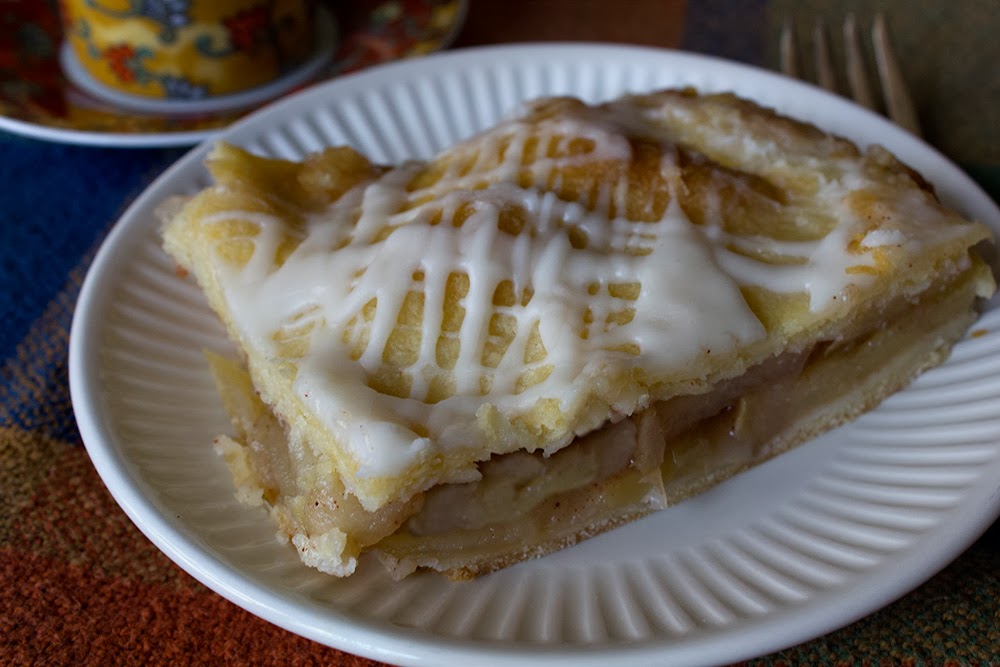
These were a HUGE hit.  There were threats to drop something on them so I couldn't take a pic and, 'Darn.  We'd have to make them again.'   I got the pics, quick, but we're still going to make a lot more of these this winter.   They are fantastic the first day and if you cover them with plastic they'll soften up and be even better the second day.   They won't last longer than that.

Here's the recipe.  It's a half a batch of the recipe here.

April's Apple Slices 
www.rurification.com    Adapted from Flour, Water, Yeast & Salt.

Crust:
2 cups all-purpose flour
1/2 teaspoon salt
2/3 cup shortening or butter
2 egg yolks
1 tablespoons lemon juice
1/4 cup water to start, plus a bit more if necessary

Filling:
5-6 cups cored, peeled, sliced apples.  I used 4 large apples
1 cups sugar
2 tablespoons flour
1/2 teaspoon ground cinnamon

Glaze:
1 cup confectioners’ sugar
2 tablespoons butter, softened
1/2 teaspoon vanilla
2 tablespoons milk

Preheat the oven to 400. 

We started with the filling. Peel, core and slice the apples.   [I'm too lazy to peel, so we left ours on.   Delicious!] Put them in a big bowl.  Mix the sugar, 2 Tablespoons of flour and cinnamon in a smaller bowl and sprinkle over the apples.   Let sit while you prepare the crust.

Combine the crust ingredients except the water with a pastry blender or a food processor.  Put the crumbles in a bowl and add the water.  Mix with clean hands - it's the only way I've found to really know how wet or dry the dough is.   Add a bit of extra water if the dough won't stay together.

Divide the dough in half and roll one half out right in a 9x13 pan.   I have a small pastry roller with a small roller on one end and a larger one on the other end.  This worked great.    Roll the other half of the dough on the greased back of another pan - I used a jelly roll pan. 

Put the filling in on the first crust in the 9x13 pan.  Sprinkle the extra spice mix from the bottom of the bowl all over the apples.   Invert the other crust on top of the apples.   It's all right if it's not beautiful.    Prick all over with a fork.

Bake for 40 minutes on a lower rack in the oven - the bottom crust gets done well this way.

Remove and let cool.   When cool, make the glaze and drizzle over the pastry.  Let the glaze set up and then serve. 

These are fantastic re-warmed and served with ice cream. 

Note:  This is a short pastry.  You don't need a pan with tall sides. You can double the recipe and make it in a large jelly roll pan.   Great for serving crowds!

Sunday, October 13, 2013

Apple Tart

Confession:   This apple tart is just an open face apple pie. 

We only had one ready-made pie crust and I was too lazy to make more.  The trick is to put it in a tart pan.  Everyone should have a tart pan for just such occasions.

Also - the apples were frozen in a bag and we didn't defrost them before we unceremoniously dumped them in the crust in big frozen chunks.

It looked awful.   I didn't care.  

Remember that - it's the unceremoniousness that makes it taste extra good.    I'm sure.

If you want to make it fresh, here's the recipe:

Apple Tart
www.rurification.com
  • 1 pie crust, pressed into the bottom of a tart pan
  • 8 cups sliced apples, skins on
  • 1/2 cup sugar
  • 1/4 tsp cinnamon
  • 1/4 tsp nutmeg
Put the crust in the tart pan.  Toss the apples with the sugar and spices.   Dump it all unceremoniously into the tart pan.   Bake on the bottom rack of the oven at 350 degree for 60 minutes or until apples are soft. 

This is the same apple sugar spice mix we use for frozen pie mixes.   We wash and cut up 1/2 bushel of apples at a time, core them and slice them.  Don't bother peeling them.   Put 8 cups of apples in a freezer bag and dump in the sugar/spice mix.   Freeze flat so it's easy to break up into chunks for those last minute apple tarts. 

Tuesday, August 27, 2013

Perma-Flo Experiment #3: Peach Plum Raspberry Pie Filling

The pie filling experiments with Perma Flo continue.    Both because I'm curious about this stuff and more than a little OCD. 

That's CDO for you guys who like to see things alphabetized.

Experiment 1 is here.  Good, but gloopy.
Experiment 2 is here.  Runny.

In this batch of pie filling I decided to see what would happen if I macerated the fruit with sugar overnight to bring out the juices so I wouldn't have to add any extra water.

We dumped enough fruit [4 cups per pie] for 3 pies in a big bowl with 3/4 cup sugar per pie [2 1/4 cups total] and let it sit overnight.  The next day the juices were flowing and I put the fruit-sugar mix in the pot and heated it to boiling.   Then I added 1/4 cup Perma Flo per pie [3/4 cup total] and stirred like crazy.   As soon as it got thick I turned off the heat.   It made beautiful pie filling at just the right consistency. 

One problem:   As soon as you add the dry Perma Flo, it clumps.   That makes it hard to stir in completely and in the finished pie, you get the occasional gloopy gluey lump.   It's not a deal breaker, but surely there's a better way.

Stay tuned for Experiment #4.  

Monday, June 18, 2012

Peach Pie Filling

Last year I made peach pie filling in a jar.   The kind that all I had to do was open it up and pour it in a pie crust and bake.  

I love that kind.

It was delicious.  Here's the link.

So this year, I decided to make some more with our peach bounty.

Only I wanted to do something a little different than just nutmeg.

So I added some red raspberries and vanilla.

Raptures.

I made a big batch so I'd have several bottles.    I'm so glad I did.

Peach Raspberry Vanilla Pie Filling
  • 16 cups chopped peaches
  • 2 cups raspberries
  • 4 Tablespoons lemon juice
  • 4 cups sugar
  • 1/2 cup corn starch
  • 1/2 tsp nutmeg
  • 4 Tablespoons vanilla
Mix it all together and bring to a boil.   It'll get clear when the corn starch does it's thing.   Yield 4 quarts.  Process for canning 20 minutes.

Note:   The cornstarch will do just fine in this pie filling for 6 months.   After that it starts to separate a bit.   Make sure you keep these at the front of the cupboard so you remember to use them first.

Bon apetit!     [Is that how you spell that?]

Monday, July 4, 2011

Peach Pie Filling in a Jar

Every year we put away peaches for pie filling.  Usually we put our pie filling in the freezer, but freezer space is always at a premium, so this year I made a few quarts of peach pie filling to bottle.  

It was easy.

And, it's pretty.

AND we can use it for pancake topping. 

AND it has nutmeg in it and nutmeg is my favorite spice.   I heart nutmeg.

AND the recipe is flexible and you can make a ton at a time, which you can't do with jelly or jam, [ask me how I know], as long as you know how to do math, which you should.

Ahem. 

This is how I did it.   

First I figured the proportions of stuff I needed for a basic single pie:   4 cups of peaches plus the other pie filling stuff.

Then I took my Giant Bowl of cut up peaches and I measured them.   I had 14 cups.

14 divided by 4 is 3 1/2.    I multiplied everything in the recipe by 3 1/2.

All of you experienced cooks are rolling your eyes.   I don't blame you.   To you this is second nature and we love you for it.    This explanation isn't for you.

Nope, this is for all you new cooks out there just figuring out what to do with your Giant Bowls of peaches that you now have because you were smart enough to take advantage of free food when you saw it.   Good for you!

Back to the regularly scheduled recipe....

Peach Pie Filling for 1 pie:


4 Cups cut up peaches
1 T lemon juice
Put this in a heavy saucepan.   Blue pans are the best.   Just sayin'.
 
Mix in a bowl:
1 Cup sugar
1/8 tsp nutmeg
2 T cornstarch

Add the sugar mixture to the peaches and heat it until thick and clear.    Put in clean, hot jars and process.  [30 minutes for quarts.]


Now, since I had 3.5 times that many peaches, I multiplied everything by 3.5:

14 Cups peaches
3 1/2 T lemon juice

3 1/2 Cups sugar
7 T cornstarch
1/2 tsp nutmeg [because it was easier than 7/16 tsp.   Really.]

Follow the cooking directions as above.

Note:   You CAN NOT do this with jam and jelly and candy recipes.  Those have to be cooked one batch at a time.   Trust me.

You CAN do it with applesauce, fruit butters, soups and stuff like that.

UPDATE:   These will keep on the shelf beautifully for 6 months.  

I've seen books that say that you shouldn't can with corn starch because it separates on the shelf.    I watched these bottles pretty carefully to see if that happened, and when.   They were just fine - and very delicious - for 6 months.    I opened the last one at 8 months and it had started to separate some clear liquid out from a gelled mass.    It was still delicious.    I'm doing more next year.
Related Posts Plugin for WordPress, Blogger...