Showing posts with label sauerkraut. Show all posts

Sunday, November 20, 2016

I Heart Homemade Sauerkraut

I've been hungry for sauerkraut.  I love sauerkraut.  Plus, it's a great winter food.   It's tasty.  It's good for you.

One thing though - it stinks.

We make it anyway.   I've posted some old fashioned methods here before.

Here's the first time I made kraut.

Here's the second one.

This year I decided to try a method I found on Food in Jars blog.  It was super easy and there was no pounding.   It does mean getting your hands in there and squeezing for a bit.

I used a small head of cabbage, about 1  1/2 Tablespoons of salt and a sprinkle of caraway seeds because I'm all about the authentic kraut experience.

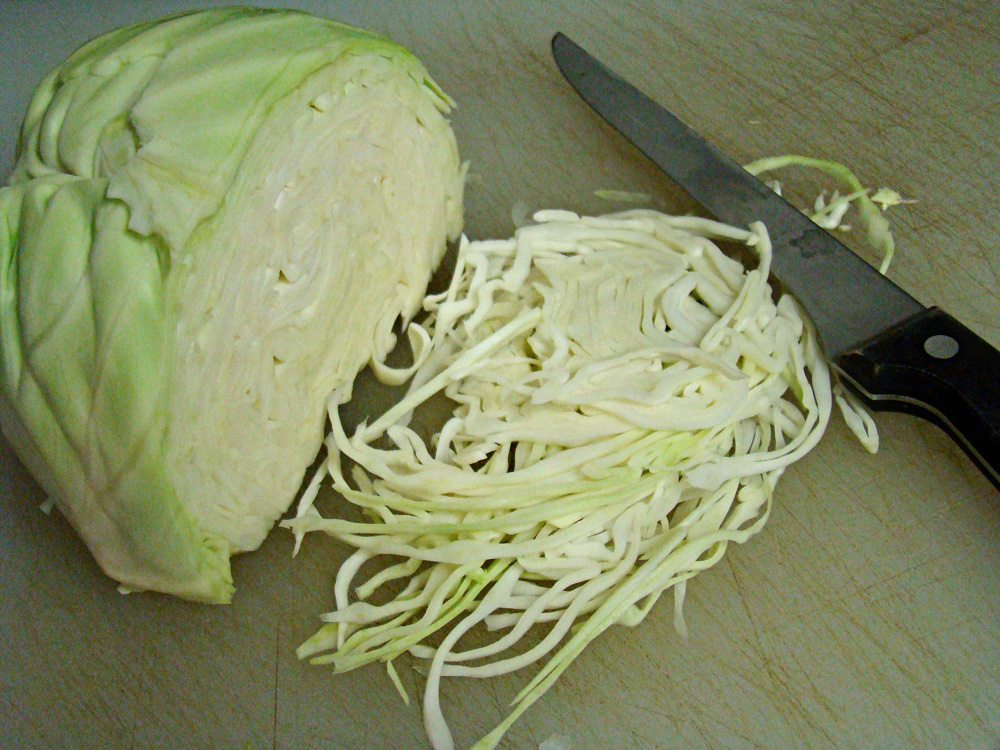
I cut the cabbage into quarters and removed the core.  Then I sliced everything very thinly by hand with a knife.  I put it all in a giant bowl, mixed the cabbage and salt and seeds with my hands, squeezing it all until the cabbage released the water.  It only took a few minutes, interrupted by the occasional washing up of jars, table, etc.   When the cabbage was looking transparent and there was a good amount of water in the bottom of the bowl, I packed it all into a quart jar. [It'll feel WET.  You'll know.]  Put some sort of weight in it to keep the cabbage below the water.  The water came to the top of the jar, so I set the whole thing in a bowl to catch the overflow.   As it ferments, bubbles will form in the kraut and displace some of the water.   It will ooze out, so make sure you put your jar on a dish,  in a bowl or a deep lid.   Watch for overflow and empty and wash it at least every day if not more often.   Let it set on your counter/window for a week, then pop it in the fridge and it's good to go.   Naturally fermented.  Nature's finest food.

Note on weights:  I used a wide mouth jar for the kraut, so I used a narrow mouth glass insert from an old zinc jar lid as my weight.   You can use a small mouth canning lid, a 4 oz. jelly jar capped and full of water, or a real life pickle weight instead.   Feel free to be creative. [I confess, I'm kind of really wanting those pickle weights, though...]

Hope you make some and hope you love it!    Happy November!

UPDATE:  It took 7 days to get gorgeous and delicious sauerkraut this way.  Fastest ferment ever.   Bonus, no stink.  This will forever be my go-to method for making sauerkraut.  

Saturday, December 17, 2011

Sauerkraut

I love sauerkraut and it's the season for starting some!

The best sauerkraut is made with the late cabbages, which is great because I'm so tired in September that I couldn't put up another thing.   By this time of year, I'm desperate to do something harvest-y, if you know what I mean, and sauerkraut is perfect.

What you need:
  • Cabbage
  • Salt:   2 Tablespoons per head of cabbage.
Really.   That's all.

What you do:

1.  Cut up the cabbage in shreds.   Ideally 1/8 inch wide.
2.  Sprinkle it with salt.
3.  Pound the living crap out of it.   Or at least pound it until the cabbage is covered in its own juice.
4.  Put it in jars and press it down until it's covered by liquid.
5.  Sprinkle extra salt on top.  Be generous - it's going to keep the mold away.
6.  Let it sit in a cool place for 4-6 weeks to ferment.


It's really very simple, isn't it.

Some things that I've learned over the years:
1.  You can put the cabbage in the food processor, but it looks more like cole slaw than sauerkraut when you're done.   It does juice up faster.    You decide which is more imporant - shreds or juice.
2.  Put extra salt in when you're using an extra big head of cabbage.
3.  Use a potato masher to pound with.   Very efficient.
4.  Pound in a plastic bucket.   Seriously.   Really.
5.  You can ferment it in a warmer place, but you're much more likely to mold.   I hate it when my sauerkraut molds before it's done.   I keep mine in a mudroom that's between 55-65 degrees.  It takes a couple weeks longer, but the product is better.
6.  Don't forget - sauerkraut smells like farts while it's doing its thing.   It's normal.
7.  Keep the sauerkraut away from your bread making area and vinegar making area.   Those yeasts might cause problems for your sauerkraut.


Here are notes from the last time I posted about sauerkraut.

So, how do you like to eat your sauerkraut?

Saturday, January 29, 2011

Sauerkraut


Sauerkraut is one of my favorite winter foods.   It's not rocket science to make, nature does all the work and it is delicious either hot in a reuben or cold with a fork right out of the jar.  Even my kids will eat it in a reuben.  I also like it on salads or as a coleslaw base.   Moosewood has a fabulous recipe for an Apple Sauerkraut Casserole in their Enchanted Broccoli Forest cookbook  (link below).  We like it with crispy polish sausage. [We fry the sausage to get as much fat out of it as possible.  Also, it's just better crispy.]

Sauerkraut happens by way of lactic fermentation. This is not the type of fermentation that makes alcohol.   Here is an interesting site on the benefits of lactic fermentation in food and they have recipes.

To make your own sauerkraut, all you have to do is take your regular every day type cabbage from the grocery store and shred it, salt it, pound it and let it sit for 3-4 weeks.   Easy.

Here is a step by step of how we do it:

1.  Get cabbage.   They say late season cabbage is the best and since I'm too busy doing other foodie things all summer and fall, winter is the first chance I have to think about doing sauerkraut.  I'm figuring that the only cabbage you can get at the grocery store in December is the late season kind.  

2.  Weigh the cabbage so we can figure out how much salt we need to use.    Figure on 1 Tablespoon of salt per pound - or about 2 Tablespoons for a regular head.

3.  Shred.  I do this by hand but you can use a food processor.  You get longer shreds if you do it by hand.  You're supposed to shoot for 1/16th of an inch shreds.  I shoot for 1/8th inch and try not to cut myself.  

4.  Salt.   We put all of the shreds in a nice huge bowl and salt it, then mix it up well.   Things should start to ooze.   Ooze is good.

5.  Pound the living snot out of the cabbage.   Do Not Pound In A Glass Bowl.  [Don't ask me how I know.]  We transfer the salty cabbage to an empty plastic ice cream bucket and use a potato masher to pound.    It is loud.  It takes some time and patience.   I use this opportunity to work out anxiety or perhaps some less than kind feelings about someone in my life.  We pound until the juice covers the cabbage.

6.  Put into jars, leaving about 1 1/2 inches of headroom.  Juice should cover the top of the kraut.  The headroom is important.   As the fermentation occurs, little bubbles push the contents up a bit and if the jars are packed to the top, things will overflow.   I know this from experience.

Ready to eat now!
7.  Put lids on the jars but don't screw them down tightly.  Air is good. Also, the ability for little bubbles to escape is good.   If they can't escape, the jars might explode.  Seriously.  This is not something we want to experiment with. 

8.  Put jars in a plastic bucket to catch any accidental overflow and then tuck it away in a cupboard where it won't freeze.   We left ours in our jelly cupboard this year and it ripened a week faster [in 3 weeks] than when we put it in our mudroom where the temp is much lower [4 weeks]. 

9.  Notes:  Sauerkraut overflow smells like farts.   We clean it up and the smell goes away.


Related Posts Plugin for WordPress, Blogger...