I grow favas every year just because they are snow tolerant. The University of Idaho extension office suggests planting favas as a winter cover crop.
Who knew?
I plant them the same time I plant the peas. This year we put extra chicken dirt on the garden and I've never seen favas so happy and dark green in my life. They're about 18 inches tall now and flowering like crazy.
White flowers with black spots.
The beans will come in pods. You're supposed to take them out of the pods, then take the outer cover off the individual beans. The outer cover can be bitter.
I don't care. I take them out of the pod then sautee them with lots of garlic. The bitter cover is pretty mild and doesn't bother me.
Also, if you haven't looked at the Gardening tab above lately, you might check it out now. I've added a lot of information on our veg gardening schedule and a comprehensive list of what I'm growing this year. As things progress, I'll be commenting on our experiences with each variety.
Showing posts with label cooking. Show all posts
Sunday, May 27, 2012
Thursday, June 2, 2011
Rose Petal Jam
Oh. Yes. Rose Petal Jam.
It's exotic. It's pink.
It's seriously summer! The roses have loved all the cool and rain and are blooming the best we've ever had them. Since we have an abundance of flowers, it's time to preserve that delicious fragrance and make some jam.
I started with a recipe for Rose Petal Jam from www.allrecipes.com. It didn't work and I do NOT recommend it.
So I played around and came up with a great recipe on my own.
1 Quart rose petals - pesticide and spray free
2 Cups sugar
juice of one lemon
3 Cups cold water
3 T Ball Low sugar pectin powder.
1. Wash the petals and drain them a bit. [They don't have to be at all dry]. If you're anal, cut off the white part at the bottom. They say it's bitter. I say that's crazy.
2. Mix the petals with the sugar and let it sit overnight. It'll be mostly syrup in the morning.
3. In a jelly pot [the kind that you can get really hot - not plain cast iron or your nice Le Creuset] mix the water, lemon juice and the Ball pectin. Heat it until it boils hard. Stir it a lot.
4. Boil hard for 1 minute.
5. Add the petals and sugar mix and boil again. Stir a lot.
6. Boil hard for 1 minute.
7. You can strain out some of the petals if you need to here.
8. Ladle into sterilized jars and process to seal. 10 minutes for pints and smaller jars. 20 minutes for quarts.
For more information about pectin, see this post.
It's exotic. It's pink.
It's seriously summer! The roses have loved all the cool and rain and are blooming the best we've ever had them. Since we have an abundance of flowers, it's time to preserve that delicious fragrance and make some jam.
I started with a recipe for Rose Petal Jam from www.allrecipes.com. It didn't work and I do NOT recommend it.
So I played around and came up with a great recipe on my own.
1 Quart rose petals - pesticide and spray free
2 Cups sugar
juice of one lemon
3 Cups cold water
3 T Ball Low sugar pectin powder.
1. Wash the petals and drain them a bit. [They don't have to be at all dry]. If you're anal, cut off the white part at the bottom. They say it's bitter. I say that's crazy.
2. Mix the petals with the sugar and let it sit overnight. It'll be mostly syrup in the morning.
3. In a jelly pot [the kind that you can get really hot - not plain cast iron or your nice Le Creuset] mix the water, lemon juice and the Ball pectin. Heat it until it boils hard. Stir it a lot.
4. Boil hard for 1 minute.
5. Add the petals and sugar mix and boil again. Stir a lot.
6. Boil hard for 1 minute.
7. You can strain out some of the petals if you need to here.
8. Ladle into sterilized jars and process to seal. 10 minutes for pints and smaller jars. 20 minutes for quarts.
For more information about pectin, see this post.
Wednesday, June 1, 2011
Pectin - Ball Real Fruit Pectin
Not all pectin brands are equal. They have very different processing requirements. REMEMBER THAT! You can't substitute one brand for another and use the same instructions.
I use Ball Pectin. Ball has a new pectin product out.
UPDATE 3: I now use Dutch Jell All Natural Lite. Way cheaper!
It's a quasi-bulk jar of pectin, 4.7 oz, designed so that you can adjust the amount of pectin easily to the amount of jam you want to make. If you only want 2 jars of jam, you only need 1 1/2 Tablespoons of pectin. The old packets of pectin were 3 Tablespoons.
It's a good idea. But it's going to take some getting used to.
First the bad news. The lovely paper insert full of recipes that used to be in the box has now been replaced with a sorta-sticky wrap-around label.
No more fun recipes. No more freezer jam recipes.
I looked online to find out if they had a recipe page, but I can't find one. Maybe they want you to buy the Ball Blue Book. [ If you don't already have one, get it. It's chock full of handy information]
UPDATE: I finally found the BALL recipe site here. Pay special attention to the instructions and the type of pectin called for. I noticed that some of them looked odd and then realized that they called for liquid pectin.
UPDATE 2: They moved the recipes page to here.
UPDATE 4: My recipes are better. Check out A Simple Jar of Jam on my sidebar. You can get a free preview by following the link. You can buy the book from my Etsy site: www.rurification.com
[If you want more recipes, you could go over to the Sure Jell site, but remember those cooking directions will NOT work with Ball Pectin!]
Another thing that REALLY bugged me was the quantity of pectin inside the jar when you open it up new.
I opened this fresh jar just before I took the pic so you can see that NEW, it's only just over half full. The first jar I opened was the same.
That is total marketing B.S. And as a consumer, it really ticked me off.
Now for the good news.
Ball makes great pectin and I love it because you can use as little sugar as you want. Make sure to get the Low or No-Sugar Needed Pectin. That's what I'm showing here.
Photo: Rose petal jam [recipe tomorrow!] that I made with it today.
Here is the basic process for using BALL pectin.
1. Stir the pectin in the cold fruit/juice or water. NO SUGAR YET. Really. I'm serious. Don't go there.
2. Bring to a boil and boil HARD for 1 minute. I always do 2 minutes just in case.
3. Add the sugar.
4. Bring to a boil again and boil HARD for 1 minute. I always do 2 minutes just in case.
5. Put in sterilized jars and process to seal.
A lot of old recipes have you adding the pectin to the sugar. That doesn't work with Ball. I know. I've tried it. Use Ball pectin the way I described above.
Notes:
UPDATE 3: I now use Dutch Jell All Natural Lite. Way cheaper!
It's a quasi-bulk jar of pectin, 4.7 oz, designed so that you can adjust the amount of pectin easily to the amount of jam you want to make. If you only want 2 jars of jam, you only need 1 1/2 Tablespoons of pectin. The old packets of pectin were 3 Tablespoons.
It's a good idea. But it's going to take some getting used to.
First the bad news. The lovely paper insert full of recipes that used to be in the box has now been replaced with a sorta-sticky wrap-around label.
No more fun recipes. No more freezer jam recipes.
I looked online to find out if they had a recipe page, but I can't find one. Maybe they want you to buy the Ball Blue Book. [ If you don't already have one, get it. It's chock full of handy information]
UPDATE: I finally found the BALL recipe site here. Pay special attention to the instructions and the type of pectin called for. I noticed that some of them looked odd and then realized that they called for liquid pectin.
UPDATE 2: They moved the recipes page to here.
UPDATE 4: My recipes are better. Check out A Simple Jar of Jam on my sidebar. You can get a free preview by following the link. You can buy the book from my Etsy site: www.rurification.com
[If you want more recipes, you could go over to the Sure Jell site, but remember those cooking directions will NOT work with Ball Pectin!]
Another thing that REALLY bugged me was the quantity of pectin inside the jar when you open it up new.
I opened this fresh jar just before I took the pic so you can see that NEW, it's only just over half full. The first jar I opened was the same.
That is total marketing B.S. And as a consumer, it really ticked me off.
Now for the good news.
Ball makes great pectin and I love it because you can use as little sugar as you want. Make sure to get the Low or No-Sugar Needed Pectin. That's what I'm showing here.
Photo: Rose petal jam [recipe tomorrow!] that I made with it today.
Here is the basic process for using BALL pectin.
1. Stir the pectin in the cold fruit/juice or water. NO SUGAR YET. Really. I'm serious. Don't go there.
2. Bring to a boil and boil HARD for 1 minute. I always do 2 minutes just in case.
3. Add the sugar.
4. Bring to a boil again and boil HARD for 1 minute. I always do 2 minutes just in case.
5. Put in sterilized jars and process to seal.
A lot of old recipes have you adding the pectin to the sugar. That doesn't work with Ball. I know. I've tried it. Use Ball pectin the way I described above.
Notes:
- Hard boil means it's boiling so hard you can't stir it down. Keep stirring. If the boil goes away, it's not boiling hard enough. When it boils even with you stirring, it's a hard boil.
- Sometimes you need to soak your fruit or whatever overnight with the sugar. Don't worry about that. DO NOT stir Ball pectin into the sugar/fruit mix. [I know. I tried it.] Dissolve your Ball pectin in cold water instead. 3 cups is nice and you can boil it down quite a bit as you're getting it to the hard boil stage.
- Add the sugar only after the Ball pectin has been activated by the 1 minute hard boil. It doesn't matter if you're adding just dry sugar, or petals and sugar that have been sitting overnight. I've done it both ways with success.
- To convert an old recipe, just re-arrange the order in which you add things. Add the pectin to cold fruit/juice or water, boil, add sugar or fruit/sugar mix, boil. You'll still be able to use those recipes - you'll just need to adjust your thinking a bit.
- Take the opportunity to reduce the sugar you use in those old recipes. You'll probably find that you can cut out 1/3 of it and not even notice. Play around. It's an excuse to make more jam.
Friday, February 25, 2011
Chicken with Tomasqua, Chantrelles and Pesto
Eric is a cooking genius. He loves good food and since I quit cooking sometime after our second kiddo, he stepped up to the plate [pun intended] and consistently hits home run after home run. My major contribution is to can/preserve what we can grow and find around here. For this dish, Eric used tomasqua, chantrelles, and pesto that we had put up during the summer.
Tomasqua is canned tomatoes with whatever summer squash is overflowing in the fridge on canning day. I just chop up the squash - yellow pattypan is my all time favorite - and toss it in the pot to cook with the tomatoes. I prefer a 3:1 tomatoes to squash ratio, but you gotta can what's ready and sometimes we have more squash than that. You want as much acid as possible in the vegetables, so I don't use more than equal parts tomatoes and squash. Always add the lemon juice and salt that the Ball Blue Book requires.
Tomasqua Sauce
Forgive me for being vague with the recipe, but I cook by feel, not by measuring cup.
Chantrelles
Yep, these are picked fresh right off our property in the summer, the day after a rain. I saute them slowly in tons of butter and freeze them.
Pesto
Use your favorite recipe. My favorite came from my friend Janiel, and uses pistachios instead of pine nuts. We make loads and loads of this all summer long and freeze it. It's an excuse to sit down and shell the nuts and listen to the birds and drink cold lemonade. Plus, fresh basil is one of those things that makes life worth getting up in the morning for.
Here is what Eric cooked last week with what he found in the cupboard and freezer.
Chicken with tomasqua, chantrelles and pesto [photo above]
Tomasqua is canned tomatoes with whatever summer squash is overflowing in the fridge on canning day. I just chop up the squash - yellow pattypan is my all time favorite - and toss it in the pot to cook with the tomatoes. I prefer a 3:1 tomatoes to squash ratio, but you gotta can what's ready and sometimes we have more squash than that. You want as much acid as possible in the vegetables, so I don't use more than equal parts tomatoes and squash. Always add the lemon juice and salt that the Ball Blue Book requires.
Tomasqua Sauce
Forgive me for being vague with the recipe, but I cook by feel, not by measuring cup.
- 1 quart tomasqua or tomatoes
- onion
- butter
- garlic - lots
- basil
- oregano
- thyme - not much
Chantrelles
Yep, these are picked fresh right off our property in the summer, the day after a rain. I saute them slowly in tons of butter and freeze them.
Pesto
Use your favorite recipe. My favorite came from my friend Janiel, and uses pistachios instead of pine nuts. We make loads and loads of this all summer long and freeze it. It's an excuse to sit down and shell the nuts and listen to the birds and drink cold lemonade. Plus, fresh basil is one of those things that makes life worth getting up in the morning for.
Here is what Eric cooked last week with what he found in the cupboard and freezer.
Chicken with tomasqua, chantrelles and pesto [photo above]
- Chicken
- Tomasqua sauce
- Sliced cheese: mozzarella or colby jack or whatever.
- Pesto
- Chantrelles
Sunday, February 20, 2011
Cheese, cheese, cheese
I love making cheese. I have made lovely, lovely chevre from the milk of my SIL's goats. Food. Of. The. Gods. Really. I had superpowers after I made and ate the first batch. I have also made mozzarella and ricotta. We regularly make yogurt - which is really just very very soft cheese - you could drown in it, it's so soft, but that would be a waste of really good yogurt.
We get all of our cultures from the New England Cheesemaking Supply Company.
Go to their site now. Be amazed. Start thinking about cheese. Read their blog: http://cheesemakinghelp.blogspot.com/ . Get inspired. Pick the cheeses you want to attempt.
Now let that lovely cheesy information culture for a while in your brain until my next post on cheese. Then let's try them!
We get all of our cultures from the New England Cheesemaking Supply Company.
Go to their site now. Be amazed. Start thinking about cheese. Read their blog: http://cheesemakinghelp.blogspot.com/ . Get inspired. Pick the cheeses you want to attempt.
Now let that lovely cheesy information culture for a while in your brain until my next post on cheese. Then let's try them!
Labels:
cheese,
cooking,
food,
superpowers
Friday, February 18, 2011
Vanilla
I love vanilla. I love vanilla ice cream. I love vanilla candles.
Just thinking about it lowers my blood pressure.
Heaven lies in the vanilla bean; I'm sure of it. At the very least, I expect that if you get to the pearly gates and present one to St. Peter, he'll definitely let you in.
In the meantime, you can make your own vanilla extract. With real vanilla beans. And real booze. It's totally easy.
Here is a bottle of my vanilla. Doesn't it smell great?! Those dark spots in it are real vanilla beans. Here's how you do it:
1. I start with a bottle of brandy. My fave is E & J. My husbands initials are E & J, but that's not why I use this. I use this because it's brandy and it's in a pretty bottle.
2. You also need a vanilla bean or two...or twelve. The more beans you use, the more powerful your extract.
You can get vanilla beans from quality spice places like Penzey's. I got my last batch from Atlantic Spice Company. If you're west of the Mississippi, it'll be San Francisco Herb - it's the same company but they ship from San Francisco instead of Massachusetts. Right now, vanilla beans are $17.50 for 4 oz of beans. That'll keep you in vanilla extract and vanilla sugar for a few years. Store the extras in the freezer. These companies have a minimum order of $30, but the sites are full of all sorts of herbs and spices and containers. Make sure you check out their Miscellaneous category. You won't have a problem meeting the $30 minimum; you'll have a problem keeping it at $30.
3. You can leave the beans long, but I cut them in smaller lengths because they fit on the bottom of the brandy bottle and stay submerged, thereby continuing to impart full flavor until the very last drop.
4. Slice each bean lengthwise to expose the center. It's not a crisis if you cut all the way through. You're just trying to open the beans and let the seeds hit the brandy. Some folks say to scrape the seeds out, but you don't have to.
5. Drop the beans in the brandy bottle. That's it. You're done.
6. You can put it in a window for a week or so and let the sun heat it up and release the vanilla a bit faster [plus brandy loves heat] or you can just put it in your cupboard. It's ready to go when you open it up and smell vanilla.
Just thinking about it lowers my blood pressure.
Heaven lies in the vanilla bean; I'm sure of it. At the very least, I expect that if you get to the pearly gates and present one to St. Peter, he'll definitely let you in.
In the meantime, you can make your own vanilla extract. With real vanilla beans. And real booze. It's totally easy.
Here is a bottle of my vanilla. Doesn't it smell great?! Those dark spots in it are real vanilla beans. Here's how you do it:
2. You also need a vanilla bean or two...or twelve. The more beans you use, the more powerful your extract.
You can get vanilla beans from quality spice places like Penzey's. I got my last batch from Atlantic Spice Company. If you're west of the Mississippi, it'll be San Francisco Herb - it's the same company but they ship from San Francisco instead of Massachusetts. Right now, vanilla beans are $17.50 for 4 oz of beans. That'll keep you in vanilla extract and vanilla sugar for a few years. Store the extras in the freezer. These companies have a minimum order of $30, but the sites are full of all sorts of herbs and spices and containers. Make sure you check out their Miscellaneous category. You won't have a problem meeting the $30 minimum; you'll have a problem keeping it at $30.
3. You can leave the beans long, but I cut them in smaller lengths because they fit on the bottom of the brandy bottle and stay submerged, thereby continuing to impart full flavor until the very last drop.
4. Slice each bean lengthwise to expose the center. It's not a crisis if you cut all the way through. You're just trying to open the beans and let the seeds hit the brandy. Some folks say to scrape the seeds out, but you don't have to.
5. Drop the beans in the brandy bottle. That's it. You're done.
6. You can put it in a window for a week or so and let the sun heat it up and release the vanilla a bit faster [plus brandy loves heat] or you can just put it in your cupboard. It's ready to go when you open it up and smell vanilla.
Sunday, February 13, 2011
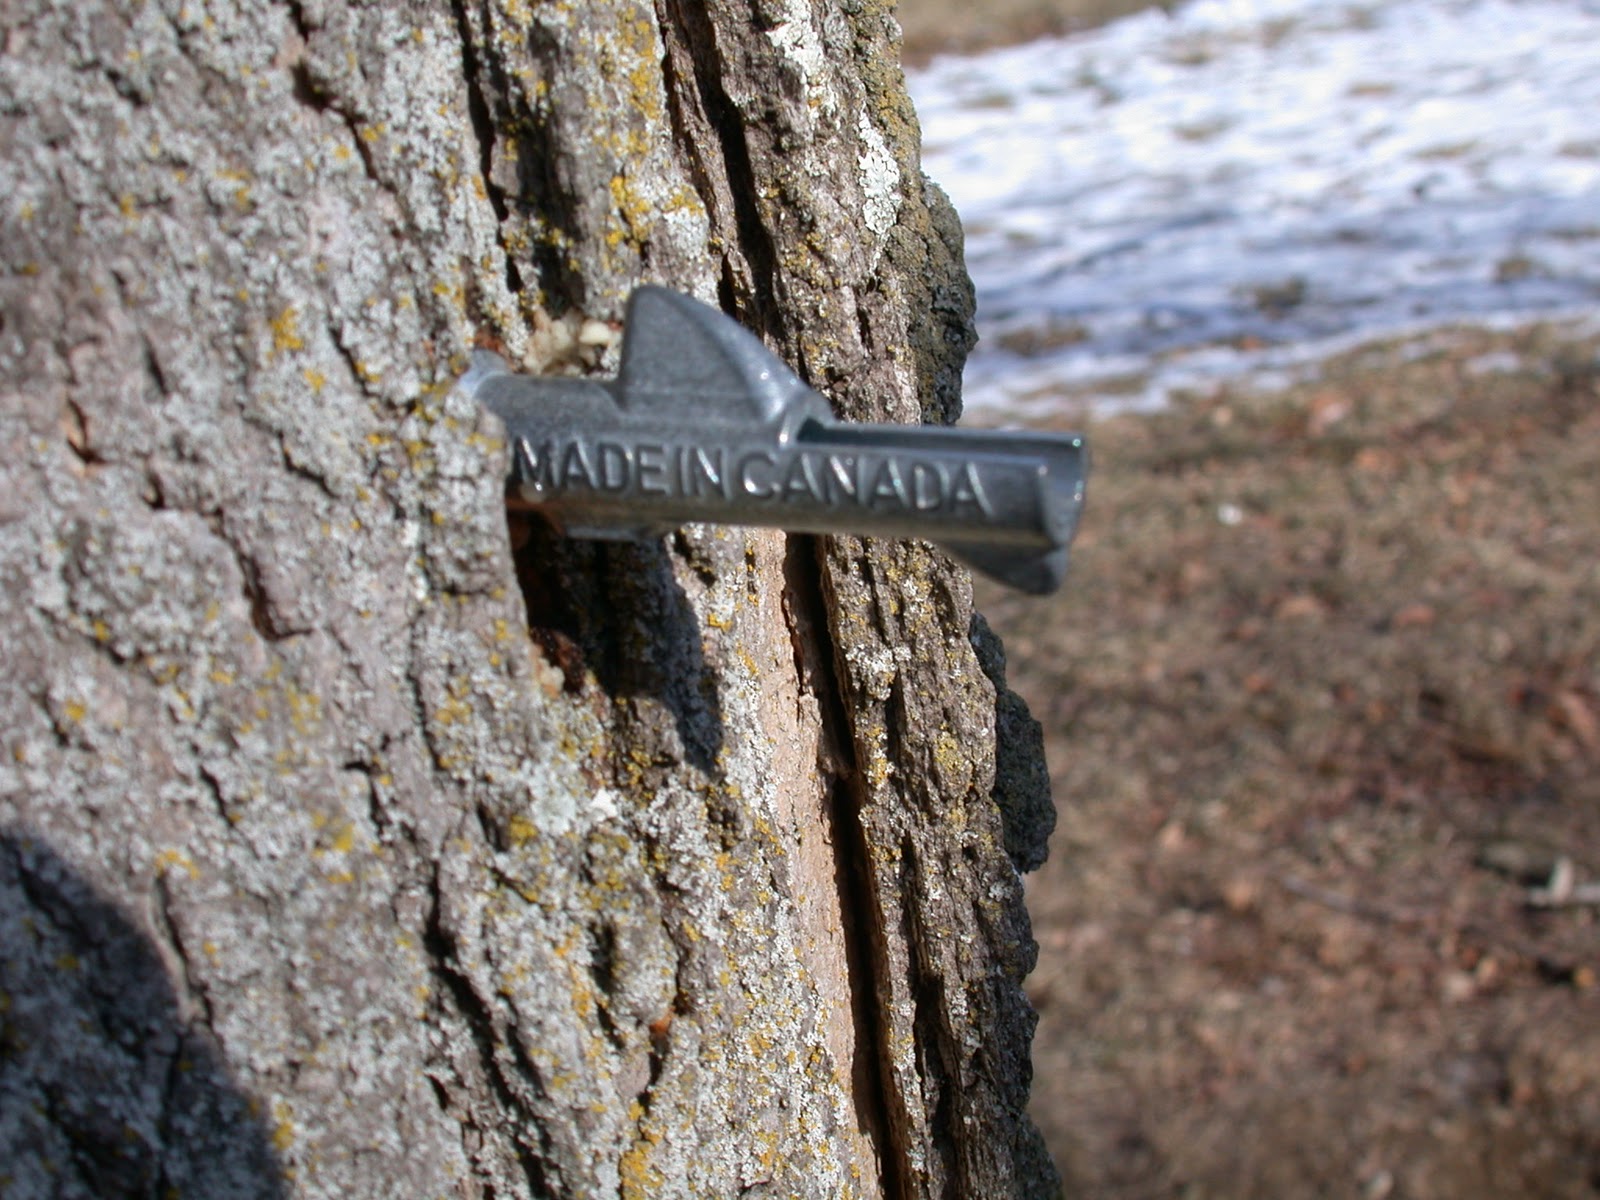
Maple Syrup: Tapping the trees
We made our first maple syrup from our own trees last year and discovered that it's not hard at all.
What you need: drill bit, taps, collection system [bag, bucket & tubes, etc depending on how you want to do it. We use bags.], maple tree at least 10 inches diameter at 4.5 feet off the ground. We got the taps and collection system from Leader Evaporator Company. They've got tons of stuff for all types of collection and evaporation and you don't have to spend a fortune.
1. Use the same size drill bit as taps you have. [We have 7/16 inch taps] Drill 1.5 inches into the tree. Wet maple is not easy to drill into so Eric used a smaller bit first, then used the big one to finish it.
2 . Put the tap in so the hook is at the top. You can use a hammer to tap it into place. We have 7/16 inch taps from Leader.
3. The bags and bag holder. The sack holder comes in two parts: a ring and a holder. Notice the hole on the side of the bag holder. That's where you'll put it all on the tap on the tree.
4. Put the bag on the ring from the inside and then fold the edges down over the outside of the ring.
5. Slide the ring inside the holder; make sure the ring is secure.
6. Put the hole in the holder over the tap. The hook on the tap will keep it all there, even when the bag is full of sap.
7. Gathering: This time of year the sap runs fast. Keep an eye on it. We empty everything into food grade buckets in the morning and in the evening. You can keep the full buckets outside out of the sun in cool weather until you're ready to boil, but they can sour, so boil as quickly as you can. The ratio of sap to syrup is 40:1, so one five-gallon bucket will give you about a pint of syrup. We're going to shoot for a whole gallon of syrup this year. That'll be about 40 gallons of sap - 8 buckets.
For more great info on how to tap your trees, check out the University of Maine's page. In a week or two I'll post on the evaporation process; it's an outdoor, open fire activity. [You don't want all that water vapor in your house.]
What you need: drill bit, taps, collection system [bag, bucket & tubes, etc depending on how you want to do it. We use bags.], maple tree at least 10 inches diameter at 4.5 feet off the ground. We got the taps and collection system from Leader Evaporator Company. They've got tons of stuff for all types of collection and evaporation and you don't have to spend a fortune.
1. Use the same size drill bit as taps you have. [We have 7/16 inch taps] Drill 1.5 inches into the tree. Wet maple is not easy to drill into so Eric used a smaller bit first, then used the big one to finish it.
3. The bags and bag holder. The sack holder comes in two parts: a ring and a holder. Notice the hole on the side of the bag holder. That's where you'll put it all on the tap on the tree.
4. Put the bag on the ring from the inside and then fold the edges down over the outside of the ring.
5. Slide the ring inside the holder; make sure the ring is secure.
6. Put the hole in the holder over the tap. The hook on the tap will keep it all there, even when the bag is full of sap.
7. Gathering: This time of year the sap runs fast. Keep an eye on it. We empty everything into food grade buckets in the morning and in the evening. You can keep the full buckets outside out of the sun in cool weather until you're ready to boil, but they can sour, so boil as quickly as you can. The ratio of sap to syrup is 40:1, so one five-gallon bucket will give you about a pint of syrup. We're going to shoot for a whole gallon of syrup this year. That'll be about 40 gallons of sap - 8 buckets.
For more great info on how to tap your trees, check out the University of Maine's page. In a week or two I'll post on the evaporation process; it's an outdoor, open fire activity. [You don't want all that water vapor in your house.]
Labels:
cooking,
food,
maple syrup,
tapping
Monday, February 7, 2011
Adventures in Alcohol
![]() |
| Lemonade Lucy |
Other notable non-drinkers are Rutherford B. Hayes and his wife Lucy, who was known as Lemonade Lucy because she refused to serve alcohol at White House functions. Also, Gene Simmons. Yes, the one from KISS. If you want to hear a great song about alcohol, I recommend Brad Paisley's song: Alcohol I heart Brad Paisley. Just sayin'.
Now, just because I do not drink does not mean I do not buy alcohol and use it in other ways.
Saturday, February 5, 2011
Thai Venison
I am secretly afraid of the slow cooker. I love the idea of it - all that cooking happening and I don't even have to be in the kitchen. Who wouldn't love that? But deep in my heart of hearts, I fear the commitment required to have a successful relationship with the slow cooker. For some reason it is impossible for me to plan ahead when it comes to meals. [Those of you who know me well, know the extent of the terrible irony of this facet of my personality.]
In order for the slow cooker to do its thing, you have to decide way ahead of time what you want cooked. Then you have to get it all together. Then you have to put it in the cooker. Then you have to remember to turn on the stupid thing. Then you can relax and feel really smug until it's time to do the dishes.
Mostly, my husband does the slow cooker thing. OK, the truth is that if anyone uses it at all, it's he. He totally gets the planning ahead about meals thing. [Also a terrible irony, but I probably shouldn't go there.] In addition, we have a freezer full of venison harvested by some excellent friends right off our property. Venison that has spent the summer feeding on our grass and hostas tastes great! My husband loves finding new ways of cooking it.
Thai red curry makes life worth living in the winter here. I love it. I also love coconut milk. Lo and behold we discovered that you can throw a can of coconut milk, 1 T of red curry paste and a package of venison out of the freezer into the slow cooker and 7 hours later, you're in gastronomical paradise.
Here's a photo of Thai red curry from importfood.com with directions on how to make your own. This is not something we've tried yet. We just go to Sahara Mart and buy it in a package.
Thai Venison in the slow cooker
1 can coconut milk
1-2 Tablespoons of red curry paste
venison [Some. Use your imagination.]
cilantro - chopped fresh if you have it. Optional. Throw it in before you serve it all.
Cook it all day. After a few hours, shred the meat so it soaks up the Thai red curry goodness. Serve over rice. Great with steamed broccoli and pineapple. We like the pineapple cool so there's a contrast in temperatures as well as flavors. This means that you can put the can of pineapple chunks on the table with the can opener as you're sitting down to dinner. That's pretty much all the planning ahead I can do.
In order for the slow cooker to do its thing, you have to decide way ahead of time what you want cooked. Then you have to get it all together. Then you have to put it in the cooker. Then you have to remember to turn on the stupid thing. Then you can relax and feel really smug until it's time to do the dishes.
Mostly, my husband does the slow cooker thing. OK, the truth is that if anyone uses it at all, it's he. He totally gets the planning ahead about meals thing. [Also a terrible irony, but I probably shouldn't go there.] In addition, we have a freezer full of venison harvested by some excellent friends right off our property. Venison that has spent the summer feeding on our grass and hostas tastes great! My husband loves finding new ways of cooking it.
Thai red curry makes life worth living in the winter here. I love it. I also love coconut milk. Lo and behold we discovered that you can throw a can of coconut milk, 1 T of red curry paste and a package of venison out of the freezer into the slow cooker and 7 hours later, you're in gastronomical paradise.
Here's a photo of Thai red curry from importfood.com with directions on how to make your own. This is not something we've tried yet. We just go to Sahara Mart and buy it in a package.
Thai Venison in the slow cooker
1 can coconut milk
1-2 Tablespoons of red curry paste
venison [Some. Use your imagination.]
cilantro - chopped fresh if you have it. Optional. Throw it in before you serve it all.
Cook it all day. After a few hours, shred the meat so it soaks up the Thai red curry goodness. Serve over rice. Great with steamed broccoli and pineapple. We like the pineapple cool so there's a contrast in temperatures as well as flavors. This means that you can put the can of pineapple chunks on the table with the can opener as you're sitting down to dinner. That's pretty much all the planning ahead I can do.
Saturday, January 29, 2011
Sauerkraut
Sauerkraut happens by way of lactic fermentation. This is not the type of fermentation that makes alcohol. Here is an interesting site on the benefits of lactic fermentation in food and they have recipes.
To make your own sauerkraut, all you have to do is take your regular every day type cabbage from the grocery store and shred it, salt it, pound it and let it sit for 3-4 weeks. Easy.
Here is a step by step of how we do it:
1. Get cabbage. They say late season cabbage is the best and since I'm too busy doing other foodie things all summer and fall, winter is the first chance I have to think about doing sauerkraut. I'm figuring that the only cabbage you can get at the grocery store in December is the late season kind.
2. Weigh the cabbage so we can figure out how much salt we need to use. Figure on 1 Tablespoon of salt per pound - or about 2 Tablespoons for a regular head.
3. Shred. I do this by hand but you can use a food processor. You get longer shreds if you do it by hand. You're supposed to shoot for 1/16th of an inch shreds. I shoot for 1/8th inch and try not to cut myself.
4. Salt. We put all of the shreds in a nice huge bowl and salt it, then mix it up well. Things should start to ooze. Ooze is good.
5. Pound the living snot out of the cabbage. Do Not Pound In A Glass Bowl. [Don't ask me how I know.] We transfer the salty cabbage to an empty plastic ice cream bucket and use a potato masher to pound. It is loud. It takes some time and patience. I use this opportunity to work out anxiety or perhaps some less than kind feelings about someone in my life. We pound until the juice covers the cabbage.
6. Put into jars, leaving about 1 1/2 inches of headroom. Juice should cover the top of the kraut. The headroom is important. As the fermentation occurs, little bubbles push the contents up a bit and if the jars are packed to the top, things will overflow. I know this from experience.
| Ready to eat now! |
8. Put jars in a plastic bucket to catch any accidental overflow and then tuck it away in a cupboard where it won't freeze. We left ours in our jelly cupboard this year and it ripened a week faster [in 3 weeks] than when we put it in our mudroom where the temp is much lower [4 weeks].
Labels:
books,
cooking,
food,
recipes,
sauerkraut
Monday, January 24, 2011
Horehound Candy
![]() |
| Marrubium vulgare: Horehound |
I began studying herbs when I was in high school. While other people were at football games and movies, I was in the library. My taste in books was varied. I read lots of murder mysteries and I loved books about plants. Although I never planted a garden back then, I drew elaborate garden plans on old math papers and eventually all that planning practice paid off when I was a graduate student and found myself living in an apartment in an old house, the back yard of which had been turned over to me to ‘do something with’. After considerable earth moving and wall building, one shovelful and rock at a time, I was ready to plant. I planted an eclectic selection of herbs, annuals and perennials and some of those plants are still with me today, three houses later. For the first time, I could look into all the gardening catalogs I had been acquiring and actually buy some of herbs I had been lusting over.
That year my love affair with all things herbal began. I have steadily increased the numbers of herbs in my collection and increased the size of my gardens to compensate. My herbal experiments have become increasingly daring and my successes and failures have become increasing spectacular.
Take for example the first time I tried making hard candy.
Wednesday, January 19, 2011
Carrots - Sunshine in a stick
| Robin's Carrot Puff |
The muffins are carrot cake with a lot of whole wheat flour and a lot less sugar. If you want them sweet, add up to 3/4 C more sugar. The puff is sort of a carrot/onion souffle. Don't worry about the 'puff' part. It's fabulous served at room temp the same day. Bake it and set it aside while you worry about the other stuff on the menu. Refrigerate overnight. I like it best the next day.
Robin's Carrot Muffins
www.rurification.com
3/4 C sugar
3/4 C veg oil
3 eggs
1 cup white flour
1 cup whole wheat flour [the real stuff]
1 1/2 tsp cinnamon
1 tsp baking soda
1 tsp vanilla
1/2 tsp salt
1/4 tsp nutmeg
3 C shredded carrots
1 C nuts
1 C yogurt [especially the thin whey-y stuff that floats around the top]
Bake at 350 degrees until they're done. Done will depend on the size of your muffins and the type of pan you're baking them in.
Robin's Carrot Puff
www.rurification.com
2-3 C shredded carrots
2 C shredded or chopped onions
2 cloves garlic, chopped or pressed.
3T butter [yes, the real stuff]
Cook that stuff in a pot until the onions are transparent. It caramelizes everything and makes it sweeter. Then add:
1/2 C oatmeal
1 tsp salt
pepper
a shake or two of nutmeg
1 1/2 C yogurt
1 C or more grated cheese
4 eggs, beaten
Put it all in a casserole dish and bake at 325 degrees for 50 minutes. I always bake mine in a blue dish because the orange and the blue look so pretty together. Also, it tastes better in the blue dish.
Subscribe to:
Posts (Atom)