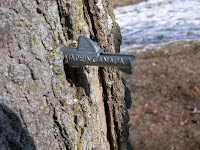
What you need: drill bit, taps, collection system [bag, bucket & tubes, etc depending on how you want to do it. We use bags.], maple tree at least 10 inches diameter at 4.5 feet off the ground. We got the taps and collection system from Leader Evaporator Company. They've got tons of stuff for all types of collection and evaporation and you don't have to spend a fortune.
1. Use the same size drill bit as taps you have. [We have 7/16 inch taps] Drill 1.5 inches into the tree. Wet maple is not easy to drill into so Eric used a smaller bit first, then used the big one to finish it.
 2 . Put the tap in so the hook is at the top. You can use a hammer to tap it into place. We have 7/16 inch taps from Leader.
 3. The bags and bag holder. The sack holder comes in two parts: a ring and a holder. Notice the hole on the side of the bag holder. That's where you'll put it all on the tap on the tree.
4. Put the bag on the ring from the inside and then fold the edges down over the outside of the ring.
5. Slide the ring inside the holder; make sure the ring is secure.
6. Put the hole in the holder over the tap. The hook on the tap will keep it all there, even when the bag is full of sap.
7. Gathering: This time of year the sap runs fast. Keep an eye on it. We empty everything into food grade buckets in the morning and in the evening. You can keep the full buckets outside out of the sun in cool weather until you're ready to boil, but they can sour, so boil as quickly as you can. The ratio of sap to syrup is 40:1, so one five-gallon bucket will give you about a pint of syrup. We're going to shoot for a whole gallon of syrup this year. That'll be about 40 gallons of sap - 8 buckets.
For more great info on how to tap your trees, check out the University of Maine's page. In a week or two I'll post on the evaporation process; it's an outdoor, open fire activity. [You don't want all that water vapor in your house.]


