Saturday, August 20, 2011

Melon - Sweet Passion

They're starting to get ripe!    This is what they looked like last week.....


And this is what they look like when we open them...

These are an heirloom melon that I grew from seed I got at Baker Creek.   I highly recommend these!   They're delicious - very sweet, just like the name says.   They're not too big [about a 6" diameter], so if you get a bumper crop, you'll be able to eat them all.  

Pick them when they turn tan and when the stem starts to detach from the fruit.  

I'll be doing these again next year.

Friday, August 19, 2011

Pink Zinnia

Zinnias are my favorite annuals.  It's easy to grow them from seed.  They're not pretentious.  They're tough.   They're a little unpredictable.   They don't whine.

Photo: K1
The curled petals at the center of this flower just melt my heart.

I heart zinnias. 

What are your favorite garden annuals?

Thursday, August 18, 2011

Pickled long beans

We've had fun eating the Chinese red long beans.   Normally, red vegetables turn green when you cook them, so we were really surprised when they turned black in our first stir fry.   

So, of course, I wondered what would happen if we pickled them.  
Here they are made into Dilly Beans.    [Recipe in the Ball Blue Book.]    I love that they stayed red.   

I just found a recipe for szechwan pickled beans.   I think I'll try those with the next batch.

Wednesday, August 17, 2011

Melon - Prescott Fond Blanc

Prescott Fond Blanc melons are pretty interesting looking.  It's not your typical netted muskmelon.  These are sectioned and warty.    Don't be put off.   They're pretty good and they're very easy to grow.   Of the six different types of melons I tried this year, these set fruit first and ripened first.

These got about 8 inches in diameter. 

Overnight, they will turn yellow.   The stem will start to separate from the melon and you'll know they're ready to harvest.

They have a classic melon flavor, but they're not very sweet.   If you like the less sweet varieties, I highly recommend these.   If you're looking for an easy melon to grow to make jam, these would be great because you'll be adding extra sugar.

Like all melons, Prescott Fond Blanc require a lot of good soil.   I have extremely well drained soil that we amend generously with manure.    The plants are very bug resistant.    They did fine in the heat as long as I watered during the dry spells [at least every three days].

Tuesday, August 16, 2011

Eggplants

This year I grew Japanese pickling eggplant from seed.    The plants are large, healthy and productive.   They're still attractive to the flea beetle that persists in making mosaics out of the leaves, but other than that, they're in good shape.  [Note:   Watch for blister beetles!   They'll eat you to nothing pretty quick!]

That's deer fence in front of them to keep the ducks out.  The dog keeps the deer out. 

The fruit of these plants is long, tender and delicious.   The eggplant in the photo below are Japanese pickling eggplant from these very plants.

Plant eggplant on the southernmost side of your garden - they crave the heat and other plants won't block the sun - it matters.    I planted mine on the south side with the tomatoes behind them.   Worked perfectly!

Update:   I've noticed that once the weather cooled down a bit, these have set a lot more flowers.  I'm hopeful to get another nice harvest before frost.  

Monday, August 15, 2011

Pickles

I've been playing with pickles.  I'll tell you all about it when the flavors have melded and we've tried them. 

At least they're pretty.

Summer Towels

One of the time honored traditions of living in the country is the ability to hang your wet stuff out to dry without worrying about the homeowners association throwing a fit and issuing a citation.

Our houses are generally smaller out here.  We don't have the room inside our houses to hide every bit of evidence of our daily living - like vegetable gardens, wet laundry, piles of mulch, all the kids' toys, the occasional dead mower or herd of dead cars.   Sometimes, folks let it all hang out.  We're not always thrilled, but we do believe in minding our own business and letting them mind theirs.

In Michigan this summer, some poor woman was being threatened with jail for building raised garden beds in her front yard and planting vegetables.   It's not just against the homeowners association rules, it's against the law.  Let me make this clear:   In Oak Park, Michigan, it is illegal to plant vegetables in your front yard because....it's unsightly.  Growing your own food is considered unsightly. 

Suffice it to say that out here we feel differently.   We know where our food comes from and like to have it convenient to the house.   We save energy by drying our laundry outside in the free fresh air.  We keep that old mower for parts.  It's better to recycle parts from it than to dump it and buy new.  When the easy parts are all stripped, we'll sell the carcass for a few bucks to old John Smith down the way and he'll finish stripping the good parts out of it and then sell the rest of it to the scrap metal place for food money - the man is destitute, but not a beggar.

No one around here is going to be harassed for showing evidence of what it takes to live life.

We hang our towels to dry on the front porch railing.    We have giant piles of sand and gravel and mulch visible all the time.   You can see our vegetables from the street.  

Our neighbor had 9 trucks parked on the other side of his barn next to the road to use for parts.  

Another neighbor has two spare mobile homes parked on his place that he uses for parts - and a chicken coop.  

Another neighbor has a permanent yard sale set up. 

Another neighbor has assorted large machinery parked by the road.   His goats climb on it and sleep under it.  

Another neighbor collects old bikes and hand plows and uses them to decorate his chain link fence.  

Another neighbor's place is in a constant state of construction, with piles of lumber and shingles and debris everywhere - for the last 10 years.  

None of that matters to us.   We figure it's none of our business.

Some of our neighbors even have homes that look like they came right out of Country Living magazine.   But we don't hold it against them.   We figure that's none of our business, too.

Sunday, August 14, 2011

Red Chinese Long Beans

The long beans are ready!    And they are really, really long.
They measured in at around 20" long.

These beans grow on vines that must be allowed to climb so we built a trellis for them.   The beans are on one side and the cukes on the other.   Everybody's happy.


The long beans shoot out little branches that end with a pair of flowers.   Red long beans have purple flowers.

Once that pair of flowers sets fruit, another set of flowers blooms off the end.   In the pic here, you can see the first pair of baby beans and the second set of flowers on this branch. 

Very symmetrical.


More baby beans and flowers.  You can see the right hand set getting longer and redder.


Almost ready to pick.   These were just over a foot long.

That's my lemon squash below them.

Finally ready.    The green beans in front look sort of inadequate in comparison, don't they.

Saturday, August 13, 2011

Melons

I grew a bunch of new kinds of melons this year.    Here is how they are progressing...

These are Sweet Passion.   So far they look like smaller versions of the typical American muskmelon, round and netted.   They'll be ripe in week or so.

These are Sakata's Sweet.   They're not getting very big - just a bit bigger than a softball and they're smooth instead of netted.

And these are Prescott Fond Blanc.    Baker Creek loves them, and as I am highly suggestible, I tried them.   They were the first to set fruit.    These are about 10" in diameter, sectioned and a bit warty.    I can't wait to try them.
I also planted Edisto, which is one of the best muskmelon varieties around, but it's taking its time and the fruit is still the size of a golf ball and hairy. 

Once these are all ripe, I"ll post more photos.

Friday, August 12, 2011

Visitors

K1 found these two little visitors to our strawberry bed.   As long as they stay on the outside, I don't mind.  

Thursday, August 11, 2011

Margined Blister Beetle

The next guest on our list of garden enemies is the margined blister beetle.
We've had this pest in our flower gardens before.   For years, they regularly ate our clematis virginiana down to sticks.  We finally dug up the clematis and hadn't seen the bug in a couple of years.   Then this year it showed up on some tomatoes and eggplant - eating the leaves to nubs.    The next day I noticed that the potato greens had been devoured.    We found dozens of these bugs in the straw around the plants.   They lay their eggs in the soil, so we have to wait for them to come up to get them. 

Rumor has it that these guys eat grasshopper eggs - which is great, except they will eat a plant to nothing, too.   Big problem. 

An even bigger problem is the fact that their bodies produce a toxin so powerful it will kill a horse and blister human skin.   Some varieties of blister bug are more powerful than others.

Truth told, I squashed dozens of these bare handed before I knew what they were.   No blisters.   I double checked the photo ID and there's no doubt what they are.   Either Eric and I got really lucky, or these just aren't as toxic as some of the others.

Handle with gloves!   But get them off your plants. 

These beetles leave a characteristic poop trail - messy wet black droppings.  That's how you'll notice them.   Look behind the leaves for the bug.  Careful picking off of these guys seems to control them.    Though we picked dozens off the potatoes the first day, there were only a few the second day and I haven't seen any since.  We're fighting them on the tomatoes now - more hiding places.    

Just drop the beetles in a bowl of hot soapy water to kill them.

Wednesday, August 10, 2011

BSU Art Museum

I love university art museums.    They're always delightful surprises and the jewel of most campuses.  I love finding out what lucky purchases have been made over the years. 

We found the Ball State University art museum 7 minutes before it closed.   [Someone please tell me why these places close at 4:30 p.m.   I don't get it.] 

However, in those 7 minutes, we discovered a lovely collection of art nouveau and deco bronzes, an Alexander Calder, a fabulous little collection of Childe Hassam sketches and paintings, and several other little gems.  I wish I'd had time to take more pics.


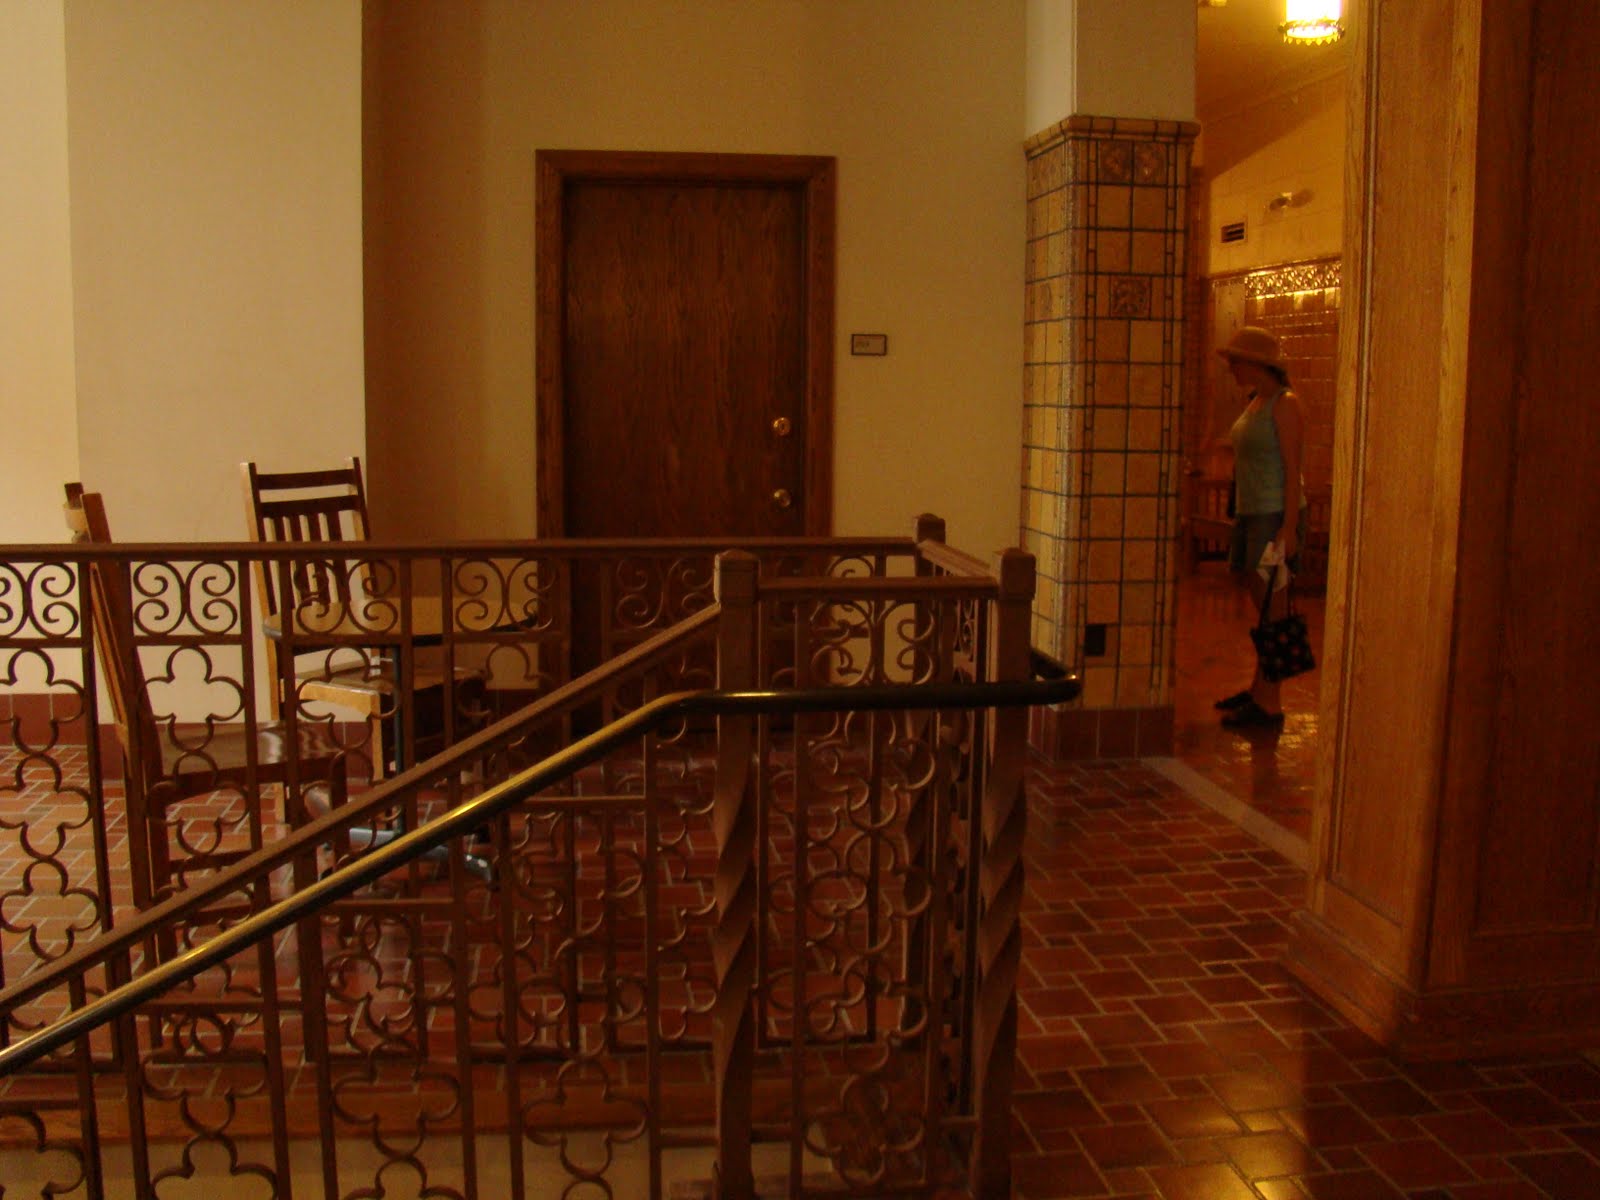
Just inside the front door, above the foot of the stairs is a stained glass skylight.   A beautiful counterpoint to the walls that are covered with burnt orange tiles.  The orange edge of the window is the same color as the tile. 


It's impossible to get a good photo of the hallways because of all that shiny orange.

See what I mean?   This is at the top of the stairs near the entrance to the collection.  Everything goes orange - even the drywalled, white walls near the windows. 


Also, see those great deco railings?


More highlights:

I loved this big buddha!   Those are penny offerings at his feet.  Beautiful. 

And so peaceful. 


One of my favorite pieces was the centerpiece of the lower exibits.  It takes your breath away as you walk into the collection.   The photo Does Not do it justice.

This chandelier is made entirely of frosted plastic plastic bottles and bottle caps. It's hung under that huge skylight and the whole thing glows.

The thing is, it doesn't look At All like recycled garbage.  It is beautiful and the material enhances its beauty. 


It hangs above their collection of bronzes. You can see them below the chandelier.  I thought that the juxtaposition of lights and darks of the artwork, echoed in the architecture was very nice. 

Next time, we're going earlier so we can spend a few hours at this museum.

Tuesday, August 9, 2011

Onions


I planted onions this year.   I got a bag of tiny bulbs from somewhere for cheap and stuck them in the ground inside my coldframe in March and then had so many left over that I stuck them all around the edges of the bed where I had the coldframe.    


I figured the ones inside the warm would shoot right up, but exactly the opposite happened.

The ones inside the coldframe stayed tiny and the ones outside shot right up and are big. 


Big and beautiful.  

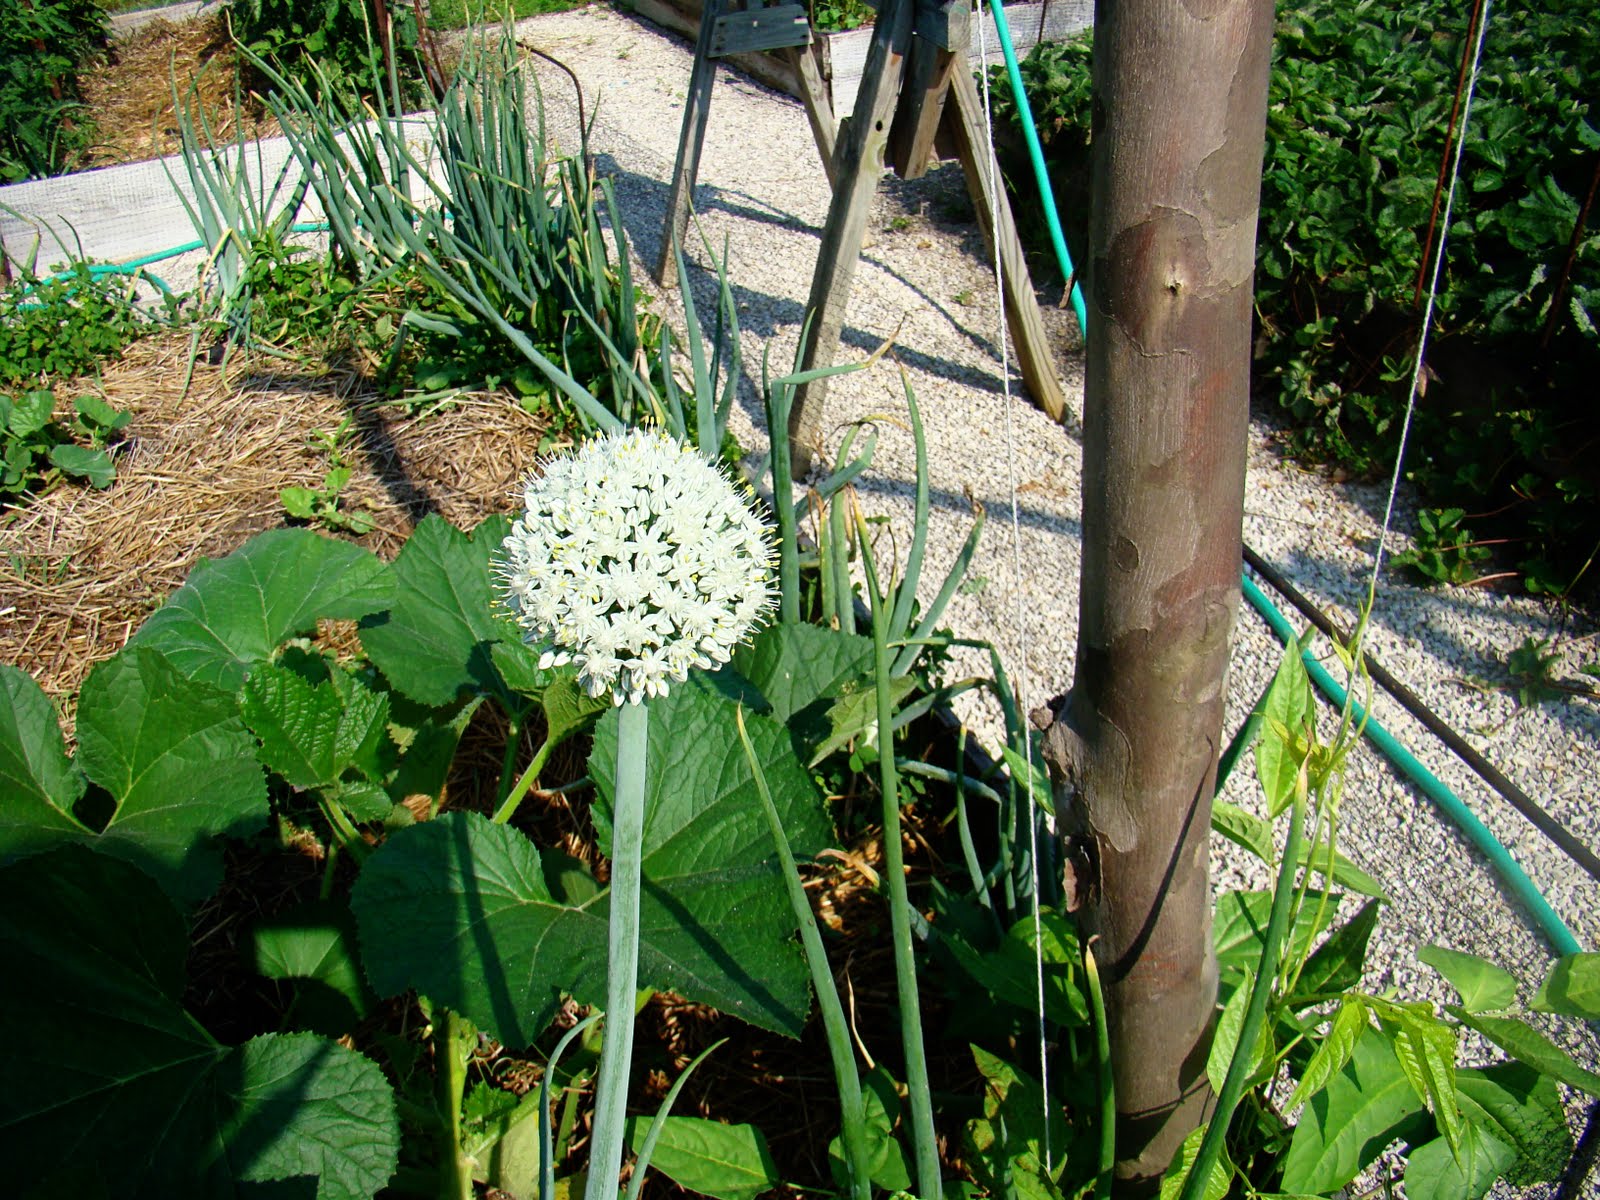
You can see them all around the edge of this bed here. 

The big white flower ball is a bloom on one of the happiest ones. 


Onions are alliums.   So are chives.   Alliums all have that typical flower ball on a spike for a bloom.  

Here's a close-up.  The blooms usually last for a long time.   I've let this one stay.    I'm hoping it will set seed and then next year I'll plant it.

Or maybe I'll sow it in the coldframe this fall, let the seedlings do their thing over the winter, then transplant the babies outside in March.   

Monday, August 8, 2011

Poop Quiz

It's a been a while since our last poop quiz.  Do you remember how to play? 

Name that poop!  For a review, check back over last week's posts.

Answer below the fold.

Sunday, August 7, 2011

Saturday, August 6, 2011

Cherry Clafouti

Annual Repost --

Since true clafoutis are always made with cherries, calling this a cherry clafouti is redundant.   Sorry about that.   I did it to differentiate between this clafouti and the one I made last week with rhubarb.  Only that one was really a flaugnarde, not a clafouti, since it wasn't made with cherries.  

As we learned before, true clafoutis are made with unpitted cherries because the pit imparts a distinctive flavor.   I wanted to find out if that is true.  So I actually went out in search of black cherries.    And I found them.    They weren't fabulous, but they were the right kind.    And they were on sale.   Perfect!

Remember how clafouti is a glorified flan/pancake thing?    With the rhubarb one, I had to pour a layer of batter in the bottom and bake it first, but with the cherries, you don't have to do that.  And since we weren't even pitting the cherries, all I had to do was put the cherries in then pour the batter over them then bake it.   Too easy.

Seriously.    It was too easy.   So I did some looking around at variations and made it a teensy bit more complicated.    I added real vanilla from a vanilla bean.    I heart vanilla.   You knew that.

This is what I made.    It was fabulous.   Totally worth leaving the pits in.   I'll never do pitless clafouti again. 

Robin's Clafouti
  • 10 inch tart dish
  • butter to rub your dish with
  • 1 to 1 1/2 lb black cherries, stems off, pits in.  Yes, in.  
  • 3 T flour
  • 1/2 tsp salt
  • 1/4 cup sugar
  • 4 eggs  [You can get by with 3 if you have to.]
  • 2 cups milk
  • 1 vanilla bean
Heat oven to 350.   Butter the tart dish well.  Arrange cherries in the bottom of the dish.   Don't pack them in, leave some spaces for the batter to get around them all.  In a small bowl, mix flour, salt and sugar.  Set aside.  In a bigger bowl, mix eggs and milk.  Cut vanilla bean longways and scrape out the insides into the egg mixture.  Gradually stir the flour mix into the egg mixture.   Pour batter over cherries.   Bake at 350 until set and golden.  About 60 minutes. 

Clafouti is traditionally served at room temp.     It's great that way.    It was also great cold, right out of the fridge for breakfast.

Friday, August 5, 2011

Ball State University

K1 and I went to Ball State recently for the Midwest Writers Workshop.    The workshop was great.   We went a day early so we could check out the the campus.   It is beautiful!  

Ball State has the only school of architecture in Indiana.    It shows.   Here are some highlights. 


All that architectural splendor was punctuated with some pretty extensive construction, right in the center of campus.   
There are some beautiful green spaces, too.


The real highlight of the campus was the art museum.  More on that tomorrow.

Thursday, August 4, 2011

Fennel Gratin - A work in progress


I adore fennel gratin.  

Really, it's one of my favorite things in the world.   I made it for the first time last year with fennel that I grew myself.    The fennel was great.   The gratin was so-so. 


I'm learning.   The one I just made was much better, but still has some issues. 

This is what I used:
  • fennel -  2 bulbs, cored and sliced
  • onions - 2 medium, sliced
  • potatoes - about three small ones,  new from the garden.   
  • garlic - 1 large clove
  • cream - maybe 1 1/2 cups
  • cheese - a cup or two cut into small cubes.   I didn't measure
  • butter
I always use my tart dish.   It's pretty.

Butter the dish.   Dice the garlic into tiny pieces and put it in the bottom of the dish.   Put a layer of  half the fennel, a layer of half the onion, all the potatos, a layer of half the cheese.  Then layer the rest of the fennel, the rest of the onion and the rest of the cheese.   Pour the cream over all.   Bake at 350 for an hour.   Or until it browns.   Or until it's soft enough for you to eat.   

You can substitute milk for the cream.   I've done it.  It tastes fine. 

This is my problem.   The cream or milk separates.  It's delicious, but watery.    I want a CREAMY gratin.    I don't know how to get it.

I can see that I'm going to have to do a lot more experimenting.   Good thing I have more fennel in the garden.

Also, I need your help.  Anyone ever made one of these so it stays creamy?  Got any ideas?

Wednesday, August 3, 2011

Squash Bugs

Anasa tristis: squash bug
So yesterday I told you all about hornworms.    Well, let me tell you, hornworms are nothing compared to squash bugs. 

I really hate squash bugs.   They multiply faster than snowflakes and do just as much damage to my squash.  

The vigilance with which I guard my tomatoes from hornworms is nothing compared to the vigilance with which I watch for and guard my squash from squashbugs.   Nothing, I tell you.

There are only two ways to control this pest:   1.  by spraying awful chemicals that are illegal for me to have and that I wouldn't want anywhere near this place anyway.   or 2.  By hand picking and squishing the adults and by finding the eggs and taking them off and destroying them.  

It's war.

Unfortunately, my adversary is wily.  

It hides.   And it lays eggs everywhere.

OK.  Not everywhere.  Just on the underside of every squash leaf it can find.    I have a lot of squash leaves.   It's not like I can hide them.  Squash bugs find them all. 

See the dark triangle on the underside of this squash leaf?   It's a squash bug egg cluster.   I hunt for them every day.    Under every leaf. 

Yes. 

Every.   Day. 

Every.  Leaf.

Last year I didn't, and I had squash bugs everywhere.   It was awful.   This year I promised I wouldn't let it get that bad.   So I hunt them every day under every leaf.  

Yes, it's a pain.   But being overrun by squash bugs is a much worse pain.   

Once I find the egg clusters, I pinch off that part of the leaf.   It leaves a hole, but a hole is better than a herd of squash bugs.  

Baby squash bugs look like little spiders with blue-ish white bodies.   They hang out together, but scatter when disturbed.   Luckily, they're soft bodied and easy to squish.  [see photos of baby squash bugs]


This year they especially love my pumpkins.   Some of the leaves are getting very holey.

I drown the eggs in a bucket of water and then let the ducks eat them.  

New eggs are light gold.   The older the eggs are, the darker they get.   Eggs that are very dark brown are almost ready to hatch.   

These squash bugs were fornicating right out in the open.   

Eww.

If they had been allowed to finish [and they weren't], the female would have found a cozy place under the leaf in the V of a leaf vein and laid a bunch of eggs. 

Instead, they suffered a different fate.  

My chickens are happy. 

The very good news this year is that all of my vigilance has totally paid off.   I have way fewer squash bugs this year because I've been taking care of the eggs as I find them.  

Tuesday, August 2, 2011

Tobacco Hornworm

Hornworms are a sad fact of gardening life.    There's no avoiding them, so I just watch for them.
It takes constant vigilance!   

If you've got good eyes, you'll start seeing a single tiny, perfectly round, light colored egg on some of  your tomato leaves.   That's a hornworm egg.   Take it off now and destroy it.  You'll be glad later.

There are a few different kinds of hornworms that attack tomatoes in Indiana.   I get the tobacco hornworms.  That is a medium sized one in the pic above.   They get bigger.

A lot bigger.

And they don't like being removed from the plant.   They twist and squirt green goo at you.  They act really scary.

I have to remind myself that it doesn't want to eat me, it wants to eat my tomatoes, so I should just suck it up and get the blasted thing off.   They don't bite.

It's not always easy to spot these things.    They are perfectly camouflaged in a tomato plant.

It's much easier to see their poop - and to be perfectly honest, when I'm looking for these guys, I look for their poop.

This is the poop from that guy in the photo above.  It's medium sized hornworm poop.   The greener it is, the fresher it is.   The bigger it is, the bigger the hornworm that dropped it is.    [Warning:  there will be another poop quiz later.  You're excited, I know!  It's been ages since the last one.]

The law of gravity being what it is, once you find the poop, you can generally look straight up to find the source.   As the hornworms get bigger, they eat and move faster so sometimes you still have to search a bit.   A little patience is all it takes to find your culprit. 

Not everyone finds these as unwelcome as gardeners do.  My lovely friend Heidi loves them and collects them so they can become adults.

photo: www.ext.colost.edu
Unfortunately, she lives in another state. I told her that if she lived here, she could come over and get as many of them as she wanted and I'd giftwrap them for her.

And I would.    Gladly. 

Then she could raise adult tobacco hornworm moths like this one.

Since Heidi is not here to rescue and revere these beauties, I'll just keep picking them off and feeding them to the chickens.   The chickens love them.

Monday, August 1, 2011

Rhubarb

Believe it or not, I still have rhubarb.   We harvested some recently and tried two new recipes - a Rhubarb Clafouti from Savor the Rhubarb and the Rhubarb Ginger Cheesecake Bars from Pioneer Woman's Tasty Kitchen Blog.

You can go to the Pioneer Woman's blog to get all the info on the cheesecake bars.   Easy and yummy!

The clafouti was a whole new thing for me.   I'd never heard of it before this year.    So, I did some research.

According to Wiki,  the proper word is Clafoutis, from the verb clafir, meaning "to fill" - as in 'filled with cherries'.  The 's' at the end is silent. 

And that is why anglophones changed the spelling to clafouti.  

The dish comes from the Limonsin region of France, which is one of the traditional provinces of France, close to the city of Limoges.  

True clafouti is made with black cherries and is cooked with the pits in.   The pits impart a distinctive flavor.   If you pit the cherries, the flavor is different.  

If you don't use cherries in this dish, it's called a 'flaugnarde' or 'flagnarde' or 'flognarde' or 'flougnarde'.   So you have lots of options. 

It looks like a traditional American cobbler only with a thinner batter.   Maybe they're related.   If you find out that they are [or aren't], let me know.    

It works like this:   You make a thin batter and pour a short layer of that on the bottom of your dish.   Bake that layer, then add the fruit or sauce and then the rest of the batter.   Bake it all until brown.   They say it's like a glorified pancake / flan.  

Rhubarb Flaugnarde

Batter:
  • 3 eggs
  • 1/3 cup white sugar
  • 1/2 tsp salt
  • 1 1/2 cups milk
  • 3/4 cup flour
Filling:
  • 3 cups chopped rhubarb
  • 1/2 tsp ground cloves
  • 1/2 tsp ground allspice
  • 1 1/2 TB lemon zest [OPTIONAL - I used a tablespoon of lemon juice instead because I didn't have a lemon.   You could probably leave it out all together.]
  • 1/3 cup brown sugar
  • 1 tsp vanilla
Preheat the oven to 250.   Butter an 8x8 dish.  Put the batter ingredients in a blender and blend it up.  Pour a thin layer of the batter into the dish and bake it until firm.  10-15 minutes or so.   Mostly 'or so'.   Keep an eye on it and jiggle it to see if it's firm. 

In the meantime, make the rhubarb filling.   Put it all in a saucepan and cook it until soft.  

When the crust is cooked, pull it out and set the oven at 375.  Spread the filling on top of the baked layer.   Then pour the rest of the batter over all.   Bake until brown and the crust puffs up.  50 minutes. 

Traditionally served at room temperature. 

YUM!   Seriously a great way to eat rhubarb.   

Notes:   This wasn't very sweet.    Put some sweetened whipped cream or ice cream on it when you serve it.  Or you can up the sugar in the filling to 1/2 or 2/3 of a cup.  
Related Posts Plugin for WordPress, Blogger...