Thursday, June 30, 2011

Lavender Wands

I need more magic in my life.   

Mostly I need a magic wand.    I want a magic wand that I can wave to rid our property of all of the blasted multiflora roses.  And the autumn olive.   And the poison ivy.   And that I can wave to mow the lawn.    And bush hog 10 or so acres of brambles.  And make my mudroom bigger on the inside, like the Weasley's tent.  And wind skeins.   And finish a dozen house and property projects that have been lingering for far too long around here. 

If I had a wand that would do all that, then I'd have more time to blog.   And weed.   And cook.   And bake.  And can.   And dye.  

It's not that I don't want to do my work.   It's that I have too much work to do.  

I need a wand! 

Sigh.

In the absence of the Magic type wands, I've made some Lavender type wands. 

And since I know you need a wand or two or ten, here's how:

What you need:
  • Lavender with long stems in bundles of 9 or 11 or any odd number that you want.   I like 9.     I try to pick my lavender just when the first blooms on the plant begin to open and before the bees really find it.   You'll see good color on the buds and they'll smell fabulous. 
  • Ribbon.   I like using 1/4" satin, but I've seen some folks use the 1/8".   I like the 1/4" because it weaves around very quickly.
  • Scissors
Here's the step by step:
1.  Cut your lavender with as long a stem as possible.   My favorite lavender plant for this is Impress Purple.   Super long stems!  Clean off the leaves and little bitty flowers on the lower stem if necessary.

2.  Cut about a yard of 1/4" ribbon [It might take 1.5 yds of the 1/8" since you have to wind it around a lot more.]


3.  Tie the stems in a bundle just under the flower heads.   Leave a tail of about 8 inches or so on one side.   The other side will be a lot longer.   Pull tight and tie a square knot.


4.  Turn the whole thing upside down and bend the stems down over the ribbon tie - all around the flower head.   You're making a stem cage around the flowers.

5.  Leave the short side of the ribbon in the center with the flower heads.  You'll need it later to tie off with.  


6. With the long ribbon, start weaving over and under the stems all around the flower heads.  Push the ribbon up snug around the heads next to the previous rows of ribbon.   Once in a while, a little flower will try to pop out.   Loosen the ribbon if you need to so you can tuck and keep the buds inside. Then pull the ribbon snug around the head and continue around.

Work all the way around and down the flower head bundle until you cover the last flower.


7.   When you have covered the last flower, do one more row around, then pull the short ribbon out of the center and wind the ends around and them tightly around the stems.  


Voila!   

Let air dry in a place with good air circulation. 


 What can you do with these?
  • Drop one in a drawer to use for a sachet.   
  • Put several in a vase.  
  • Leave a long loop in your last tie and loop it over a hanger in your closet.  
  • Tuck them in with your sheets.   
  • Wave the wand three times clockwise and it will clean your house for you.

OK.   I'm really not too sure about that last one.


Wednesday, June 29, 2011

Brownie Cake with Raspberry Filling

K2 has been baking!  [I love it when she bakes!]

This week's delight is very simple:   Brownie Cake with Raspberry Filling.  This is what you need:

2 Cups sugar
1 Cup butter
2 tsp vanilla
6 eggs
1 1/3 Cups flour
1 Cup cocoa powder
1 tsp baking powder
1 tsp salt

1 Cup [or so] Raspberry Jam for filling

Directions:
Mix all cake ingredients together [Not the jam!].   Pour into 2 greased, round cake pans.  Bake at 350 for 20-25 minutes.  Don't let it over-bake. 

Let cool completely.    Place one round  upside down [flat side up] on cake plate, cover with raspberry jam.  Stack other round on top, right side up [flat side down] and frost with Chocolate Buttercream Frosting.

Chocolate Buttercream Frosting:
1 Cup butter - softened
1 tsp vanilla
4 Cups powdered sugar
3/4 Cup cocoa powder
4 Tbs milk - add 2 T at a time.

Mix until well blended.   Spread on cooled cake.

For those neato chocolate shavings on top:  Freeze your favorite chocolate bar.  Make chocolate shavings by using a vegetable peeler to grate the edge of the bar.  

Tuesday, June 28, 2011

Trixie has the Blues

K2 loves her ducks.  A lot.

So it was very upsetting to discover that Trixie had suffered a fly strike.    We think it was a combination of grooming herself for her nest and being a drake magnet.   The boys won't leave her alone.   And it's been damp.   And she's been setting.   And she hid her nest under a daylily, next to some siberian iris in the lower flower terrace.   It's cozy there, but not much air circulation.   The flies found her. 

I won't describe what K2 found.    Eew.   It took an extremely strong stomach and a lot of courage for a 12 year old to gather Trixie up and bring her to me.

Trixie had a large active area on her lower back and a smaller area under one wing.  We washed her and washed her and washed her.   Then K2 did some internet research.

Can I just say right here that I heart the internet?  

I heart the internet.    Seriously.

K2 did the preliminary investigation and then I followed up with the technical stuff.  There are wonderful posts out there about these kinds of problems.   Backyard Chickens forum is a fount of excellent information.  

After some reading, we decided to spray her with ProZap to kill the rest of the flies.  We did that for a couple of days, then we sprayed her down with Blu-Kote as an added antiseptic to help her heal.   We've kept her penned up, away from the others and out of the water so that she'll stay dry and so the boys won't bother her.    [They've been hanging out right next to her pen.]

I find it professionally ironic that both of these medications dyed her blue.   She's gorgeous!   The light blue is the ProZap, the darker is the Blu-Kote.   Yes, her beak is blue.  Both medications are safe. 
I almost wish we could keep her this color.

Seriously.

Monday, June 27, 2011

Mohair and Ribbon Triangle Shawl

I've been playing a lot with simple pattern ideas for ribbon yarns.   I especially like ribbons combined with yarns of other textures - like mohair - so I knitted up a very quick triangle shawl to show both yarns off.


This is all you need:

Needles:  11 or larger [The bigger the needles, the bigger the shawl]

Yarn: 

The pattern is simple:

Cast on 3 with both yarns held together. 
Row 1:  Knit across with both yarns, increasing 1 stitch at the beginning and the end of the row. 
Row 2: Knit.
Row 3-4: With ribbon yarn only, repeat rows 1-2. 
Rows 5-6:  With mohair/ rayon yarn only, repeat rows 1-2. 

Continue on until you are almost out of yarn.  Bind off very loosely.  Cut and weave in ends.

Sunday, June 26, 2011

Road Trip - Michigan: Wetland

Every morning, a very large bunch of turtles slides up on the shore of the neighbor's sea wall to sun.   They stay there all day unless there's a lot of boat traffic back and forth along the channel.

The only thing I love as much as birds is plants.    And I especially love wetland plants.   It's a texture thing.

Lilies in a garden pond
Lilies in the lake
Path along the lakeshore
Lakeside pool
Lake house side yard
Cattails in high water pool
I could look at these all day long.   Some day, I'm going to have a lake house and take long walks every day and sit and paint what I see and I"ll fill my walls with the paintings and be happy just looking at them.

Saturday, June 25, 2011

Road Trip - Michigan: Water birds

I love birds.  
Ducks in a row
I love water.    
Swans on the lake
I had a field day with the camera on vacation.     
Mirror, mirror...


Especially with the swans.

Oh, yeah.
Lucky shot
This is my favorite one. 

Friday, June 24, 2011

Road Trip - Michigan: The water

So, they have a lot of water up there in Michigan.  

Lots of it, I tell you.   Lots and lots.   Dudes love their boats.  And fishing. 

As we were staying lakeside, I felt it incumbent upon me to share all that lake joy with you by taking advantage of the opportunity to photograph all that water and all those boats. 

Incumbent, I tell you!


This is the back yard of the place I stayed.  Right on the channel that leads to the lake.  

It faces east, so the morning light on the water makes the house all bright and cheery.  

Usually in the mornings, the channel is smooth as glass.   Then folks wake up and go fishing and skiing and sight seeing on their boats and the channel gets a lot less glassy. 


Dudes fish all the time.   In all weather.   When the channel ices over, they ice fish.    [I hear tell that it's no fun at all to have folks tramping through your yard all winter to ice fish.   No fun at all.]


I bet you catch more fish and ski better if you're in a red boat.  

I know I would.


No one was skiing off this boat.  He was probably trying to beat someone else to the best fishing. 


Here's another channel leading to the lake.   A lot of folks on the lake have pontoon boats like this one.  

They're not for skiing.  

They're for meandering around on the lake.   Or maybe fishing.   Or napping.   Or partying.  We saw one all decked out in Japanese lanterns for a party.  

This pic has nothing to do with boats, but I thought the textures were so pretty. 

And I wondered what they use all that wood for.  Since we didn't see a big fire pit outside,  or a 'Wood For Sale' sign, I assume they use it inside for heat.   They must live on the lake year round. 

If I lived on the lake I'd want a fire in the fireplace every night, too.  

And even if I didn't have a boat, I'd sit outside and paint the lake and the stuff in the lake and on the lake and all those dudes fishing and skiing.  And it would make me happy.

Thursday, June 23, 2011

Road Trip - Michigan

I was born in Michigan.    Yep, in Benton Harbor, which is right on Lake Michigan near St. Joseph.

Even though I've lived in Indiana the vast majority of my life, I still have a soft spot in my heart for Michigan.

I heart Michigan!

It's a 5 or so hour trip from here to where we stayed with my sister on one of the myriad of tiny lakes that dot Michigan.  


Here are the highlights of our drive.   It was Pure Michigan.  

Which every other billboard reminded us, the closer we got to the state line.  


I love the giant old northern barns.    beautiful old dairy barns.

Look at the size of that!


I also love all the little lakes. 

And now a Cliff Clavin moment:  It's a little known fact that wherever you are in Michigan, you are within 6 miles of a lake.     

Just so you know. 

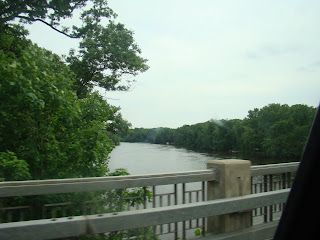
We crossed the St. Joseph River, which meanders down into Indiana and then back up to empty out into Lake Michigan.  

On the southern bend of the river, there's a lovely city called.....South Bend.    I did most of my growing up there.   It's a beautiful place.

Mostly what I love looking at as we go further north is this....

Black dirt. 

Black dirt is magic.   It's full of good stuff.  Combine that with all the sand in the Great Lakes region and you've got fabulous soil.

We don't have black dirt.   We have orange clay.

If I'd had room, I'd have brought a truckload back with me.  Totally.   

But the most interesting thing we saw on our drive was when we stopped to check out the car, which was making a bad noise [turned out to be stuck in 4wd - it fixed itself at 65 mph]. 

While I was checking the tires and under the car, K2 snapped this pic.


What do you suppose he was planning on doing up there?

Wednesday, June 22, 2011

What's that plant?

K1 found a little cluster of these beauties at the edge of the woods near the creek.
The colony
One whole plant
The bloom.
Pretty, huh!    We don't get these every year.   All the rain we've had has encouraged some infrequent bloomers.

Hint:  The common name comes from the color.

Answer below the fold.

Tuesday, June 21, 2011

Dye Studio - Dyeing with Acid Dyes

So you're ready to play with acid dyes on protein fibers!  Good for you!   If you want all the same color on your skein, then you need to follow the dye manufacturer's instructions. See yesterday's post for a list of places to get acid dyes.  If you want to paint different colors on your skeins, then here are some instructions.

This is what you need:
Bottom of steam pan with rack
  • Gloves:  thin ones to dye with AND heavy ones to handle very hot fiber with.
  • Apron and dye clothes.
  • Bucket big enough to hold your fiber loosely in water.
  • Fibers:  protein fibers like wool, etc.
  • Acid dyes:  One Shot, Jacquard, Kool-Aid, etc.
  • Acid:  vinegar or citric acid
  • Trash bag to cover your table.
  • Squirt bottles or brushes to put the dye on with.
  • Large pot with lid to boil water in.
  • Rack that fits inside the pot to hold the fibers out of the water while they're steaming.
  • Plenty of old towels or rags.
As I mentioned in the last post, the basic steps for hand painting with acid dyes is this:
1.  Wet out your fibers in hot water with acid in it.
2.  Mix up your dyes into dye solutions
3.  Paint your skeins with the dye
4.  Heat the skeins
5.  Cool the skeins
6.  Rinse and dry. 

But you want more details, right?   I'll take it step by step.

1.  Wet out your fibers in hot water with acid in it.

How much water?   Enough to cover your fiber well.
How hot?   This is going to be heat set - start the heat now.   Use hot water.
How much acid?   1 Tablespoon of citric acid or 2 Tablespoons vinegar per gallon is plenty.   It only has to be a little acid.

Put the acid in the hot water and then the fiber.   Let it sit for 15 minutes or so while you get everything else ready.

2.  Mix up your dyes into dye solutions.    It's a good idea to start heating your steam water now.   By the time you're done with the dyeing, the water will be boiling and ready to go.

How strong should the dye solutions be?   That depends on how dark/bright you want your colors to be.

1% dye solution gives bright/dark colors.
.5% gives nice medium shades. 
0.1% solution gives good pastels. 

Remember:  There are no RULES.   Make things as dark or light as you want!

3.  Paint your skeins with the dye.

When you're done with the top, squeeze the dye through the skein by pressing and squeezing a section at a time along the skein, then flip it over and paint the other side.

Squeeze the dye through one last time.

NOTE:   Gravity will pull the dye through the skein and it will puddle on the bottom.   You'll get darker colors wherever it puddles.    If you can't deal with that, then grab a dry towel and soak up the puddle of dye.

4.  Heat the skeins.
I use 2 large veg pans and a stove rack to steam on.

Gently lift the skein onto the steamer rack.    REMEMBER:  Dye wicks quickly and easily through protein fibers.  The more you move the skein, the more the colors will move.   Magical and beautiful things might happen.   If you don't want color movement, then move things as little as possible.

Put the rack over the steam, cover and let steam for 20-30 minutes.   If you're only doing one skein, then you can get by with 15 minutes.   If you're doing a bunch of skeins, it might take 50 minutes.    Don't skimp on the steam time.

REMEMBER:  Don't let your steamer run dry.   [No fun!  I've done it.   My steamer has the scars to prove it.]

When the steaming is done, turn off the heat.   Lift the lid by opening the side AWAY from you first.    Steam burns are very painful!

One batch cooling while the next steams
5.  Cool the skeins.

Take your fibers out of the rack and let them cool.   Let them cool until you can touch them bare handed.   It'll take longer to cool the center, so spread them out a bit for cooling.

6.  Rinse and dry.


REMEMBER:   You don't want to felt your yarn!  

Fill a bucket with very hot water.  It's fine to use any temp that is warmer than your skeins.   Lay your fibers in the bucket.   If the dye took well, there should be very little bleeding at all, if any.   Let it sit for a minute or so.  Do not agitate!  You don't want felt.

Nylon dries fast!
Dump the bucket and fiber gently into the sink.   Let the water drain off.   Press down on the yarn to get as much water as possible out of the fiber.

Spin out the excess water by putting the yarn in your washing machine and doing a SPIN CYCLE.   NOTE:   Do NOT use a full rinse cycle - that will wet your yarn, then agitate, then spin.   Use only the spin cycle.

OR, you can just roll the yarn in a towel and squeeze hard to get as much water out as you can.

Hang it to dry.


Troubleshooting:

* I followed the directions but all the dye rinsed right out!    

Your yarn wasn't protein.   The dye knows!    And believe me this has happened to all of us!    I just got a batch of yarn that we thought was nylon.    The dye rinsed right out of it.    Surprise!   I tested it with MX dyes and turns out it was a very shiny, clear, rayon.   Oops.   But not a crisis.

*  The dye takes, but a lot of it rinses out!

You need a longer steaming time.   I had a terrible time dyeing alpaca and wensleydale until I doubled the steam time.    Some fibers take their time opening up and taking the dye.   Give them plenty of steam time.

*  The yellows are rinsing out!

It's a weird fact that some fibers don't like certain dye colors.   My issue is yellows.   Yours might be some other color.   Wool generally takes everything just fine.   Alpaca and wensleydale, which is a rare breed wool, don't like my yellows.    I doubled the steam time and that helped a lot.   I still lose some yellow, but I can get it out in a single rinse. 

If you run into other problems, you're welcome to let me know!    Happy dyeing!

Monday, June 20, 2011

Winner - I heart Knitting T-Shirt

And the winner of this fabulous T-shirt, as selected by random.org  is:  #3 Jessica!

Please email me at [robin at morenna dot com ] with your mailing address by Monday, June 27, 2011 and I'll get it right out to you.

The next giveaway will be July 1-3, 2011 - a skein of handspun yarn.
Related Posts Plugin for WordPress, Blogger...