Showing posts with label hoop house. Show all posts

Sunday, September 7, 2014

12 Month Gardening

We've been busy with the bees and the gardens here lately.   We've moved the hives closer to the house to a place at the end of the existing gardens where we will be putting in a berry patch.    It's so nice to have the bees closer!   Expect more details on that later this week.

What I want to talk about first is 12 month gardening.   

We grow food in our gardens for 12 months of the year.   When I posted last winter about veggies that like cold weather, one of my lovely readers cross posted it on Reddit.   I got lots of pageviews [Thank you!!] and some very interesting comments posted on reddit.  

A few people thought my list was ridiculous.   They assumed that I go out in January in the snow and plant my lettuce and radishes then.    There is a deep misunderstanding of how 12 month gardening works.  

Winter gardening is not going out in the dead of winter with your hoe and a packet of seeds and  then carving a row out of the frozen ground, then planting the seeds and expecting them to grow like they do in May.

No.   Definitely not.  

Winter gardening begins in early fall - September, here.   We prep the beds and get them planted and then cover them for the winter in hoop houses and cold frames.  This way we can harvest through the entire winter and then plant again as soon as our latitude gets enough sunshine in the spring.

It's as easy as you want it to be.   Put some straw mulch in there if you want to prevent weeds and water if it gets too warm. 

Here are some things to think about now for your winter garden:

1.  Good soil:  Fertilize with manure or something else before you plant things.   This is especially necessary if you've grown a crop in that bed already this year, as I do. 

2.  Choose appropriate winter veggies:   Don't plant corn, squash and tomatoes.   Do plant greens, radishes, fennel, carrots and other cold weather loving veg.

3.  Prepare appropriate covers:  I use a two layer system - a cold frame or hoop house on the outside with row covers or extra plastic on the inside.   It's like you being in a winter coat in a car in the sunshine.  Even when it's really cold out, you are going to be much warmer than the outside temp.   And that's warm enough for the right kind of vegetables.  

If you can get your hands on some double walled greenhouse 'glass' [it's really acrylic] or some recycled double paned windows, they'll work too.  

And remember - cold frames don't have to be very big and they can tuck up nicely on the south side of your house.   That's just enough to plant a short row of radishes and some greens.

4.  Plant early enough so that you're still getting enough light for things to grow.  Once they get so big, they'll be fine all winter in the ground.   This is where the idea for root cellars came from.   I can plant until early October.  

5.  Watering:  In cold weather, the plants aren't respiring as heavily as when it's hot, so you don't have to water unless it's really warm in there.   If it's warm enough for you to be outside working comfortably, then check the cold frame and if it's dry, sprinkle it. 

6.  Weeds:  They'll grow too, so we use a thick layer of straw between rows.  Newspapers or cardboard work just as well.

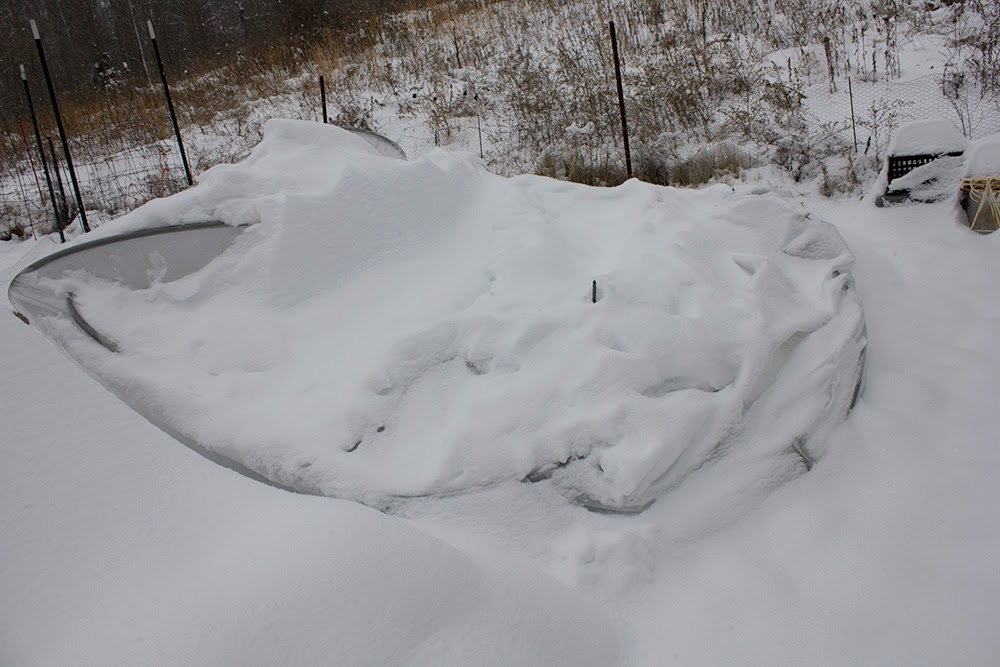
We will likely be replacing our current hoop house structure [made with pvc] with a structure made with a 16' cattle panel.   The old one was fine....until we got loads of snow and it collapsed.   The new one should be a little more collapse proof.   I'll keep you updated.


Thursday, March 6, 2014

Lettuce

This is the lettuce coming up in the hoop house.  I planted it in November.  It lived under it's blanket, inside the hoop house all winter long.  And it was COLD, baby.  [got down to at least -25 here]

Now that the days are longer, it'll grow faster.    Once it gets warm, it'll take right off.

Monday, March 3, 2014

The 12 Month Garden

On Saturday, I talked about what vegetables are terrific for cool/cold weather gardens.

On Sunday, I talked about how to figure out what times of year you're getting enough daylight to grow vegetables - you want 10 hours of daylight a day.

Then I told you that we garden 12 months of the year.    How is that possible, given that we get less than 10 hours of daylight a day from November 16 through January 25?

An excellent question.   See that pic up there?   That's a cold frame [built with straw bales] on Christmas Day under the snow.   See all those greens in there?

The truth is that things do continue to grow during the dark parts of the year, they just grow very slowly.   And another important truth is that vegetables in the ground keep far far longer than they do in your refrigerator.   Which means that if you plant carrots and they're ready in late November,  they'll keep quite nicely in place, in the ground, unharvested, all through the winter and you can use them as you need them.

Winter gardens double as root cellars.  [Actually a good root cellar mimics the conditions of a winter garden.]

I know this for a fact.   We do it here.   I can plant carrots in late September or early October and can harvest the best carrots I've ever eaten in late February.  [Carrots are much sweeter when grown in cold weather.]

So, start thinking now about your winter garden.   Buy seeds now for those cold weather veggies that you can plant late in the year in a cold frame or hoop house or green house in the fall and then eat on all winter long.  [See the post from a couple of days ago for a list of good cold/cool garden veggies.]


For information on hoop houses and cold frames see the links to my posts in the sidebar under Garden Helps ---->

Here is more information on winter gardening from Eliot Coleman.  Check out his Winter Garden Handbook in my book list over there in the sidebar ---->.

And here's even more information on winter gardens from the Walden Effect blog.

And here's a guide from Johnny's Seeds.   It's written for folks wanting to do large quantities for farmer's markets, but there's good stuff for every gardener in there, too.   Scroll down until you hit the section on 10 ways to extend your season.


Saturday, March 1, 2014

Early Planting: Plants that love cold weather.

There are two big things that winter gardens need to grow well - warmth and light.   I thought you might be interested to know how to deal with those things in order to get a 12 month garden.  We'll talk about temperature today and  light tomorrow.

Some plants just don't like the cold and you'll never get them to go through the winter, even if you can keep the temps above freezing in your greenhouse or hoop house.  Basil is a good example.   It spots and pouts if the temp gets down near 40 degrees.    Not to worry!  There are plenty of plants that love cold weather.

Good cold/cool weather plants are:
  • lettuce
  • arugula
  • spinach
  • maiche
  • endive
  • claytonia
  • carrots
  • radishes
  • scallions
  • sorrel
  • watercress
  • leeks
  • chard
  • beets
  • turnip
  • mustard
  • pak choi
For specific varieties,  check out Eliot Coleman's The Winter Harvest Handbook: Year Round Vegetable Production Using Deep Organic Techniques and Unheated Greenhouses [also in the book list on my sidebar.]    The book is fantastic and he's trialed many varieties.

Plants that must have very warm soil to be happy are:
  • squash
  • melons
  • eggplant
  • sweet potatoes
  • basil
  • red long beans
In other words, don't plan on keeping these happy in a hoop house over the winter.    I don't even plant them until well after the last frost date, in very warm soil.   In the fall, these things are the first to keel over and die when it gets close to frost.

By planting things during the right season, you can double or triple the production of your garden.   Plant carrots and lettuce under cover now, then harvest it in early May, when you can pop some melons and basil in that same bed.   Then when you harvest the melons and basil, you can plant a winter garden and have radishes, carrots and arugula all winter long.


Saturday, January 25, 2014

Winter Veg

After we cleaned out our dead hives [see yesterday's post], Eric reminded me that we hadn't checked out the cold frame or hoop house to see how those vegetables had weathered the weather. 

At last, some good news!   Some lettuce, little radishes and little carrots had done just fine.  A lot of the greens had some frost damage, but we expect them to bounce back pretty well.


In the cold frame I found my two little spinach starts doing just fine.   So, if I can get this stuff to grow, which I haven't been able to do in the past, at least we know it's cold hardy!   I will likely let these go to seed and save it for next year to try again. 

Thursday, January 16, 2014

Hoop House Re-Do

We've been thinking about how to re-do the hoop house so it is less vulnerable to collapse and so it has doors that are easier to navigate.

Here is a link to Walden Effect's post on Eliot Coleman's hoop houses.   Read my review of Coleman's book here.   Here is his website.

This is the place he gets his row covers.  It looks like he's using Agribon 15 or 19.  That's the most affordable, but it doesn't last long according to Anna at Walden Effect [see link above].

Here is the pdf for how Coleman builds smaller hoop houses.   This is what we're going to try to do.   His are 13 ft wide and I need 10 ft wide ones.   Not sure how we're going to do that yet.   We have a couple of options. 
  • Do the bends higher so the hoop house is taller and narrower.
  • Do it his way and cover my entire bed and the paths on either side.   I couldn't easily get around the hoop house that way, though my paths are pretty wide so maybe it would be just do-able.
Here's the link to Johnny's tunnel pipe bender.   And here's the link to their slideshow on how they build the moveable greenhouses.

Here's a site that has the clamps:  http://shop.hoopbenders.net/    Check their sidebar for a list of sizes. 

Sunday, December 15, 2013

Hoop House Collapse

We had some heavy snow last week

You probably heard about that.

We were stuck away from the place for a couple of days and when we got back, we found this.


And this.  The hoop house didn't like the weight of freezing rain and 8 inches of snow.  Since we weren't there to brush it off occasionally during the storm, it came down. 

A few of the pvc supports broke off at the base and then the center top support broke in half when the thing came down. 

It would have been cool to see happen.

We swept the snow off with brooms and Eric climbed inside and reoriented everything while I hauled the pool ladders over so we could put them inside in case it decides to 'rest' again.  [This is why rural people keep all kinds of junk around.   You never know when you'll need that second old pool ladder.]

Notice the plastic over the greens in the beds.  The double protection really paid off. 


It looks like this now.    Eric's planning on replacing the pvc with metal conduit.   And a door on the end, which should give it a bit more stability for the next time we're away from home during a big snow [which I hope is never.]


This is what was under the lower plastic bed covers.   Lots of nice greens, slowly getting bigger and bigger.

January salads!

Thursday, November 28, 2013

Hoop House Goodies

Here's a pic of the hoop house and the smaller cold frame all covered up for the winter. We're trying the cold frame without the straw surrounds this year - just to see what happens.   They say that it's the soil temp that matters, not the surround.   As long as the soil is covered and gets some sun, it'll stay warm enough to grow greens and things. 

I planted lots of greens in the hoop house in October, a few days before we put the cover on.   They will grow very slowly because we're not getting a lot of light this time of year, but by Christmas we should be able to start to harvest out of the hoop house. 

Here is a baby carrot.   It'll probably be early spring when they're ready.   Just after I planted the hoop house, we had 5 inches of rain one day.   It sort of scrambled the seed.    My carrots and radishes are no longer in rows in the hoop house.   I don't think they care, as long as they have enough elbow room. 


Monday, October 14, 2013

Cold Frames and Hoop Houses

This is a pic of radishes that I was growing in my zone 4 garden in December.

December.   

They were delicious. 

I grew them in a cold frame.

If you haven't done it already, it's time to set up and plant those cold frames and hoop houses.
 Here's how I do my cold frames.   It's not rocket science.   Straw bales and an old tempered glass door on top.   I toss some clear plastic over the whole thing to tuck it in when it gets way cold and stays that way. 

Radishes and fennel in December!   Mmmmm.  Greens all winter long!


If you have the space and actually want to stand up in your cold frame, then try a hoop house.  Here is how we built ours.  Follow the links in the posts for more information and theory about how they work.  [The trick is to blanket things inside, too.]

We're doing just hoop houses this year.  Greens, carrots, onions, radishes, fennel and a few potatoes. 

Tuesday, June 18, 2013

Carrots

 After last year's attempt at carrots, I swore I was done growing carrots.

Then over the winter, I read The Winter Harvest Handbook, by Eliot Coleman and realized that carrots are a cool weather veg.  As in COOL weather.  Not summer. 


So I picked up some mixed-color carrot seed from Rural King or Menard's or somewhere like that and sowed a row in the hoop house on Valentine's Day.

And look what I grew!    I harvested early this month and was pleasantly surprised at the size of some of them. 

I noticed that the white ones were tiny and not very tasty - but those purple ones!  Mmmm.  

I'll be planting another row of carrots this fall for overwintering.

Saturday, June 15, 2013

Early Summer Greens

These are some of the greens I planted on Valentine's Day in the hoop house.  When the weather got warm, we took the plastic off the hoop house and set up that trellis to keep shade on the lettuce.

Worked like a charm.  The lettuce has stayed sweet and been a lot slower to bolt.   We're eating a lot of salads and my goal is to eat it up before it gets bitter.

That's a renegade kale plant in the center.   I need to try making kale chips.  I hear they're delicious.

The square metal things are from old political signs that were abandoned after elections.   I put them in to hold up a row cover, but that didn't really work.  They did work brilliantly as a place to grab when I'm leaning over to weed the bed.   I'll use them that way again next year. 

Tuesday, May 7, 2013

Hoop House Progress


When the weather got hot, the hoop house was like a blast furnace inside.   Time to roll up the sides.  I'm keeping them rolled up as long as the nights are in the 40s.  To keep them up, I bunched the corners and wrapped a little bungee around them. So far it's working great - and it's something I can do by myself if I need to.


In the center of the hoop house are the jugs I start tomatoes and things in.   They work fabulously. 

On the far side of the jugs is a bed of mixed greens.  It went from seedling to seeding in just a couple of weeks.  I didn't harvest fast enough.   Good thing the flowers are tasty, too.

I had a row of radishes next to them - delicious! and done in time for the heat.  I won't plant radishes again until August - our summer heat is fierce and makes for very spicy and woody summer radishes.   


On the front side is a bed of bib lettuce.  Still delicious and slow to bolt.  We're thinning like crazy.

In the fall, I'll plant another bed of this stuff, plus a bed of arugula (our favorite!).  Plus a bed of carrots and another of radishes.  I'm going to need at least two hoop houses this fall.  


Thursday, April 25, 2013

Hoop House Goodies


These pics were taken a couple of weeks ago, but they're proof that stuff is coming up in the hoop house.   I'll post current pics soon.

I planted a bunch of bib lettuce and it's happy.  I have baby carrots coming up and a few seedlings of fennel.   Also, radishes and a bunch of other greens.


We happened to put the hoop house over the bed that had a lot of cilantro last year.

I love cilantro and it's a good thing because it self sows like crazy.   We'll probably never have to plant it again.

I think the seedlings are cute.

Saturday, March 16, 2013

Mini Greenhouse Veggie Starters

My genius friend Sharon told me about these a couple of years ago.    They're milk jugs.    You use them as mini greenhouses to start seeds in.   I use them for my peppers, tomatoes and eggplants.  

Start things early [in February, here] and they can stay all snug in the jugs until it's safe to plant them out in May.   In the meantime they can get big in these.

And they're double protected from goofy March weather because I keep these mini greenhouses inside the cold frames and hoop house where it's not going to freeze.

Genius, right?    I love them!


This is what you do.

Save your milk jugs.   Then cut them like this.  Cut all the way around but don't cut them under the handle.   This gives them a lid that stays on, but that you can bend open if you need to.

I cut them with scissors - just stab the scissors in right there under the handle and cut, cut, cut.


Then I poke holes in the bottoms using a skewer.  Or a screwdriver.   Or Lily's pocket knife because she always has it with her and my pocketknife is always in my purse.   Except for that one time that I took it out before I went on an airplane because I didn't want to be arrested for potential terrorism or have it confiscated because it's a cool little pocketknife. 

Poke lots of holes.  Maybe 8-10.

Usually I forget to poke the holes in the jugs until I have a couple of these full.   I hate that.   That's why I'm reminding you to poke your holes before you put the dirt in.

So don't forget.  

Then I fill the bottoms with this stuff.  From right to left:   chicken dirt, sand, potting soil. 

I love chicken dirt.   You can read about it here and here.

In this order, I put in 2 scoops of chicken dirt, 4 scoops of sand and 4-6 scoops of potting soil.

Or you can use plain old dirt.   It works too.


Then I plant my seeds and put labels in the jugs.

Don't forget the labels.   If you grow 6 varieties of peppers, you'll want to know which one is which.   Or not.   It might be fun to plant a big row and see what's what later. 

I spray everything down really well with a spray bottle full of water and I bend the lids back over to close them up so they stay nice and snug and then I tuck them in the cold frame or hoop house. 

Check them occasionally to make sure they don't dry out too much.    Seeds do not like dry.   Keep them moist.

This will give you a nice head start on veggie production for the season.   That's important when you have a kid whose only vegetable is tomatoes.   


Thursday, February 21, 2013

Hoop House

This is my new hoop house.     We've been using cold frames for years - and I love them because I can grow greens all winter long.

All. Winter. Long.

But there's one big problem with the cold frames and that's that they're too short to get into easily.   Especially when they're all bundled up in the cold.    It's a serious pain to uncover them and get in and harvest quickly.    And then bundle it all up again.

So I've been thinking about doing something taller, that I can walk into.   Taller would let me double cover things - the big outside cover plus inside row covers to keep things warm even when it gets to 20 below zero, which happens out here occasionally.

Taller, but still cheap.     And fast to build.

Eliot Coleman had some great ideas for hoop houses.   See this post for my review of his Winter Harvest book.   He makes his with electrical conduit and they grow things in Maine, all winter long.

Dude.  If he can, we can.

So Eric started thinking and planning and scrounging and shopping.    This is what he collected.
  • 14 - 10' lengths of 3/4 inch pvc electrical conduit  [$27 total]
  • pvc cement [$3]
  • uv stabilized zip ties [$4]
  • plumbing strap [$1.50 for 10 feet]
  • screws [$4.50 for a 1 lb box.   You won't need anywhere near that many.]
  • 6mil plastic sheeting [$72 total for 100 ft of 20' wide sheeting.   We figure it'll cover three houses]
We had most of this stuff around here already, so all he had to bring home was the pvc and the plastic sheeting.     We figure it cost around $50 per 8x10 hoop house if you buy everything new.   The hoops will last for years and the plastic will, too, if you roll it up neatly and store it between seasons.  If it lasts just three years, then that's less than $18 per year for a really nice cold frame that will extend your harvest at least two months every year and if you plan well will allow you have fresh vegetables 12 months of the year. 

This is how we built it:

We joined two sections of  pvc so they'd be 20 feet long and we glued them together.  We made 6 of those 20' lengths.  Then we took them over to the existing 8x10 garden bed and bent them so we could shove the ends into the dirt.   The 6 hoops span the 8' length of the bed.   

Eric took one of the remaining 10' pieces of pvc and attached it across the tops of the hoops.  He drilled holes through the pipes and used the zip ties to connect the 10' piece to the tops of the hoops.   The last piece of pvc was cut in half and then he attached those as triangles on one side of the house to further stabilize it.    You can see it sort of in this pic to top right.   There's another triangle out of the pic on the bottom right, pointing down to the front corner of the bed.

Once it was all stabilized, we covered it with the plastic.   The 20' width of the plastic just fits over the hoops with enough to lay on the ground on both sides so that we could 'attach' it with cinder blocks.  There were 4-6 inches left on the ground on either side. 

More rural recycling.    These cinder blocks show up out of old chimneys and shed foundations and stuff and they're too good to throw away, so we toss them in our masonry piles [one pile for bricks with holes, one pile for bricks without holes, one pile for broken bricks, one pile for old limestone, and one pile for old cinder blocks and square concrete.]   We use these cinder blocks for steps and seats and weights.    We actually stripped our whole pile to use as weights on the plastic. We put every block we had on the sides and ends to weight the plastic down so it wouldn't blow off.

Inelegant, but it works.
I cut the plastic on the ends long so it would come all the way down from the top and lay on the ground a bit to be weighted so the plastic wouldn't blow off.  

I folded it across the back end like this.  It keeps the sides tight.

I did the same to the front.

And that evening the wind started to blow.  Hard.   And all night long I wondered if our hoop house plastic would end up in Indianapolis.   We got up in the morning and it was just fine.   Then the wind blew harder.   And harder.   And by the time we got home from our school co-ops that afternoon, one little section of plastic in the front had blown free.   I dropped another weight on it and that did the trick.

So I can definitely say that these babies are sturdy as long as you weight them down very very well.

I planted peas, greens, radishes, carrots, lettuce and fennel inside.    They should be leaping out of the ground.   If we get a serious cold snap, I'll drop a row cover over things to keep them warmer.

I'll keep you posted on how these work.

Related Posts Plugin for WordPress, Blogger...