Monday, August 8, 2011

Poop Quiz

It's a been a while since our last poop quiz.  Do you remember how to play? 

Name that poop!  For a review, check back over last week's posts.

Answer below the fold.

Sunday, August 7, 2011

Saturday, August 6, 2011

Cherry Clafouti

Annual Repost --

Since true clafoutis are always made with cherries, calling this a cherry clafouti is redundant.   Sorry about that.   I did it to differentiate between this clafouti and the one I made last week with rhubarb.  Only that one was really a flaugnarde, not a clafouti, since it wasn't made with cherries.  

As we learned before, true clafoutis are made with unpitted cherries because the pit imparts a distinctive flavor.   I wanted to find out if that is true.  So I actually went out in search of black cherries.    And I found them.    They weren't fabulous, but they were the right kind.    And they were on sale.   Perfect!

Remember how clafouti is a glorified flan/pancake thing?    With the rhubarb one, I had to pour a layer of batter in the bottom and bake it first, but with the cherries, you don't have to do that.  And since we weren't even pitting the cherries, all I had to do was put the cherries in then pour the batter over them then bake it.   Too easy.

Seriously.    It was too easy.   So I did some looking around at variations and made it a teensy bit more complicated.    I added real vanilla from a vanilla bean.    I heart vanilla.   You knew that.

This is what I made.    It was fabulous.   Totally worth leaving the pits in.   I'll never do pitless clafouti again. 

Robin's Clafouti
  • 10 inch tart dish
  • butter to rub your dish with
  • 1 to 1 1/2 lb black cherries, stems off, pits in.  Yes, in.  
  • 3 T flour
  • 1/2 tsp salt
  • 1/4 cup sugar
  • 4 eggs  [You can get by with 3 if you have to.]
  • 2 cups milk
  • 1 vanilla bean
Heat oven to 350.   Butter the tart dish well.  Arrange cherries in the bottom of the dish.   Don't pack them in, leave some spaces for the batter to get around them all.  In a small bowl, mix flour, salt and sugar.  Set aside.  In a bigger bowl, mix eggs and milk.  Cut vanilla bean longways and scrape out the insides into the egg mixture.  Gradually stir the flour mix into the egg mixture.   Pour batter over cherries.   Bake at 350 until set and golden.  About 60 minutes. 

Clafouti is traditionally served at room temp.     It's great that way.    It was also great cold, right out of the fridge for breakfast.

Friday, August 5, 2011

Ball State University

K1 and I went to Ball State recently for the Midwest Writers Workshop.    The workshop was great.   We went a day early so we could check out the the campus.   It is beautiful!  

Ball State has the only school of architecture in Indiana.    It shows.   Here are some highlights. 


All that architectural splendor was punctuated with some pretty extensive construction, right in the center of campus.   
There are some beautiful green spaces, too.


The real highlight of the campus was the art museum.  More on that tomorrow.

Thursday, August 4, 2011

Fennel Gratin - A work in progress


I adore fennel gratin.  

Really, it's one of my favorite things in the world.   I made it for the first time last year with fennel that I grew myself.    The fennel was great.   The gratin was so-so. 


I'm learning.   The one I just made was much better, but still has some issues. 

This is what I used:
  • fennel -  2 bulbs, cored and sliced
  • onions - 2 medium, sliced
  • potatoes - about three small ones,  new from the garden.   
  • garlic - 1 large clove
  • cream - maybe 1 1/2 cups
  • cheese - a cup or two cut into small cubes.   I didn't measure
  • butter
I always use my tart dish.   It's pretty.

Butter the dish.   Dice the garlic into tiny pieces and put it in the bottom of the dish.   Put a layer of  half the fennel, a layer of half the onion, all the potatos, a layer of half the cheese.  Then layer the rest of the fennel, the rest of the onion and the rest of the cheese.   Pour the cream over all.   Bake at 350 for an hour.   Or until it browns.   Or until it's soft enough for you to eat.   

You can substitute milk for the cream.   I've done it.  It tastes fine. 

This is my problem.   The cream or milk separates.  It's delicious, but watery.    I want a CREAMY gratin.    I don't know how to get it.

I can see that I'm going to have to do a lot more experimenting.   Good thing I have more fennel in the garden.

Also, I need your help.  Anyone ever made one of these so it stays creamy?  Got any ideas?

Wednesday, August 3, 2011

Squash Bugs

Anasa tristis: squash bug
So yesterday I told you all about hornworms.    Well, let me tell you, hornworms are nothing compared to squash bugs. 

I really hate squash bugs.   They multiply faster than snowflakes and do just as much damage to my squash.  

The vigilance with which I guard my tomatoes from hornworms is nothing compared to the vigilance with which I watch for and guard my squash from squashbugs.   Nothing, I tell you.

There are only two ways to control this pest:   1.  by spraying awful chemicals that are illegal for me to have and that I wouldn't want anywhere near this place anyway.   or 2.  By hand picking and squishing the adults and by finding the eggs and taking them off and destroying them.  

It's war.

Unfortunately, my adversary is wily.  

It hides.   And it lays eggs everywhere.

OK.  Not everywhere.  Just on the underside of every squash leaf it can find.    I have a lot of squash leaves.   It's not like I can hide them.  Squash bugs find them all. 

See the dark triangle on the underside of this squash leaf?   It's a squash bug egg cluster.   I hunt for them every day.    Under every leaf. 

Yes. 

Every.   Day. 

Every.  Leaf.

Last year I didn't, and I had squash bugs everywhere.   It was awful.   This year I promised I wouldn't let it get that bad.   So I hunt them every day under every leaf.  

Yes, it's a pain.   But being overrun by squash bugs is a much worse pain.   

Once I find the egg clusters, I pinch off that part of the leaf.   It leaves a hole, but a hole is better than a herd of squash bugs.  

Baby squash bugs look like little spiders with blue-ish white bodies.   They hang out together, but scatter when disturbed.   Luckily, they're soft bodied and easy to squish.  [see photos of baby squash bugs]


This year they especially love my pumpkins.   Some of the leaves are getting very holey.

I drown the eggs in a bucket of water and then let the ducks eat them.  

New eggs are light gold.   The older the eggs are, the darker they get.   Eggs that are very dark brown are almost ready to hatch.   

These squash bugs were fornicating right out in the open.   

Eww.

If they had been allowed to finish [and they weren't], the female would have found a cozy place under the leaf in the V of a leaf vein and laid a bunch of eggs. 

Instead, they suffered a different fate.  

My chickens are happy. 

The very good news this year is that all of my vigilance has totally paid off.   I have way fewer squash bugs this year because I've been taking care of the eggs as I find them.  

Tuesday, August 2, 2011

Tobacco Hornworm

Hornworms are a sad fact of gardening life.    There's no avoiding them, so I just watch for them.
It takes constant vigilance!   

If you've got good eyes, you'll start seeing a single tiny, perfectly round, light colored egg on some of  your tomato leaves.   That's a hornworm egg.   Take it off now and destroy it.  You'll be glad later.

There are a few different kinds of hornworms that attack tomatoes in Indiana.   I get the tobacco hornworms.  That is a medium sized one in the pic above.   They get bigger.

A lot bigger.

And they don't like being removed from the plant.   They twist and squirt green goo at you.  They act really scary.

I have to remind myself that it doesn't want to eat me, it wants to eat my tomatoes, so I should just suck it up and get the blasted thing off.   They don't bite.

It's not always easy to spot these things.    They are perfectly camouflaged in a tomato plant.

It's much easier to see their poop - and to be perfectly honest, when I'm looking for these guys, I look for their poop.

This is the poop from that guy in the photo above.  It's medium sized hornworm poop.   The greener it is, the fresher it is.   The bigger it is, the bigger the hornworm that dropped it is.    [Warning:  there will be another poop quiz later.  You're excited, I know!  It's been ages since the last one.]

The law of gravity being what it is, once you find the poop, you can generally look straight up to find the source.   As the hornworms get bigger, they eat and move faster so sometimes you still have to search a bit.   A little patience is all it takes to find your culprit. 

Not everyone finds these as unwelcome as gardeners do.  My lovely friend Heidi loves them and collects them so they can become adults.

photo: www.ext.colost.edu
Unfortunately, she lives in another state. I told her that if she lived here, she could come over and get as many of them as she wanted and I'd giftwrap them for her.

And I would.    Gladly. 

Then she could raise adult tobacco hornworm moths like this one.

Since Heidi is not here to rescue and revere these beauties, I'll just keep picking them off and feeding them to the chickens.   The chickens love them.

Monday, August 1, 2011

Rhubarb

Believe it or not, I still have rhubarb.   We harvested some recently and tried two new recipes - a Rhubarb Clafouti from Savor the Rhubarb and the Rhubarb Ginger Cheesecake Bars from Pioneer Woman's Tasty Kitchen Blog.

You can go to the Pioneer Woman's blog to get all the info on the cheesecake bars.   Easy and yummy!

The clafouti was a whole new thing for me.   I'd never heard of it before this year.    So, I did some research.

According to Wiki,  the proper word is Clafoutis, from the verb clafir, meaning "to fill" - as in 'filled with cherries'.  The 's' at the end is silent. 

And that is why anglophones changed the spelling to clafouti.  

The dish comes from the Limonsin region of France, which is one of the traditional provinces of France, close to the city of Limoges.  

True clafouti is made with black cherries and is cooked with the pits in.   The pits impart a distinctive flavor.   If you pit the cherries, the flavor is different.  

If you don't use cherries in this dish, it's called a 'flaugnarde' or 'flagnarde' or 'flognarde' or 'flougnarde'.   So you have lots of options. 

It looks like a traditional American cobbler only with a thinner batter.   Maybe they're related.   If you find out that they are [or aren't], let me know.    

It works like this:   You make a thin batter and pour a short layer of that on the bottom of your dish.   Bake that layer, then add the fruit or sauce and then the rest of the batter.   Bake it all until brown.   They say it's like a glorified pancake / flan.  

Rhubarb Flaugnarde

Batter:
  • 3 eggs
  • 1/3 cup white sugar
  • 1/2 tsp salt
  • 1 1/2 cups milk
  • 3/4 cup flour
Filling:
  • 3 cups chopped rhubarb
  • 1/2 tsp ground cloves
  • 1/2 tsp ground allspice
  • 1 1/2 TB lemon zest [OPTIONAL - I used a tablespoon of lemon juice instead because I didn't have a lemon.   You could probably leave it out all together.]
  • 1/3 cup brown sugar
  • 1 tsp vanilla
Preheat the oven to 250.   Butter an 8x8 dish.  Put the batter ingredients in a blender and blend it up.  Pour a thin layer of the batter into the dish and bake it until firm.  10-15 minutes or so.   Mostly 'or so'.   Keep an eye on it and jiggle it to see if it's firm. 

In the meantime, make the rhubarb filling.   Put it all in a saucepan and cook it until soft.  

When the crust is cooked, pull it out and set the oven at 375.  Spread the filling on top of the baked layer.   Then pour the rest of the batter over all.   Bake until brown and the crust puffs up.  50 minutes. 

Traditionally served at room temperature. 

YUM!   Seriously a great way to eat rhubarb.   

Notes:   This wasn't very sweet.    Put some sweetened whipped cream or ice cream on it when you serve it.  Or you can up the sugar in the filling to 1/2 or 2/3 of a cup.  

Sunday, July 31, 2011

From the Garden

This is just part of our morning harvest:
  • Japanese pickling eggplant
  • Rhubarb
  • Dragon Tongue beans
  • New Russet potatoes
We also got some strawberries, one tomato, green beans and some cilantro.

What have you eaten from your garden?

Saturday, July 30, 2011

Pesto

It's pesto time.

Pesto tastes like early misty sunrises and hot humid walks in the fields.    It makes me happy just thinking about it.

I make pesto with these basic ingredients.  
  • basil  [4 cups or so]
  • pistachios [1 cup or so, shelled]
  • olive oil  [1/4 cup or so]
  • garlic [3 cloves or so]
  • parmesan cheese [1/2 cup or so]
  • parsley [just a touch]
Put it all in a food processor and process until smooth.   

I never make it the same way twice because I never measure.   It's always good.  

Note:  I do not use pine nuts.   I don't really like them very much.   I love pistachios and they have enough salt to help cut the bitter.

Salt cuts bitter.   Did you know that? 

It's true.   Some people put salt in their coffee to cut the bitter.   I don't drink coffee, so I put salt in my pesto to cut the bitter. 

Rumor has it that the best, smoothest pesto happens when you use a mortar and pestle to grind it up.    I will never know because I have no intention of using a mortar and pestle to grind up as much pesto as we eat in a year.

We make pesto all summer and put the extra in jars to freeze.  We eat it on pasta, on green beans, on squash, on tomatoes, on mozzarella cheese and just plain with a spoon. 

Just plain with a spoon is my favorite.

Friday, July 29, 2011

Blackberry Barbeque Sauce

Remember what I said the other day about desperation?

Desperation makes me creative.

I had a lot of blackberries I needed to use.    I was desperate to use them.   Desperate I tell you.

But not in jelly.   And not in syrup.  And not in bags of mixed berries in the freezer for pies later.

Even though I love blackberry jelly and syrup and bags of mixed berries in the freezer for pies later, I have enough.  

Enough is enough. 

So I really, really needed to find something else to do with more blackberries. I was desperate.  Before they took over the house.  And desperation resulted in creativity.

And creativity resulted in Blackberry Barbeque Sauce.     It's delicious.   As a bonus, it used up some cans of diced tomatoes I had in the pantry.   Here's the recipe:

Blackberry Barbeque Sauce
  • 2 cans diced tomatoes 
  • 2 large cloves garlic
  • 1 small-medium onion, diced
  • 1/4 cup red wine vinegar
  • 4 cups blackberry juice
  • 1 cup  white sugar
  • 1 cup brown sugar
  • 2 tsp molasses
  • 1/4 tsp cayenne
  • 1/2 tsp mustard powder
  • 1/2 tsp ground allspice
  • 1 TB salt
Heat the tomatoes, onion and garlic until soft.   Puree in blender.   Put back into wide bottom pot.  Combine the rest of the ingredients in the pot and simmer until reduced by half.    Adjust spices to taste.  Makes 6 1/2 cups. 

Notes:
  • Blackberry juice:   Cook the blackberries with a bit of water [so they don't stick to the pot].   Mash.  Strain seeds and skins out.    I line my chinois [colander, sieve, strainer] with cheesecloth, put the mash in, and squeeze the juice out. 
  • Consistency:  We like it on the thin side.  If you want it thicker, cook it longer. 
  • You can halve the recipe if you need to.

Thursday, July 28, 2011

Commenting on a post

K2's hibiscus.  The flowers are huge.
Bloggers love comments.  

Comments show us that we're not just walking around talking to ourselves.

Not that we don't walk around talking to ourselves.

We do.  Sometimes. 

Comments let us know who's out there.  Knowing our audience is an important way of gauging our material.  

We like to gauge our material.   It's nice to talk to someone and not just send words out there to land wherever.   We like being revelant.   I mean relevant.  

We like being revelant, too, but we can only do that when our crystal ball is working and that hasn't happened in a while.  

ahem. 

Comments let us know what questions you have and what interests you have.    This is very helpful when we are stumped for topics.   I know it's hard to believe but occasionally the creative well runs a bit slow and we run out of ideas. 

Also, we don't always write as well, or clearly or completely as we think we do.  

So we like the help. 

OK.   I like the help.   [Really, what's with the royal 'we' business.]

Mostly, I just love hearing from you all. 

In case you want to comment on a post, and I hope you do, this is how you do it:
  • Look down at the bottom of the post.  If you're on the Home page you'll see the phrase:  ' ___ comments so far...'.   Click on that to take you to the post's comment page.   
  • If you're already on a post page, at the bottom of the post [and below the other comments, if there are any], you'll see a white rectangle below the words 'Post a Comment'.   Type your words of advice, wisdom and reaction there. 
  • Just below your text, you'll see 'Comment as'.    That lets you choose which ID you want to comment as.   If you don't want to use any of those IDs, you have two other options.   You can comment using your Name/URL, if you have a website or blog.   OR you can comment as Anonymous.    
  • Remember:  If you are commenting on a giveaway post,  you need to leave me your name - so if you post as Anonymous, make sure your name is in your comment.  
I hope I hear from you soon.   

Wednesday, July 27, 2011

Creativity Exercise: Finding Beauty

Creativity is born of desperation.

It's true.  If we weren't desperate, we would have no need at all to do anything new.  

Remember that saying, "Necessity is the mother of invention'?   Necessity and desperation are the same thing.  

We need to fix something.   We need to save someone who is hurt.   We need to feed our families.   We need to find work.   We need to put this big pile of stuff into that not-big-enough space.   We need to get a long list of stuff for school with a short list of resources.    We need to entertain our kids or ourselves.   We need to do something harder than we have done before.   We need to finish what we've started.   We need to see if we can build/make/write/compose something from nothing.    We need to know if we can take an idea and make it real.    We need to satisfy our curiosity. 

Creativity is born out of all that need.  

It's easy to let creativity take a back seat to other stuff:  Other stuff takes our money, our energy, our space our time, our focus.    We give priority to our families, our jobs, our pets, our house, our lawn, our friends.    That's normal.    That's appropriate.

This exercise is for those of us whose creativity needs to be unshackled for a little while and let out for a walk.  This is for those of you who are desperate to feel creatively alive again.

Task:     Find 10 beautiful things inside your house.  Take a picture of them or draw them or write them or compose them. 

That's it.   Think outside the box.   Look at the cobweb in the corner with new eyes.   Spray it with water and take a picture of it.    Look at how the books on your bookshelf have beautiful lines when you tip your head over and look at them sideways.  Look at the texture of that old drawer pull.  Listen to the music of the dryer.

There are 100 beautiful things in the same room you're in right now.   Find 10 of them and tell me about them. 

Good luck.  Keep in touch.

Tuesday, July 26, 2011

Designer Beans


We love fresh green beans.

And we love fresh green beans that aren't green but are sort of a pasty pale greenish white with purple stripes. 

It makes for a nice change.

I grow our beans from seed.  It's one of the few veggies that I plant from seed that I never stress out over.

That's rare.

It's hard for me to grow things from seed.   You have to baby seeds.   I hate babying seeds.    You have to make sure they're at just the right temperature and watered just so.    I don't even make sure that I'M the right temperature and watered just so.  Seeds and me have a rocky relationship.  

But beans I shove into the ground, salute and walk away from and in a few weeks I have food.

It's awesome.

This year we grew two kinds of bush beans:  Blue Lake Bush and  Dragon Tongue Bush.    I'll let you guess which ones are which in the photo above.

I love bush beans because they stay short.   I don't have to build structures to support them and then take those structures down at the end of the season.     All I have to do is pick the beans.    I love that.

The Blue Lake beans are great beans.    They're reasonably bug and disease resistant.   They're great producers.    They have a beautiful white flower and smooth green flesh. 

No need to string them, just snap the stem end off and they're delicious.

These beans are my favorite beans to use for Dilly Beans.   They stay quite firm and have a bit of crunch and I like that in a dill pickle.

The dragon tongue beans are a whole different experience.


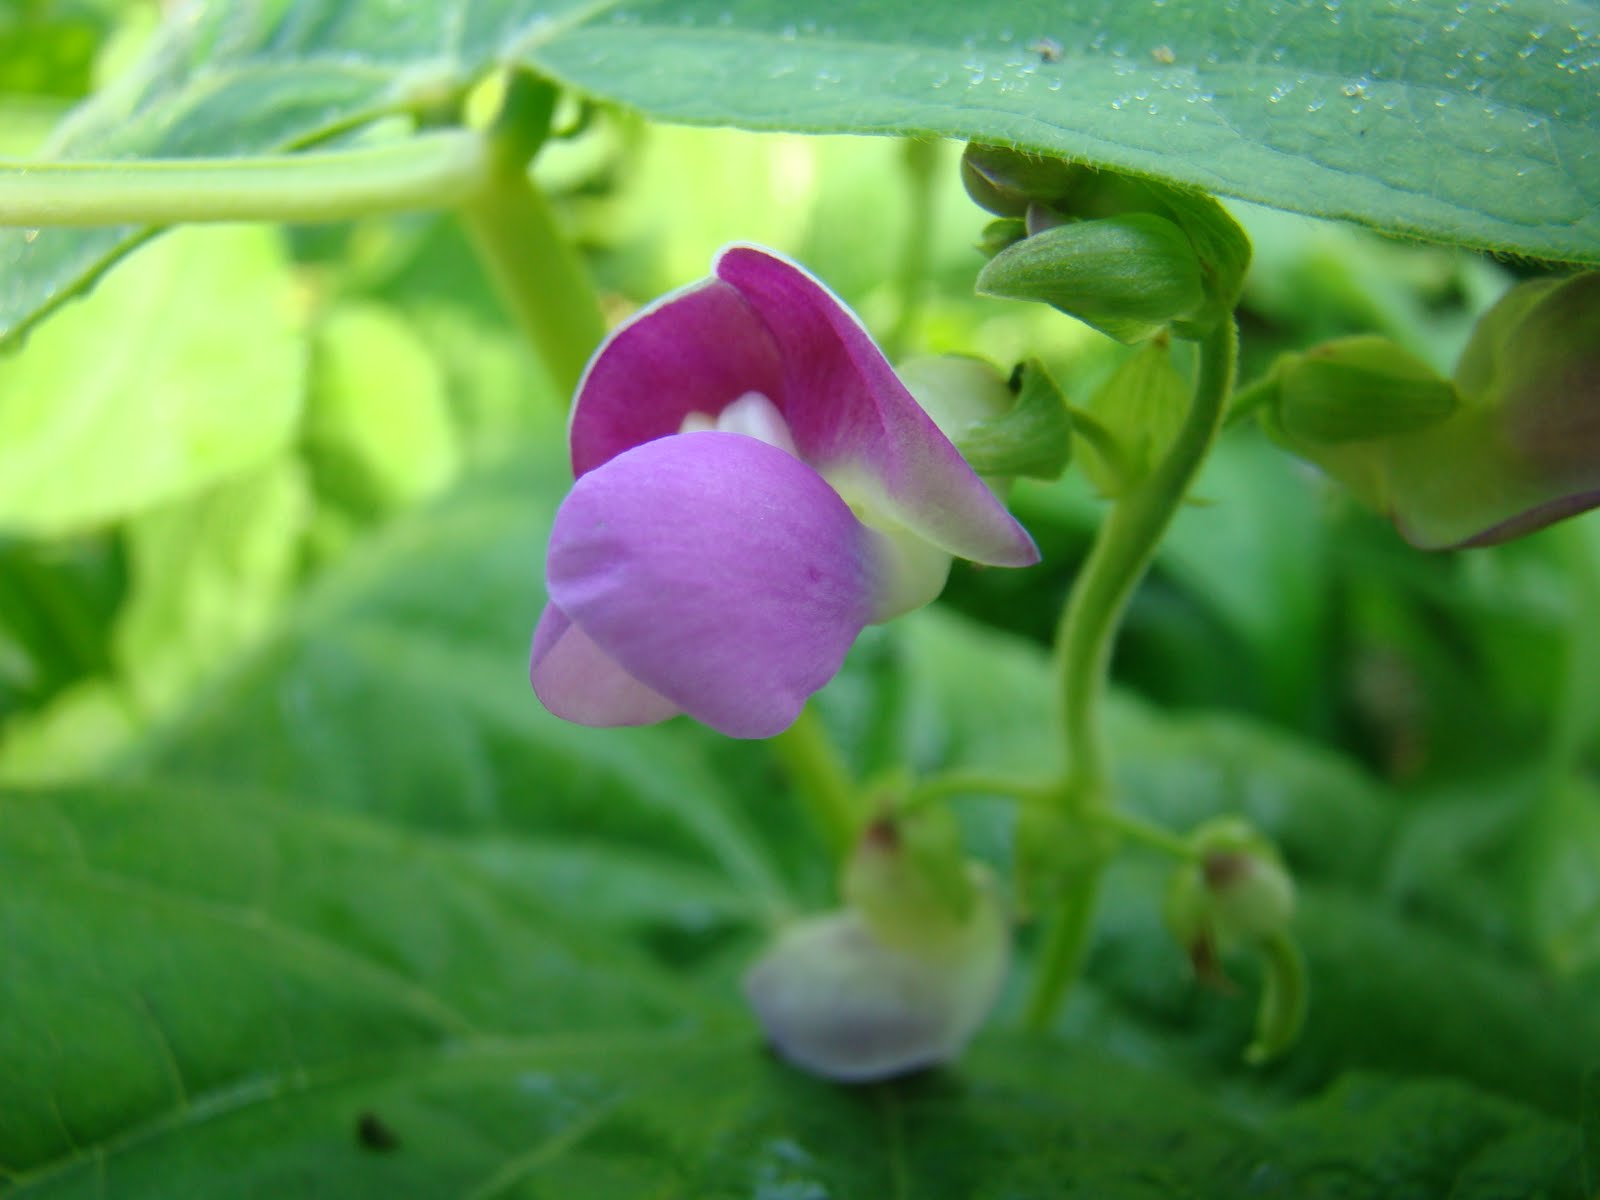
They have pink flowers.

This, of course, makes them far superior to every other bean on the planet.   Just ask K2. 


Dragon tongues are flat and have a rougher texture than regular green beans, but they are delicious!  We like them sauteed with garlic and olive oil.   It's too bad that those exotic purple stripes disappear during cooking.

I tried these beans in Dilly Beans last year, and they were fine at first,  but after a few months they turned soft.  They'd be great to pickle now to use for a Halloween treat [Yes!  Serve your kids Dragon Tongues for dinner!], but I wouldn't want to keep them much longer than that. 

I also planted some Chinese Red Long Beans this year, but they're not ready yet.  More on them later.

What kinds of beans do you grow?

Monday, July 25, 2011

Lavender Sachets

Remember when we made lavender wands?  

The thing about lavender wands is that you have to make them pretty soon after you pick the lavender and it's still soft and pliable.

Pliable is good. 

We like pliable.

After pliable comes dry.   Dry is not pliable.   Dry is stiff and brittle. 

Dry is what happens when you pick the lavender to make the lavender wands and then get distracted by real life stuff like changing diapers, going to work, cleaning the house, taking care of Grandma, writing letters to your representatives,  making pickles, going to the vet, sleeping for a few hours every night, etc.

Yeah, that sleeping business really gets in the way, I tell ya.    While you're sleeping, the lavender is leaving the land of pliable and heading at warp speed into the land of dry.  

It's pretty near impossible to make lavender wands with dry lavender. 

Never fear!  All is not lost!    You can use that lavender to make lavender sachets!

This is what you need:
  • Paper.  Pretty paper!
  • Double-sided tape
  • Lavender
  • Paper cutter or scissors
We used old scrapbooking papers that I knew I wouldn't use for scrapping, but would look fabu full of lavender in my drawer.

Cut the 12x12 ones in half.   Leave the 8.5 x 11 as is.   Fold them all lengthwise.

See where the fold is?   On one side of the fold, put tape across the top, one edge and bottom.   You don't have to use much.  

See?

Now, put a small bunch of lavender in the sachet - a dozen stems or so.

See how mine in the photo are too long?   I just cut the ends off.   They were dry and brittle and I could just bend and twist to get them off.  

Now, fold the other side of the paper over the lavender and stick it together. 

Voila!    A lavender sachet.   With rescued lavender!  Aren't you clever!

I made mine with bits of tape so there are open spaces along the edges.  That means that bits of lavender might fall out.    Mine are in the bottom of my drawers so I don't have a problem with that.    If you want secure edges, make sure you tape all along the top, edge and bottom so there won't be any openings for lavender bits to fall out of. 

They smell good immediately.  My scarf collection loves these.

So do my sheets.  

So do my holiday towels.  

And my t-shirts.    

And my kids' drawers.

You can also punch a hole in the top, thread a ribbon through it and hang it on a hangar in your nice clothes.   It would make you happy every time you opened your closet. 

Sunday, July 24, 2011

Lemon Squash

Pattypan type squash are my favorite.  Patisson Golden Marbre Scallop is my favorite pattypan variety.  They're the beautiful scallop shaped squashes.   I love them.   They have a denser texture than crookneck or regular zucchini.   I slice and steam them and eat all my favorite pasta sauces on them instead of pasta.    They're also good sauteed with garlic and butter.   [But then, so is everything.]

This year I added a new pattypan type squash to our garden lineup -Lemon Squash.    I grew them with seed that I got from Baker Creek. They're big, tough plants that survive squash bugs and vine borers.  Baker Creek says they have "huge yields and the best resistance to insects I have seen in a summer squash."  I was hoping that meant that the bugs wouldn't bother them, but both the vine borers and the squash bugs did go after them.   However, the plants are doing fine and producing well.  So I guess that 'best resistance' means that even if they are attacked by both [as mine are this year], the plants will live on and produce.   I heart that!
Here's a pic of both male [right] and female [left] flowers.   If you click on it, it will blow up so you can get a closer look at the difference between them.

Another way to tell the difference is just to look at the base of the flower.    The female flowers have baby squash at their bases.  

See the bigger baby squash at the top left of the pic?  The blossom is still on it.   It'll be ready to eat in a few days.  Now look at all the tiny ones, lower down on the vine.   Their blossoms haven't opened yet.

But they will!   And I'll be waiting with butter, garlic, skillet and fork in hand.

Saturday, July 23, 2011

Our Veg Garden

Our veg garden was a lot of years in the making.    I was first a flower and herb gardener.  Vegetables were not as interesting to me as herbs and flowers.   Plus, the gardens were in the bottom of our hollow.   Frost collects there.   This was bad for vegetables.  I killed a lot of vegetables in those lower gardens.

From the end of the veg garden looking on to the studio
Once the studio was built, we had a nice flat place on the west side of it that was perfect for more gardens.   It had full sun, except for the first couple of hours after sunrise.  Plus, it was up and out of the frost-collecting bottom of our hollow.  

One problem.  

Clay.

Clay, clay, clay.    Winter and Spring:  slimy mud.   Summer and Fall:  brick.

I built raised beds.   We have six of them now, plus smaller borders around the south and west sides of the studio.  

After we built the beds and the borders, I ordered a dump truck load of sand.  I'm not kidding.   We filled the beds and borders with sand.

From the corner of the studio looking on the garden.
Sand, sand, sand.

And then manure.   Chicken manure and horse manure. 

Then we dug and mixed and dug and mixed and dug and mixed.    It was hard work.    I stink just thinking about it.

Then I planted vegetables.   And by golly, they grew!   And they produced fruit!  And we ate it and all was well with the world.   Finally, a place where our vegetables can be happy.

I put the herbs in the studio borders.   They're happy there.   So is the okra.

The paths were still an issue.  Muddy and boggy in the spring.   And weedy.   I hate weeds.  

From the strawberry rhubarb bed toward the house.
I got my shovel out [again] and dug shallow ditches to direct the wet away from the beds.   I laid landscape cloth in the ditches to discourage weeds and put tons, literally, of gravel on top.    Works like a charm.   We have fabulous drainage now. 

Since the ducks adore squash and melon leaves, and bean bugs and pretty much anything they can reach, we wrapped every bed with plastic deer fence [which so would not keep out deer, by the way!].   That keeps the ducks out.  We also put some of the deer fence on top of the strawberries to keep the birds out.  As long as we keep it high enough to let the rhubarb get tall, it works great. 

The saw horse in the middle of the garden is where I put the sprinkler.  It likes being high.  

And the trellis in the middle is where we train the cukes and Chinese long beans.   They like to hang.

All in all, it's a very happy garden.    I love it.

Right now I'm learning how to combat squash bugs and vine borers.   I hate them.    More on that later.

Friday, July 22, 2011

Blackberry Marinade

We have so many good blackberries this year that we've been reading up a bit on cool stuff to do with berries.   We love The Berry Bible by Janie Hibler.    It's chock full of information about berries of all kinds and what to do with them.  

She has a great section on sauces and after reading some of hers, we started playing around with a recipe of our own for a blackberry marinade.   It was great on pork shoulder chops!

Blackberry Marinade
  • 2 cups blackberries
  • Zest and juice of 1 small lime
  • 1/4 tsp chipotle powder.   [More if you really like chipotle]
  • 2 green onions chopped.
  • 1/2 tsp garlic salt
  • 1 T red wine vinegar
  • 1/4 tsp oregano
  • 1/8 tsp paprika.  
  • OPTIONAL:   5 T sugar [if you want a sweet marinade]
Put berries in saucepan.  Mash while heating.   Add other ingredients and heat until everything is well mixed and dissolved.   Refrigerate until chilled.    Spoon over meat and let marinate for several hours or overnight.  

Thursday, July 21, 2011

Mozzarella Curd Cheese

This weekend we scored some more fresh milk from The Swiss Connection, so I made lots of cheese!

The first one was Mozzarella Curd Cheese, which is a new cheese from Suzanne McMinn at Chickens in the Road.  It's a nice change from regular pulled mozzarella, very easy to make, and quite delicious.    Make this one with raw milk.   Raw milk moz acts very different from moz made with store milk.  It's much better. 


Don't worry if you don't have lipase; it works just fine without it. 

This cheese is great with a good olive oil and dipping herbs, and rumor has it that it's great sliced on a sandwich and melted.    Ours never lasts long enough to do that.    If you try it, let me know how it turns out.

Wednesday, July 20, 2011

Digging holes

Because I like to garden, (O.K.; because I am compelled to garden by some mysterious power) I am often in intimate contact with dirt, or as real gardeners call it, soil.  Also because I am compelled to garden, my husband is compelled to garden.  The only mysterious power that compels him is me.  His projects involving dirt are sometimes different from my gardening projects that involve dirt.  I dig holes and put in perennials.  He digs holes and puts in septic systems.   Same process, different sized holes.

Shortly after we moved out here, we discovered that our septic system emptied right into our creek across the road.  When we mentioned this to the former owners, they didn't understand why that could possibly be a problem.  After all, didn't everyone's empty into the creek?

We immediately began to dig a septic system.  Eric got a license from our county and discovered that it was only within the past year or so that our county had any waste water disposal regulations at all, and that was because the state had refused to give the county money if they didn't adopt existing state waste water regulations.  Ah, the power of the mighty dollar.  So, our county instituted waste water regulations and specific guidelines for septic systems.  That is not to say that anyone actually enforces them.

One of the things we had to do was have someone come out and test the soil in the area where we wanted to put the system.  Now, we had done enough digging to know that we already had clay.   Eric, who has a degree in Environmental Sciences, was not allowed legally to do this.  We actually had to PAY someone a lot of money to come out and take a soil sample and say, yep, you got a lot of clay and silt. 

They came and took a soil sample to the depth of five feet, I think.  As they removed the sample, they laid it in a half piece of PVC cut lengthwise.  It was very interesting to see the layers of different types of soils.  Actually, we really had only three layers:  Topsoil, clay/silt, and damp clay/silt.  Since there was enough slope to the area, but not too much and since we were digging a septic system big enough for a hotel, we had no problem getting approval and installing the new system.

The dirt in this part of Indiana varies.  Rumor has it that this is because the glaciers melted right about here.  The hills on our property are large rocks with leaf mould based soil.  The hills on my parents property, which is just a few miles away, are all sand.  Wonderful orange sand.  We have sand in a narrow strip right around the creek that comes down from the northwest corner of our property.  The rest of our dirt is what many people around here call clay, but what is in fact mostly very fine silt, which when dry and chiseled out in clumps, might as well be rock. 

Clay is wonderful dirt if one wants to dig it up to make water storage vessels.  Clay is horrifying dirt if one wants to dig it up to plant flowers.  Silt is wonderful dirt if one wants to dust (i.e. MAKE dust) with it.  Silt is horrifying dirt if one wants to do anything else with it.  You see our problem.

A decade or so ago, we expanded our main flower/vegetable garden area yet again, only, this time we decided to do it right, the way the books tell you to.   

The books tell you that when one is beginning a planting bed, one should amend the soil with whatever it is lacking:  humus, sand, peat, etc.  One first digs out all the dirt in the bed to a depth of eighteen inches or so and sets that aside.  Then one tills up or digs up the next layer to loosen the soil and amend it.   Then, one puts back the first stuff that had been set aside, tills it up and amends it.  Then one has a beautifully prepared, well drained, amended and slightly raised garden bed all ready to plant.  Voila!  The whole process is called double digging.

When we decided to add six more planting areas, Eric told me that we should double dig the new beds and tailor each bed to the needs of what we wanted to plant in it.  For example, we could have a really sandy bed for things like larkspur and root vegetables.  We could also raise all of the beds since flash flooding had saturated the west half of that garden area.

Eric started out with a song in his heart and a shovel in his hand.  In no time at all, he had dug out and set aside the first layer of dirt in the first bed.  Then it rained.  Instead of a garden bed, we now had a lovely swimming pool.  The birds thought so; the frogs thought so; my dad thought so.  My dad didn't actually swim in it, he just teased us mercilessly about it.

As the water in our pool would dry up, it would rain again and fill right up.  The dirt around that thing was practically impenetrable and the water stayed there until it evaporated.  A few weeks later we were able to finish the job.  We amended with lots of sand to improve the drainage.   Then we realized that what we might have done was to create a delightful little container that would collect and fill up easily and then be impossible to empty.  This was a problem.   We wanted to plant carrots, not cattails.  We're still perfecting a drainage system.

When we built the studio, we decided to put the electric underground.    Sigh.  This meant completely reworking how the electric came off the power line to the house.    We had to dig huge trenches from the power line around where the veg garden was going to be, to the back of the studio, then from there down the side of the studio to the back of the house.

At the same time, we had to lay in the water lines to the studio from the house and the waste water pipes from the studio to the septic field.   More big deep trenches.  

It was August.    Clay + August = brick.  After a couple of hours of trying to dig by hand, we gave up and  I hired a local guy with a backhoe to come out and dig for us.   In just a couple of hours, he had all the trenches dug.   It was fabulous.    Except that our backyard looked like the Grand Canyon.   Deep trenches with big piles of dirt next to them everywhere.  

We hustled and got the electric, water and sewer laid in, covered it all with whatever gravel was needed, if any and then covered the trenches back in by hand.    And foot.   When I was too tired to keep shoveling,  I just sat down next to the hole and pushed the dirt in with my feet.   It worked and the kids thought it was a game.   They helped. 

When we put the veg garden in, we put drainage in, too.   By then it was spring and wet.   I literally carved shallow trenches just deep enough in the clay to direct the water where we wanted it.   Then I laid landscape fabric in the trenches and filled them full of gravel.   It works like a charm. 

We didn't even try double digging the veg beds.   I built raised beds [8'x10'; 12" or so high] and set them right on top of the clay, then filled them full of sand and manure.   More on them later.

These days I'm kind of over the whole digging holes thing.   The only holes I dig now are just big enough for a plant.    There may be more construction events in our future, but I'm saving my pennies so that someone else can move all that dirt. 

Related Posts Plugin for WordPress, Blogger...