We were so excited to do our first real check of the hives. This time we put on our veils because we weren't sure how docile the bees would be.
And we used the smoker. Can I just say right now that so far the hardest thing about beekeeping is keeping the stupid smoker lit? Geez.
The first hive we checked was the Tardis. We took out two empty frames on the far end so we'd have room to move things around and put them on the frame holder outside the hive. Then we took out each frame in turn to see how things were going. When we were done looking at it, we put it back in the hive scooted over to the side so we could pull out the next one.
We were happy to find 6 frames partially filled with comb.

It was beautiful.
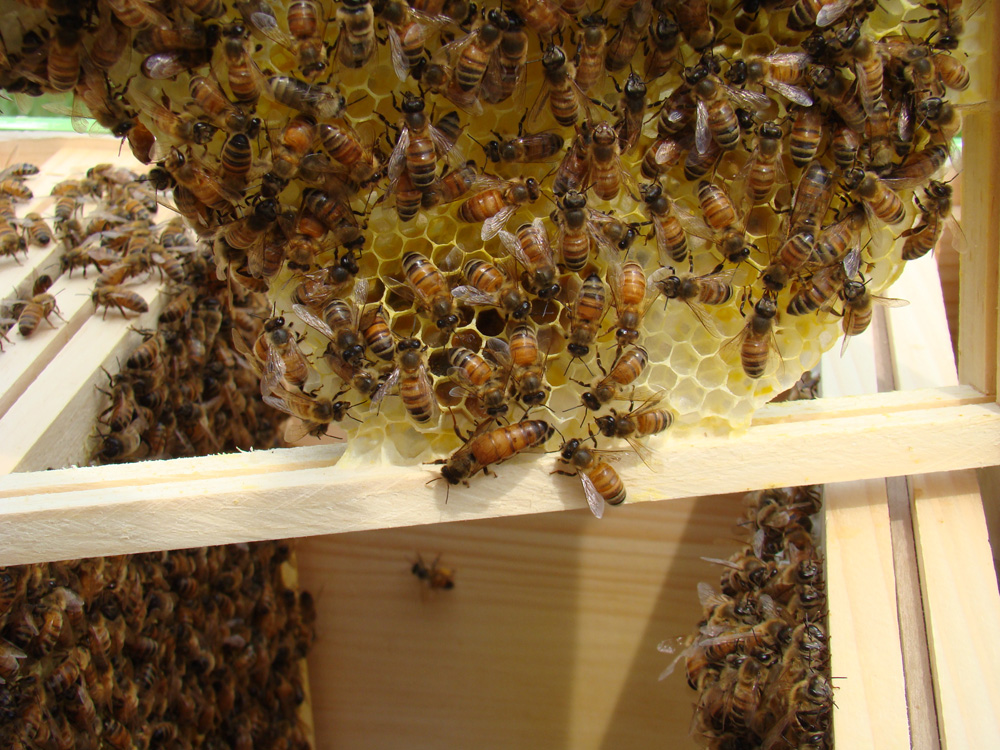
White, white comb. Covered with bees. The bees on this comb were thick and we had to brush them off to see anything.
See that bright red pollen cell in the center? They keep some pollens separate. Some is red, most is yellow, some is creamy.
So we brushed them gently into the hive. And underneath, on the bottom halfs of the combs we found lots of eggs.
If you blow the pic up you can see what look like grains of rice in the cells. Those are eggs.
That yellow thing? Pollen.
At the top of each comb we found glistening stores of uncapped honey and below that loads of pollen.
Honey is concentrated by evaporation, eventually it will reach the right concentration and then the bees cap it so that it doesn't become diluted by the humid air. Cool, huh.
We saw lots of different pollens on the bees.
Here's some white. Look at the size of those baskets.
And here's some yellow.
I wanted to get some better pictures, but the bees move constantly and quickly and it was really hard to get anything decent. I'll keep trying. You wouldn't believe the size some of the pollen baskets get.
Anyway, we looked carefully through all 6 frames for the queen, but never found her. I wasn't surprised. It takes a certain skill to be a queenspotter and I imagine that will take time.
When we were done, we put the frames back where they were, pushed them tightly together, put the lid back on and moved to the Flower Lang.
We lit the smoker, again. Opened it up and the first thing we saw was a bit of burr comb on the south side.
That comb running perpendicular from the frames to the side of the box, doesn't belong there.
Rookie mistake. When the frames are all in the box, there's still about an inch of wiggle room. You need to push the frames together to one side or in the center so that you won't get burr comb.
I pushed them to one side - the north side. But the bees like the warmer, south side to put their brood against so, they built comb where they wanted it.
The bees will do what they want and not what you want.
We started at the other end of the hive and left the burr comb for last. I removed 3 frames from the other side and started looking at what the bees were doing.
Interesting. The first frame I pulled out had this in it. A lovely little piece of comb on the edge of the frame, with bee space behind it and between it and a bigger piece of comb on the other side.
Not going to work.
And sure enough when I put the frame back in, it fell right off.
Not to worry. I knew how to fix it.
I put rubber bands around an empty frame like this.
Then I tucked the comb in the frame with the rubber bands to support it.
Neat trick, huh! I learned that by watching vids on the forum at beemaster.com.
The comb will stay there quite nicely and the bees will fill in around it, where I want them to.
Now that comb on the other side of the first frame we pulled out was too far to the other side.
So I took a knife and carved it down level with the top of the frame so it wouldn't bump out.
I was afraid that these two combs were wonky because all the others were first, but when we looked, the ones in the middle were just fine.
Lucky.
We took out all the other frames and looked at them and they all had plenty of eggs, pollen and uncapped honey. Then we got to the last one with the burr comb.
I cut the burr off the last frame so we could take it out. And this is what we found behind it.
An entire comb on the wall of the super. With bee space behind it.
It had to come out. So I put my gloves on because there was no way I was going to get all those bees out of there first, and I wanted to concentrate on getting the comb out not not getting stung because I crowded the bees.
I cut straight down the side of the super and was happy to see that it was connected by only 3 inches or so of wax.
You can see the section that was connected. It looks like the bottom stroke of a capital Q in the pic.
This frame was all pollen and honey. No eggs. No surprise. No room to move around much. Plus, the bees typically keep the stores to the outer edge of the hive and the brood in the middle.
I repaired this comb the same way I did the other, by tucking it between rubber bands in a frame. Then I put that frame back on that side of the hive, only I pushed the frames tight together on that south side this time. Hopefully the bees will get the hint.
When the bees fill this frame in, they'll chew the rubber bands off, or when I go back in, if there's plenty of comb around this one supporting it and connecting it to the frame, I can clip them off and get them out of the bees' way.
All in all, it was a very interesting inspection. We found no capped honey or brood yet in either hive, but it's only been 12 days. We'll do another frame inspection next weekend and we hope to find plenty of capped brood and capped honey.
In the meantime, I have got to spend some quality time with the smoker practicing keeping it lit.

 It was great to have Lily there to do the camera thing so we could focus on the bees. Thank you, Lily!