Showing posts with label pickles. Show all posts

Thursday, September 12, 2013

Lemon Honey Tea Concentrate

I love all sorts of lemon pickles and preserves.   The top shelf of the fridge and sometimes the window sills are crowded with lemon pickles in various stages of fermentation and preservation

So I was kind of excited to see another type of lemon preserve over at the blog Twenty Two Pleasant.   [It's a lovely blog with some of the best photography I've seen in a blog.  It'd be worth your while to click around and look at her gorgeous pics.]

Twenty Two Pleasant made Lemon Honey Tea Concentrate after she saw it here and it was so beautiful and sounded so good that I had to try it, too.   All you do is slice up lemons, put them in a jar and pour honey over them.  If you like ginger as much as I do, you can add some thin slices of ginger to the mix, too.

After a time, the honey and lemons meld into a jam-like consistency which you can use as a lemon tea concentrate by putting a spoonful in a mug and then pouring hot water over it.    Easy squeezy.

Generally, lemon pickles take a few weeks to do their thing, so start now and be patient.    By the time cold weather hits, it'll be ready to dip into.  Honey is anti-bacterial and that combined with the high acidity in the lemons makes this an almost fool-proof preserve.   As the lemons do their thing, they'll start to float.   That's normal.  

You can bet that I'll have a few jars of this stuff around all winter long.   Mmmmm.

Tuesday, March 5, 2013

Pickled Limes

Last year I experimented with several ways to pickle lemons.     They were all fabulous and we use them all. 

This year I decided to do some pickled limes.    We used the easy Moroccan style method of pickling - just slice them up and put them in a jar with layers of salt in between.  Then squeeze lime juice over them all to fill it up and let it sit in a window for a few days to pickle.   

Pickled limes have been around for a long time.

James Lind, a Scottish surgeon, documented the use of citrus fruit to treat scurvy in 1753.   After several decades the British navy began requiring sailors to have a daily ration of citrus to prevent the disease.   Limes were more readily available than lemons, so they became the citrus of choice on ships.  Hence, the nickname 'Limey' for British sailors.    Wiki rumor has it that once it was found that lemons were a better treatment for scurvy, that fact was a closely guarded military secret.  A navy that used lemons was stronger than the British navy that used West Indian limes.  [No documentation of that rumor, but it's a great story.]

Limes were pickled to preserve them for long sea voyages.  But they were made and used at home, too.   Louisa May Alcott's book, Little Women refers to Amy's love of pickled limes that she purchased from the store.

Linda Zeidrich, who wrote my favorite pickling book The Joy of Pickling said this:
“There they were sold from glass jars on top of candy-store counters, and some families even bought them by the barrel. Because the import tariff for pickled limes was quite low – importers fought to keep them classed as neither fresh fruit nor pickle – children could buy them cheaply, often for a penny apiece. Kids chewed, sucked, and traded pickled limes at school (and not just a recess) for decades, making the limes the perennial bane of New England schoolteachers. Doctors tended to disapprove of the limes, too; in 1869 a Boston physician wrote that pickled limes were among the “unnatural and abominable” substances consumed by children with nutritional deficiencies.” Parents, however, seemed generally content for children to indulge themselves in the pickled-lime habit.
 Here's another site that talks about the history of pickled limes: Food Timeline  includes this recipe for pickled lemons from 1747:

"To pickel LEMONS.
Take twelve Lemons, scape the with a Piece of broken Glass, then cut them cross in two, four Parts down right, but not quite through, but that they will hang together; then up in as much Salt as they will hold, and rub then well, and strew them over with Salt. Let them lay in an earthen Dish for three days, and turn them every Day; then slit an Ounce of Ginger very think and salted for three Days, twelve Cloves of Garlick parboiled, and satled three Day, a small Handful of Mustard-seeds bruised, and searched through a hair-sieve, some red India Pepper, one to every Lemon; take your Lemons out of the salt, and squeeze them very gently, and put them into a Jar, with the Spice and Ingredients, and cover them with the best White Wine Vinegar. Stop them up very close, and in a Month's time they will fit to eat."
---The Art of Cookery Made Plain and Easy, Hannah Glasse, facsimile 1747 edition [Prospect Books:Devon] 1995 (p. 133) 

Sounds kind of good. I may have to try this with lemons and with limes.

Monday, September 10, 2012

Dill pickles by the pint - Epic Fail

You know what I hate?   

Mushy pickles.  

I hate soft, mushy pickles.  

Ew.  

My dill pickles have been delicious, but mushy.  I hate that. 

I like crunchy pickles.  Like the bread and butter pickles I made a couple of weeks ago.  Remember that recipe I gave you so you could make bread and butter pickles by the pint jar instead of by the bushel?  

Basically, you soak the cukes in salt water for a while, then you boil the pickle juice, then you put the cukes in and return it to a boil, then you put them in a jar with some pickle crisp and seal them up.   And they come out crunchy.

So I was thinking we can do the same thing with dill pickles.   And then they'll be crunchy, too!  

This is what I did:

Slice the cukes and soak them in water with one tablespoon of salt for every pint.   You don't have to measure exactly.  Really, you can just guess.    And then stick them in the fridge for a few hours or overnight. 

Wash your jars and put this stuff in each jar:
  • 1 small clove of garlic, peeled
  • 1 large fresh dill flower or a bunch of fresh dill leaf
  • 1/8 tsp Ball Pickle Crisp
This is what you need for juice for each pint of pickles, so multiply this stuff by the number of pint jars you're making.  Mix this stuff in a pot and bring it to a boil.
  • 1 cup vinegar
  • 1 tsp salt
Drain the cukes and put them in the pot with the pickle juice.  Bring it back to a boil.  Put the cukes in the jars, pour the juice in, put the lids on and then seal them up.   10 minutes for pints.

Except it didn't work.

It.   Didn't.  Work. 

I got mushy soft pickles again.    Eww.    Don't use this recipe. 

So maybe the crunchy thing has to do with the sugar?      I have no freaking idea.   Back to the drawing board.

Tuesday, July 24, 2012

Bread and Butter Pickles by the Pint

Turns out my kids love bread and butter pickles.    I made them for the first time last year and I didn't make enough so this year I'm making a lot more.

I've been using the recipe from The Joy of Pickling but it calls for more cukes than I ever have at one time.

I hate that.

I can as things come out of the garden, which is a different prospect from buying a bushel of something and canning it all at once.

Not that I'm knocking buying a bushel of something and canning it all at once.   It's the only way we can do peaches.

But that's not how I do cukes.  

I have about this many cukes at a time.  If they go in the fridge, they disappear.

Or get partially frozen.  [It's an ooold fridge.]

I hate that.

So I revised the recipe so I could do it by the jar.

I'll just let you ponder on the genius of that idea.

...

Pickles by the pint. 

As in - you cut the veggies up and figure out how many pint jars they'll make,  then make enough pickle juice for just that many jars.

I know.

I know!

I can now make three jars of pickles.   Or twelve.    How many ever I want!

I had to take a nap from the sheer exhaustion of thinking up such a great idea.

[Please don't feel it incumbent upon yourself to disabuse me of the notion that I am the first person to think this up.   Just let me live in my fantasy for a while.]

Here's how it works. 

1.  Cut up the cukes and onions.   I use about 3 parts of cukes and 1 part onions.   But this is America.  You can use more or fewer onions if you want to.

2.  Measure how many pint jars of veggies you have.  You can pack them into a wide mouth jar and count how many you have or you can guesstimate.  I guesstimated.

[Did you know that the word 'guesstimate' is in the spell check?   It didn't come up as a misspelling like cuke did.   Cuke is not a word according to spell check.  Now you know.] 

3.  Put the veggies in a big bowl with 1 Tablespoon of salt for every pint you're making.   Dump some cold water and ice cubes on the veggies and let them sit for a few hours brining.  [Brining is not a word according to spell check.]   You don't have to use ice.   We never have ice.  I just use cold tap water.    You can put them in the fridge or leave them out.   Whatever.

4.  When you're ready to finish the pickles make this much juice for every pint of bread and butter pickles you want to make. 

Bread and Butter Pickle Juice for 1 Pint
  • 1/2 cup + 1 Tablespoon vinegar
  • 3/8 cup sugar
  • 1/4 tsp turmeric
  • 1/4 tsp celery seed
  • 1 tsp mustard seeds
  • 1/8 tsp Ball Pickle Crisp [calcium chloride]  optional
Bring the pickle juice to a boil in a big pan.   Add the vegetables and return to boil.   Pack into jars and fill with juice.   Cover and process for canning 10 minutes for pints.

UPDATE:   You don't need that extra 1 Tablespoon of vinegar.  Keep it simple and just use 1/2 cup vinegar per pint.     Also,  you can put the pickle crisp right in the jar if you like, instead of in with the rest of the pickle juice.
5.  Multiply that recipe by the number of pints of pickles you want to do.  This means that you will have to do math.

I'm sorry.

You can do it!

6.  If you have extra juice, then put it in a jar in the fridge.  It'll keep forever and you can use it the next time you make pickles.   Just dump it in with the new stuff.  

Note:   The pickles shrink some and the juice evaporates some when you boil it.   If you have to choose between making a little more or a little less, then I'd go for more, but that's just me.   If you run a bit short, then make sure you have equal amounts in all the jars and then add a bit of water to fill it out.   Not a big deal.    Lots of people cut the vinegar by 1/2 when they're making pickles.   You won't even notice. 


Thursday, February 2, 2012

Lemon Pickles

When I discovered The Joy of Pickling, I found some recipes for pickled lemons.   I tried three of them for the exotic fun of it and to our surprise, we found that we actually use and like them enough to make more when we run out.  


So far, we've gotten the most use out of the plain ones.   We eat them in pasta especially - a lovely zesty tang in rosemary sauce or scampi.   Mmmm.

It's easier than you think to make them.   Once you try them, you'll be hooked.   We're making them 2 pints at a time now. 

Lemon Pickles
  • 1 pint jar
  • 2 organic lemons
  • 2 tsp salt
  • extra lemon juice
Wash the lemons, cut off the ends, and slice the rest of the lemon into rounds.    Put a slice in the jar and sprinkle it with a bit of the salt.  Repeat until all the slices are in the jar.  Use all of the salt.  You can press the slices down to make them fit.   Put a lid on the jar and let it sit overnight to draw out the juices.   The next day, add lemon juice to fill up the jar and then sprinkle a bit more salt on the very top slice. 

Let them sit on the counter for 3-4 weeks, until the peel completely changes texture - it will look darker.   At that point you can refridgerate them.  

You'll find that they're a fun and interesting snack - surprising and delicious. 

Monday, October 10, 2011

Lemon Pickles


 So, I've been playing with lemon pickles.   There were several recipes for different types of lemon pickles in the Joy of Pickling book that I just read [Link below]

I've never had pickled lemons, so I had to try some.  I mentioned it to a friend and she told me how her mother used to pickle lemons.  Even more motivation!

I didn't know which ones to try, so I tried three different kinds:   Moroccan and Indian [from the book] and Venezuelan [from my friend].

Here they are [L-R]:   Venezuelan, Moroccan, Indian.

The Venezuelan ones were very salty and spiced with pepper, coriander, allspice and bay.

The Moroccan ones are milder and pickled in lemon juice, salt and a bit of olive oil.

The Indian ones were spiced with fennel, cumin and black pepper as well as salt.   After a week, you pour off the juices and mix them with sugar and hot peppers, then boil it all [with the lemons] for a while and let it sit for another few weeks.    Sweet hot and delicious!

The recipes for the Moroccan and Indian pickles are in The Joy of Pickling.   Here's the recipe for the Venezuelan ones.   Enjoy!

Venezuelan Pickled Lemon Slices
  • 2 lemons
  • salt
  • 1 1/2 tsp allspice
  • 1 1/2 tsp cracked black pepper
  • 1 1/2 tsp coriander
  • bay leaves
Makes 1 pint.  Slice the lemons.  Mix the spices [without the salt] together.   Layer in the jar as follows:
  • salt
  • spice
  • lemon
  • salt 
  • spice
  • bay leaf
  • lemon
Continue until all the lemon slices are used up.    When the slices are about half way up the jar, slide bay leaves into the jar on the outside of the slices.   [It's pretty and adds more bay].    Let sit on the counter or in a window  for a couple of weeks.   They'll start to ooze and the jar will fill up with juice in a few days.  That's normal.

These were super salty when we made them.  I used a generous layer of salt between the lemons.  Next time, I'd use just a very generous sprinkle of salt in each layer - about the same amount of salt as you use spices in each layer. 

UPDATE:  A better way to deal with the saltiness is to just rinse them off before you use them.   Doesn't matter how much salt you pack them in then.    Also, that salt is tasty as a flavoring for meats and soups.    Use it all.


If you try these, let me know how you like them.  Here's the link to the book.  

Thursday, September 29, 2011

Book: The Joy of Pickling

photo:  Amazon.com. 

I like pickles.

I like making pickles.  I like eating them.   I like looking at them.

This year I was braver and tried a bunch of new pickles.  Then I found this book and tried even more.

These are not your grandma's pickles.

But....wait a minute.....some of them ARE your grandma's pickles.    This is a great collection of new and traditional pickles from all over the world.

I've made three kinds of lemon pickles, ginger pickles, sauerkraut, etc, etc, etc.    It's a pickle jackpot.

The book is divided into two main parts:  pickling with fermentation and pickling with vinegar.

Fermentation pickling happens when you let natural bacteria make your pickles for you.   The old pickle barrels were fermentation vats.   Sauerkraut is made by natural fermentation.  It's fun and easy and delicious and very very good for you.    Try it.

Vinegar pickling is what happens when you pour a vinegar solution over the veggies and let them sit in it.   The vinegar solution usually has salt and other spices in it to make things interesting.   This type of pickling is also very easy and delicious.

Lest you think that this is 250 recipes for dill and sweet cucumber pickles, let me assure you that there are recipes to pickle all kinds of fruit [yes, fruit!] and veggies in all kinds of ways, with all kinds of flavors.  

If you're at all interested in making pickles, get your hands on this book and read it.   Even if you don't go near the stove or touch a veggie, you'll still learn a lot about a type of food that has been around for milennia.  


Wednesday, September 21, 2011

Curry Pickles - New and improved

Curry pickles with curry paste
Remember when we made that first batch of curry pickles?

I tried it again with curry paste instead of powder.   I'm so glad I did.   These were really, really good!  So much better than the first batch.

I made a jar with red long beans and red curry paste. 

And I made a jar with green beans and cukes and green curry paste.

The curry paste was a much improved curry flavor, but they were both medium heat and really kicked the heat up a notch.   Since I've got a low heat eater, next time I'll leave the extra chili pepper out of the jar or use mild heat curry.  

With all the different types of curry out there - Indian, Thai, etc. - and all the heat levels, these pickles are really versatile.   I'm excited to try this with different curries next year. 

I really like this recipe because you don't have to make much.  It's easy to cut in half if you want just one jar.  And if you want to try two different things, it's easy to do a different thing in each jar.   Plus, if you don't like them much, then you can always take the other jar to a potluck.  Someone will definitely like them. 

Here's the revised recipe for you.    Enjoy!

Curry Pickles - New and improved version!

  • Green or red beans - enough to pack 2 pint jars
  • 2 cups water
  • 2 cups vinegar
  • 1 T canning salt
  • 1 rounded tsp of curry paste in each jar.
  • 1 dried chili pepper in each jar.
  • 1 garlic clove in each jar.
Wash and trim the beans and pack them into the jars. Put a chili [if you want the extra heat] and a garlic clove in each jar.   Boil the water, vinegar, and salt.   Pour over beans until they're covered 1/2 inch with liquid.  Process 10 minutes for canning.  Makes 2 pints.

Wait two weeks before opening.  

Tuesday, August 30, 2011

Coriander Pickled Carrots

My next experiment in pickling came from a recipe that Shauna Ahern posted herself on the Gluten Free Girl pickle party post.  I had some aging carrots in the fridge and some of last year's coriander seed put away, so I pulled them out to try this. 

These had a nice flavor, but I kept thinking they needed a bit of sweet and more oomph.   [Of course, next to the Szechuan beans, everything seems a little bland.]   Next time I'm going to add 1/2 cup of sugar and  double the amount of coriander.  

Coriander Pickled Carrots
  • Carrots - enough to pack 2 pint jars
  • 1 1/2 cups water
  • 1 1/2 cups vinegar - my own white wine vinegar!
  • 1 T canning salt
  • 2 tsp peppercorns
  • 2 tsp coriander seeds
  • 1 inch of ginger, sliced
Peel and slice the carrots into sticks.   Pack them into the 2 jars.  Put 1 tsp of peppers and 1 tsp of coriander into each jar.    Boil the water, vinegar, salt and ginger.   Pour over carrots, covering about 1/2 inch above tops.   Process 10 minutes for canning.    Let sit for at least 3 days before opening. 

Monday, August 29, 2011

Szechuan Bean Pickles

I love spicy Szechuan food.   These sounded sooo good I couldn't wait to try them.  Plus, I had a bunch of my red Chinese long beans, too - and I want to try those beans as many ways as possible, while I've got them fresh.

In our taste test, these pickles were by far the favorites.   I'll be making these every year.   Use regular green beans if you can't find the long beans.  

Szechuan Long Bean Pickles
  •  Beans - enough to pack 2 pint jars, about 1 lb. 
  • 1 C Oriental Spice vinegar
  • 1/2 C water
  • 1/4 C soy sauce
  • 1/4 C sugar
  • 2 T dark sesame oil
  • 1 T peppercorns
  • 1 inch fresh ginger, sliced
  • 2 garlic cloves, sliced
Clean and trim the beans.  Pack into 2 pint jars.    Put all other ingredients into a saucepan and boil.   Pour over beans, covering 1/2 inch above tops.  Process for canning, 10 minutes.  

Let sit for 4 weeks before opening.

Note:  You can blanch the beans first and then you'd only have to wait a week for the flavors to meld before opening the bottles.   I didn't have the time to blanch, but I do have the time to wait.

Saturday, August 27, 2011

Curry Pickles

I've been trying a lot of pickles lately.   Just a couple of pints of each to see if we like them.    It's a big adventure because we're sort of a two pickle family:   dilly beans and sweet pickle chips.  The end.

Gluten Free Girl hosted a pickle party this summer and she posted a ton of links to all sorts of pickles for all sorts of vegetables.   It was amazing.    It also made me braver.  

I tried three new kinds of pickles:   Curry pickles with regular old green beans, Szechuan pickles with Chinese long beans, and spicy coriander pickles with carrots.    Over the next couple of days, I'll give you all of the recipes that I used and tell you how we liked them.    I hope you share your favorite pickles with us, too.

UPDATE:   We had a pickle taste test today and the verdict on these curry pickles was that they need some adjusting.    The curry flavor is nice, but the curry powder isn't the way to get there.   These were some of the suggestions for the curry pickles:   Toast the curry powder to get a richer flavor OR use a tablespoon of red or green curry paste instead of powder OR use curry spices instead of the powder and let the flavors meld in the jar.       Next batch I'm going to try the curry pastes.   I'll try red paste in one jar and green in another.  

I've adjusted the recipe below to reflect our findings.  

Curry Pickles
  • Green beans - enough to pack 2 pint jars
  • 2 cups water
  • 2 cups vinegar
  • 1 T yellow curry powder curry paste or toasted curry powder
  • 1 T canning salt
  • 1 dried chili pepper in each bottle.
  • 1 garlic clove in each bottle
Wash and trim the beans and pack them into the jars. Put a chili and a garlic clove in each jar.   Boil the water, vinegar, salt and curry powder.   Pour over beans until they're covered 1/2 inch with liquid.  Process 10 minutes for canning.

Wait for 4-6 weeks before opening.  

If you have left over pickling liquid, you can save it!   Just pop it in a jar and label it.   You can use it for dressings, or to deglaze a pan or anywhere else you'd like to use a nice flavored vinegar.   You do not have to refrigerate it, but you can.

Monday, August 15, 2011

Pickles

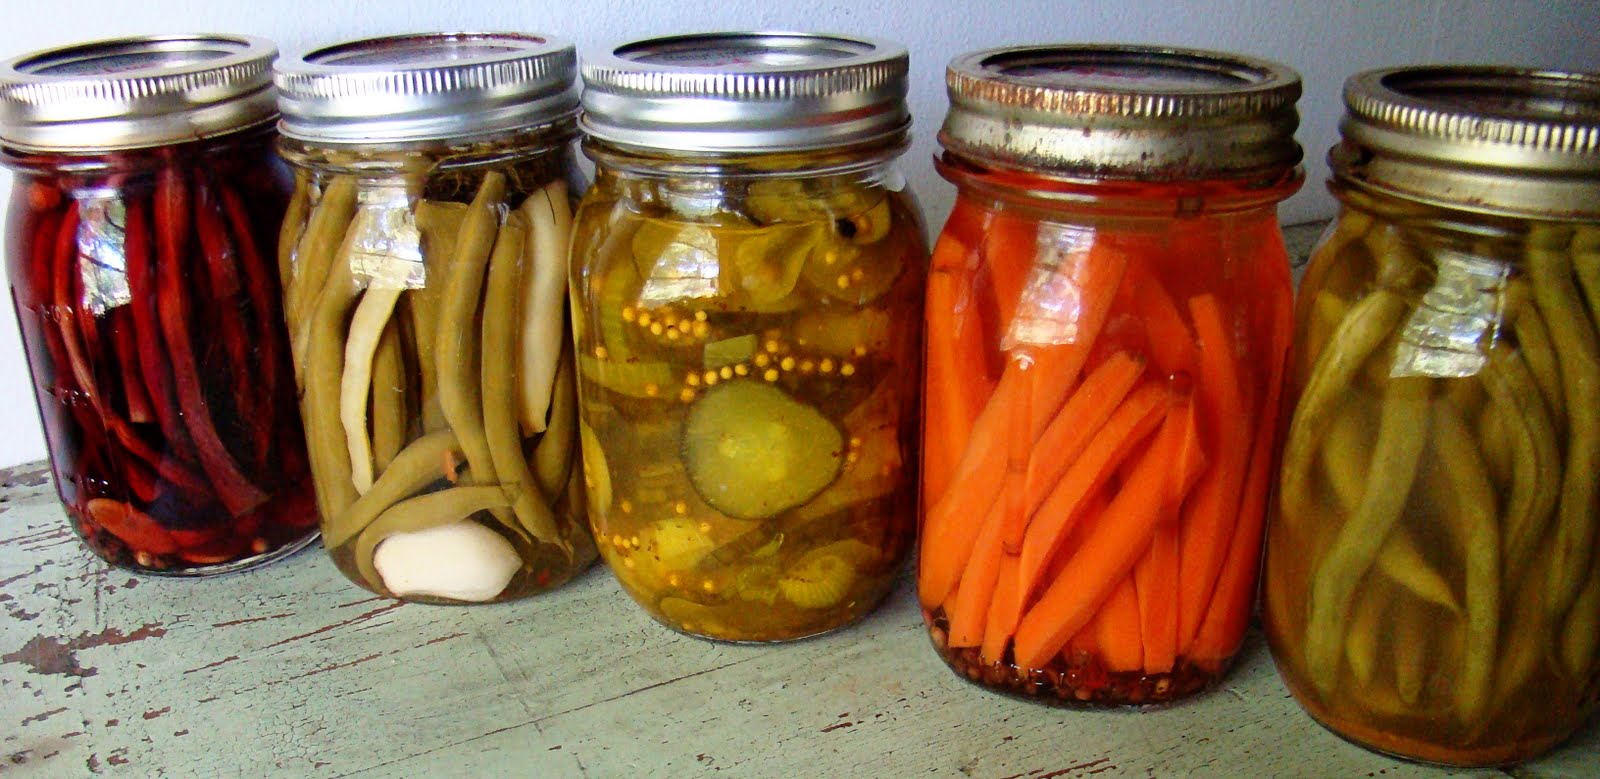
I've been playing with pickles.  I'll tell you all about it when the flavors have melded and we've tried them. 

At least they're pretty.
Related Posts Plugin for WordPress, Blogger...