Showing posts with label recipe. Show all posts

Saturday, February 11, 2017

A Little Winter Canning

We ran out of barbecue sauce.  Completely.  There was weeping and wailing and sadness.  What can I say?   We like our barbecue sauce.  A lot.

I make the sauce in large batches and a single batch will yield 7-8 pints of sauce.  Enough to last and to give some away [though this year I have been expressly forbidden to give any away.  No Sharing the Sauce, Mom.]

Well.  Okay, then.

I'll share the recipe instead.   Here you go!


Robin's Favorite Barbeque Sauce 
www.rurification.com

7 1/2 cups brown sugar
6 1/2 cups ketchup
1/2 cup molasses
1 cup apple cider vinegar
1/4 cup Worcestershire sauce
3 rounded tablespoons mustard powder
3 tablespoons salt
3 tablespoons paprika [smoked paprika is really good, too!]
3 tablespoons black pepper
1 tablespoon chili powder
1 tablespoon garlic powder  or 1 entire head of garlic, peeled and minced
1 tablespoon onion powder  or 2 onions, minced
1 teaspoon red pepper flakes

This year I ran out of brown sugar, so I used 3 cups brown sugar and 3 cups of honey instead.  Perfect!  Honey is sweeter than sugar, so you can use about 25% less of it when you're substituting.

Mix all ingredients together in a large pot and bring to boil.   Ladle into clean jars; cover with lids and rings and process for canning.     Makes 7-8 pints of sauce. 

[According to the National Center for Food Preservation, you can process barbecue sauce in pint jars in a boiling water bath for 20 minutes.   There's a link to them in the sidebar in case you want to check altitudes, etc. ]


Sunday, November 20, 2016

I Heart Homemade Sauerkraut

I've been hungry for sauerkraut.  I love sauerkraut.  Plus, it's a great winter food.   It's tasty.  It's good for you.

One thing though - it stinks.

We make it anyway.   I've posted some old fashioned methods here before.

Here's the first time I made kraut.

Here's the second one.

This year I decided to try a method I found on Food in Jars blog.  It was super easy and there was no pounding.   It does mean getting your hands in there and squeezing for a bit.

I used a small head of cabbage, about 1  1/2 Tablespoons of salt and a sprinkle of caraway seeds because I'm all about the authentic kraut experience.

I cut the cabbage into quarters and removed the core.  Then I sliced everything very thinly by hand with a knife.  I put it all in a giant bowl, mixed the cabbage and salt and seeds with my hands, squeezing it all until the cabbage released the water.  It only took a few minutes, interrupted by the occasional washing up of jars, table, etc.   When the cabbage was looking transparent and there was a good amount of water in the bottom of the bowl, I packed it all into a quart jar. [It'll feel WET.  You'll know.]  Put some sort of weight in it to keep the cabbage below the water.  The water came to the top of the jar, so I set the whole thing in a bowl to catch the overflow.   As it ferments, bubbles will form in the kraut and displace some of the water.   It will ooze out, so make sure you put your jar on a dish,  in a bowl or a deep lid.   Watch for overflow and empty and wash it at least every day if not more often.   Let it set on your counter/window for a week, then pop it in the fridge and it's good to go.   Naturally fermented.  Nature's finest food.

Note on weights:  I used a wide mouth jar for the kraut, so I used a narrow mouth glass insert from an old zinc jar lid as my weight.   You can use a small mouth canning lid, a 4 oz. jelly jar capped and full of water, or a real life pickle weight instead.   Feel free to be creative. [I confess, I'm kind of really wanting those pickle weights, though...]

Hope you make some and hope you love it!    Happy November!

UPDATE:  It took 7 days to get gorgeous and delicious sauerkraut this way.  Fastest ferment ever.   Bonus, no stink.  This will forever be my go-to method for making sauerkraut.  

Sunday, August 30, 2015

Ricotta Tart with Honey Cinnamon Glazed Figs

I have figs!

Two years ago I planted a Chicago Hardy fig tree.   In November.   Right before that nuclear winter we had that lasted forever - you know, the one with the Polar Vortex from hell. 

That winter.

And the next spring, the fig came up anyway.  So here's my shout out to Stark Bros where I got the fig and where I get a lot of my fruit trees/plants.   Great stock and they'll replace if the plants don't make it a year. 

The plant died back to the ground, but that spring the fig bore 3 whole figs, which got the size of marbles and then fell off before they ripened.   

Last winter the fig died back again all the way to the ground, but popped up this spring when the ground warmed up.   I have dozens of tiny figs along the branches.    And one ripe one.

The figs get suddenly larger when they ripen, then they turn that color and droop.  And when they are ripe, I will make this tart.  Again.  I made this recipe up myself.   It is delicious.   I plan on eating it several more times this season.

Because I have figs.

 Ricotta Tart with Honey Cinnamon Glazed Figs
www.rurification.com

1 dozen or so very ripe figs [California Mission are fine]
1 lb ricotta cheese
1/4 cup white sugar
3 eggs
1 tsp vanilla
1/4 tsp cinnamon for the filling + 1/4 tsp more cinnamon for the glaze
1/4 cup honey
 Your favorite pie or tart crust for bottom of tart/pie plate.

Directions: 
Preheat oven to 350.  Make the crust and put it in the bottom of a tart or pie plate.

Filling:  Mix the ricotta, eggs, sugar, vanilla and 1/4 tsp cinnamon well.   Put into pie crust.

Topping:  Wash and slice the figs in half.   Arrange the figs cut side up around the top of the filling, fat ends out, skinny ends pointing to the center.

Glaze.   Heat the honey and 1/4 tsp cinnamon in the microwave for 30 seconds.   Mix it as well as you can [it won't want to mix].   Pour/spread glaze evenly on all figs and around the top of the tart. [If you LOVE this glaze, feel free to make more.   It's good when it's baked and oozing all over the place.]

Bake 60 minutes.   Cool.    Delicious at room temp or chilled. 

Thursday, July 30, 2015

Sweet Cherry Chutney

One of my favorite things of all is Peach Chutney.   Lily and I can go through a jar ourselves.  It's lovely with sliced apples and brie.   Or poured over pork chops and slow cooked.  I like it with 2 tsps of red pepper flakes, which gives it just enough heat, but not too much for me.   You can add more or less to taste.

I had a few bags of sweet cherries left and decided to try my favorite chutney recipe with cherries instead of peaches.    It was lovely!   Here's what I did.

Sweet Cherry Chutney
www.rurification.com

  • 8 Cups pitted sweet cherries, sliced in half
  • 2 T mustard seeds
  • 1 tsp - T red pepper flakes  [I like 2 tsp]
  • 2 Cups sugar
  • 1/2 Cup white wine vinegar [I use my own homemade white wine vinegar]
  • 1/4 Cup crystallized ginger, chopped up [That's a handful of ginger pieces, if you don't want to cram it into a cup measure.]
  • 3 cloves garlic, minced
  • 3/4 Cup raisins 
Combine ingredients and cook down until enough liquid boils off that you can drag a spoon/spatula across the bottom of the pan and it leaves a dry place for a second before the juices flow again.   Take your time.    The cherries were pretty juicy, so I let it cook on low, with a simmering bubble, for a couple of hours. 


For more recipes as easy as these, check out my ebook on the sidebar.  A Simple Jar of Jam: 180+ recipes & variations for jam using low sugar pectin.  Every purchase goes a long way toward supporting the blog.   Thank you!

Tuesday, July 28, 2015

Sweet Cherry Vanilla Jam

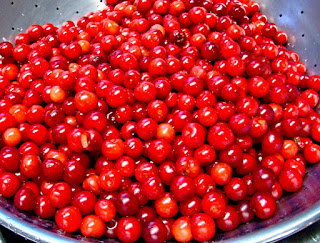
This year I added 20 lbs of sweet cherries to my fruit order and was thrilled at how fabulous they were.   Sweet cherries travel much better than sour cherries [which often arrive brown and running with juice, though delicious.]  Sweet cherries store well, stay firm and the extra few days gave us time to finish the peaches, which arrived first, and deal with the sour cherries and berries.   It was a very busy couple of weeks.   I washed the sweet cherries and put them in ziplocks stacked flat in the fridge.   It was easy to grab a bag in the morning, set it out and I confess we ate many many of those cherries fresh before I had a chance to make anything with them.

But I did make a couple of things with them and the first on the list was a batch or two [or three] of Sweet Cherry Vanilla Jam.  

It. Was. Heaven.   Like my favorite clafouti without the custard.    Soooo good.   Make some of this.  [Put it on chocolate cake.   Or just eat it with a spoon right out of the jar.]

Sweet Cherry Vanilla Jam
www.rurification.com

4 cups pitted sweet cherries, cut in half
1 cup water
1 vanilla bean, cut in half and then sliced open lengthwise
1/2 cup low sugar pectin [Dutch Gel All Natural Lite is my favorite]
1 cup sugar

Put the cherries, water, vanilla and pectin in a large pot.   Bring to a boil, stirring constantly.  When the jam reaches a hard boil [that bubbles like crazy even when you're stirring constantly], time it for 1 minute.    Add the sugar, stir constantly and return it to a hard boil.   Time it for one minute.   Turn off the heat, ladle into jars.   We process the jam in 1/2 pint jars for 15 minutes.   Yield:  2.5 - 3 pints.

For more recipes as easy as these, check out my ebook on the sidebar.  A Simple Jar of Jam: 180+ recipes & variations for jam using low sugar pectin.  Every purchase goes a long way toward supporting the blog.   Thank you!


Saturday, July 25, 2015

Cherry Pie Filling with Perma Flo


Once again, I attempted to make cherry pie filling with Perma Flo and this year it totally worked!

We pitted the cherries and then let them sit while we made the Mixed Berry Pie Filling I told you about in the last post.   The juices flowed.   I added a bit extra perma flo to compensate.  This year the bottles are packed with fruit and the sauce is perfectly thick.   So delicious!


Sour Cherry Pie Filling with Perma Flo
www.rurification.com

1 gallon sour cherries, pitted
6 cups sugar
1 1/2 cups Perma Flo

Mix the sugar and the Perma Flo well in a bowl.   Put the cherries and all their juice in a large pot.  Mix in the sugar/Perma Flo combination and stir well.   Bring to a boil stirring constantly.   The sauce will become clear when it reaches the boil.   Make sure it boils!   As you're stirring, watch for stray pits and pull them out with a spoon.  Once the filling is boiling, put it in jars.   We processed ours for 30 minutes.

Yield:  5-6 quarts of pie filling.

Thursday, July 23, 2015

Berry Pie Filling with Perma-Flo

We've been so busy this summer. It seems that all the fruit got ready at once. Within a week, we had bushels of peaches, cherries, blueberries and raspberries. So much goodness all at one time! I got together with one of my sisters for a day and we blasted out dozens of quarts of pie fillings. Peach Vanilla, Spiced Peach, Sour Cherry, Mixed Berry.... So, so delicious. One of the tricks of making berry pie fillings for canning is making sure that everything is heated enough, but that the berries aren't stirred so much that they are completely broken down in the process. Not to worry, I had a plan. Heat 1/4 of the berries with water, smash them to bits for as much juice as possible, then add the perma-flo and make the sauce. Once the sauce was done, then add the berries and heat through stirring gently. Bring back to a boil and can. It worked perfectly!!  

Berry Pie Filling with Perma-Flo
www.rurification.com

1 gallon red raspberries and black raspberries mixed
1 quart water
2 cups sugar
1 cup Perma Flo

Mix the sugar and Perma Flo and set aside.   Put the water and 1 quart of the berries in a large pot and smash the berries with a potato masher to release the juice.   Add the sugar and Perma Flo and stir well.   Heat the mixture until it boils, stirring constantly.   When it boils, it will become clear and thick.   When the sauce is clear and bubbling, add the rest of the berries and fold them gently in.  You don't want to break them all up.   Once the mix is boiling again, it's ready to go into the jars.

We processed the jars for 30 minutes for canning.

Yeild: 4-5 quarts of pie filling.


Saturday, February 14, 2015

Chocolate Jams

Happy Valentine's Day!    We're whipping up a quick batch of Chocolate Raspberry Jam to have with our treats today and it reminded me that it's time to do a quick review of the Chocolate Jams that I've done on the blog.   

You can make any fruit jam into a chocolate jam.  We've used a few different methods.  The easiest is to heat up 8 oz or so of your favorite fruit jam and then stir in 1/3 cup of chocolate chips until they're all melted.  


Here are the jams we've loved.
I hope you get a chance to try one this weekend. Enjoy!  

Saturday, February 7, 2015

Rabbit Stew

This is the time of year I see a lot of rabbit damage on our trees and on any exposed greens tucked in the corners of the beds. We are lucky enough to have a neighbor who hunts the multitude of cottontail rabbits that threaten to eat my entire garden and reduce my fruit trees to barkless sticks.

The neighbor and his buddy shoot with muzzle loaders – one uses an antique musket. When they shoot, it sounds like cannon fire instead of gunshot. They bring a rabbit dog [beagle] and they spend a happy afternoon roaming the brush on our place scaring out the rabbits. This past weekend they scored four rabbits. They skinned and prepped them and then brought us two of them to eat. We love rabbit stew!

We brine it overnight and then slow cook it all day the next day. Here are the details.

Rabbit Stew
www.rurification.com

Brine [Enough for 1-3 rabbits]

1 rabbit, skinned and cut into parts [4 legs and the back section]
3 cups water
1/3 cup salt
2 garlic cloves
1 bay leaf

Coating [Enough for 1 rabbit. Multiply for more rabbits]

Ground pepper [a few grinds. More if you love pepper]
½ cup flour
2 teaspoons dried thyme

Stew [Enough for 1 rabbit. Multiply for more rabbits.]
Bacon grease or butter
3-6 mushrooms [or more]
1 onion
1 quart water
3 cubes chicken bouillon

Cooking directions:

Day 1: Brining
Mix the brine and soak the rabbit pieces in it overnight. That is enough brine for 1-3 rabbits. Keep it in the fridge.  Discard when finished.  Do not use the brine to cook with; it's way too salty.


Day 2: Stewing
Cut up the mushrooms and brown them in a large skillet with some of the butter or bacon grease.

While they are cooking, make the coating. Mix the flour, pepper and thyme in a dish. Coat the meat on all sides.


When the mushrooms are done, put them in the crockpot and brown the rabbit with more grease in the skillet. You’re not trying to cook it all the way, just brown it.

While the rabbit is cooking, slice up the onion and drop it in the crockpot.

When the rabbit is browned, put it in the crockpot with the bouillon cubes.

Pour the water into the skillet to deglaze and get the crispies all out of the pan. After a couple of minutes, even the really stuck ones will come right off the pan. Once they’re soft, scrape the water and everything into the crockpot.

Cook on high for 6-8 hours. We have also cooked this in a cast iron pot on the stove all day.

Once the meat is done, decide if the gravy is thick enough. You can whisk more flour in if you need to thicken it up. OR, you can drop in some noodles or rice and let them soak up the gravy as they cook.

You can drop some veg in there for the last hour if you like – chopped carrots, peas, potatoes, etc.

Nota Bene: If your hunters are using shotguns, make sure you watch for shot pellets in every bite. You don’t want to chip a tooth.


Wednesday, December 17, 2014

Mushroom Potato Soup


I was hungry for my Zuppa Toscana and then found out I didn't have any sausage.   You just can't have Zuppa Toscana without sausage.  You can maybe pull off some zuppa, but it just won't be Toscana. 

So I improvised.

And made some really terrific Mushroom Potato Soup instead.   I'm warning you ahead of time that this is not a fast soup.   It takes time.   Time and butter.  Don't skimp on either.   The trick here is to let the onion and mushroom actually brown in the pans. 

Yes, pans.    It'll be worth it.

Robin's Mushroom Potato Soup
www.rurification.com

1 lb mushrooms, cut in half and then sliced up.
2 tablespoons butter
1/2 onion, diced
2 more tablespoons butter
1 tsp salt
5 small potatoes, peeled and diced
6 cups of broth [I used chicken]
2 chicken bouillon cubes or the equivalent
1/4 cup flour
1/2 cup cream [optional]

Brown the mushrooms with 2 T butter and 1/2 tsp of the salt on medium heat in a large skillet.   In a soup pot, brown the onions on medium heat in the rest of the butter and the salt.   When the onions are brown, add the broth and the potatoes.  Bring to a boil and cook the potatoes until fork tender.  When the mushrooms are brown, add the flour and 1 cup of the stock out of the potato pot. Stir around to make a gravy.  Add the mushrooms to the rest of the soup.   Stir well and simmer until it thickens a bit.   Optional:  If you want a creamy potato version, add 1/2 cup cream. 


This is some great soup! 

[Sorry about the photo quality.  It's December.  It's dark.] 

Wednesday, October 15, 2014

Homemade Laundry Soap

Lily came home the other day from her public speaking class with a recipe for homemade laundry soap that was super easy and super cheap.  The woman who had made it has three active boys and she swears by this stuff. 

Right about the same time, our youngest started getting a rash that we thought might be related to a new laundry soap, so I seized the moment and made a batch.

A batch is 5 gallons of concentrated laundry cleaning superpower.  You dilute it in equal parts with water.

To use it, you fill your soap container [I use an old empty Era bottle] half full with this concentrate and then fill it the rest of the way with water.    I keep it on my dryer so that it's always vibrating and stays mixed. 

The recipe:

Laurie's Homemade Laundry Soap
[She got it via the Duggar Family]

1 bar Fels-Naptha soap, grated
4 cups very hot water
1 cup Arm and Hammer Super Washing Soda [not baking soda!]
1/2 cup borax
5 gallon bucket with lid

Heat the water in a saucepan and add the grated soap.    I used the grater you see in the pic above and then used the same grater to stir everything with.   It took about 15 minutes to melt the soap.   I didn't want any lumps, so I stirred until all the lumps were gone.

When you get bored of stirring, measure the borax and washing soda into the bucket and fill the bucket half full with the hottest water you have out of the tap.    Then stir until it's dissolved.   I put the bucket on a chair next to the stove and took turns stirring the bucket and the Fels-Naptha stuff [all with the same grater]. 

When the soap is done melting into the water, then pour it into the bucket and stir, stir, stir.   Fill the bucket the rest of the way with water and put the lid on tight.    It'll be ready to use tomorrow after it cools.  The color is sort of a pearly pale gold.    It smells nice as is, but they say you can add some essential oils if you like.   Laurie's got thick like consomme, but ours didn't.   It works fine anyway.

The Math:
The truly fabulous thing about this is that if you get a few bars of Fels-Naptha, then you can easily store enough dry ingredients [soap, washing soda and borax] for a year or two's supply.  And it's cheap.    Really cheap!

On Walmart.com, the prices are as follows:

Fels-Naptha $2.34/bar
Arm and Hammer Super Washing Soda:  $3.24/box
20 Mule Team borax:   $6.58

We bought 3 bars of soap and a box each of the other stuff [enough for 3 batches or 30 gallons of laundry soap - and enough washing soda and borax for many more batches if we got some more Fels-Naptha.]

Total:  $16.84 for 3840 fl oz.  [Yes, three thousand, eight hundred and forty ounces]
Or:  $  .56/gallon.   [Yes, fifty-six cents per gallon]

Era cost $8.97 for 150 fl oz.  Or  $7.65/gallon

If you go through a gallon a month [conservatively speaking if your family is like ours], then you'd spend a half an hour in the kitchen and about $6.72 for the homemade stuff.   Or you'd spend $91.80 on Era or something like it.  

You'd save $85.08 a year.   And if your family is more like mine you'd go through twice as much laundry soap [we dig a lot...] and so you'd save $170.16 a year on laundry soap.

A substantial savings, wouldn't you say?    Enough to buy the supplies you need for a decent 72 hour emergency kit.    Yep.

Saturday, October 11, 2014

Apple Slices

So I was telling you that I made a bunch of apple pie filling, but I ran out of the Perma Flo long before I ran out of apples.   There were a lot of apples left over.  A veritable Everest of apple slices.

So.  

Yeah.   

I could have made pie filling to freeze [Choose your favorite recipe, put the dried stuff in the sliced apples, toss and put in freezer bags in the freezer.  Easy squeezy.]    

But I'm trying to can more and freeze less.  

So I took that mountain of apple slices and canned them plain.   Just jars of apple slices.    Since this was a first time for me, I went to the National Center for Home Food Preservation and mostly did it their way.     I used vitamin C tablets to keep the the apples from browning [same way I do peaches.] and I put them in a light syrup.  

A word about syrup.    The reason that fruit is canned in syrup is not that food companies want you to eat more sugar.    It is that the sugar helps stabilize the cell structure of the fruit and keep it firm and not mushy.   It helps keep fruit beautiful.  And those companies know that you are much more likely to buy pretty food than mushy shreddy food, so they keep it beautiful.

I've canned fruit both ways. Sugarless fruit loses its shape and looks ragged pretty fast.  This time I did not want applesauce, so I used a light syrup to keep the apple slices as slices in the jar.   [You could even use a very light syrup.]

Those apple slices are fabulous!   We loved them in our favorite coffee cake base.    We used the same cake that's in the pumpkin cream cheese coffee cake recipe and left out the cream cheese and pumpkin.   Use the apple juice from the jar to replace the milk.   Add the apples by either dumping them in the batter and mixing them in entirely  - OR, you can put them on top of the batter in the pan and swirl them around a bit before baking.   Either way, YUM!

Sunday, August 31, 2014

Elaeagnus [Autumn Olive] Raspberry Jam

I'm shameless.  I saved the best for last.

As you know, I've been doing a lot of new jams this year using the abundant elaeagnus [autumn olive] berries around here.  I'm happy to say that the family has loved every single one of them.  However, this one was truly a jam home-run.

I mixed the elaeagnus with red raspberries to see if it would be anything like the cran-raspberry stuff you get at the store.  [You can make jelly out of the cran-raspberry juice at the store by using this method here.  It's fabulous!]   It worked.  

Oh. My. Sweet. Buttered. Biscuits.

This jam. 

This Jam

Come to mama.   As soon as the first jar was emptied, someone opened a second [so it's a good thing I made 2 batches of this one!]

Elaeagnus [Autumn olive] Raspberry Jam
www.rurification.com

2 cups elaeagnus [autumn olive] pulp [for directions on getting the pulp, see this post]
2 cups red raspberries [fresh or frozen]
3 tablespoons low sugar pectin
2 - 3 cups sugar 

Combine elaeagnus, raspberries and pectin in a large pot. Bring to a hard boil [one that you can't stir down.] Boil one minute, stirring constantly.   Add sugar and stir well.  Bring to hard boil again stirring constantly.  Boil one minute.   Ladle into jars and cover with clean lids and rings.  Process for canning.

This jam is very acidic and is very safe for canning.  Makes about 5 cups.

Note:  I used 3 cups of sugar and it's pretty sweet.  If you want to use less sugar, I think you might be able to try it with only 2 cups.  Taste it before you do the final boil to see if you need more sugar and add to taste.

Thursday, August 28, 2014

Elaeagnus [Autumn Olive] Apple Jam

I've been experimenting with Elaeagnus [autumn olive] and other fruit in jam this year.   Since elaeagnus are a bit similar in flavor and tartness to cranberries, I knew I'd have to try an Elaeagnus Apple Jam.

It's heaven in a jar.  Everyone in the family loved it.  I'm thinking this would be a fabulous jam to use as a glaze on ham.   Or chicken.   Or those meatball thingies that you make in the slow cooker.   Yes!

To make it easier to make, I used apple juice concentrate from a can in this jam instead of fresh apples and since that stuff is pretty sweet, I cut the sugar down to 2 cups.  It's perfectly sweet-tart just like cran-apple juice.


Elaeagnus [Autumn olive] Apple Jam
www.rurification.com

2 cups elaeagnus [autumn olive] pulp [for directions on getting the pulp, see this post]
1 can apple juice concentrate
3 tablespoons low sugar pectin
2 cups sugar 

Combine elaeagnus, apple juice concentrate and pectin in a large pot. Bring to a hard boil [one that you can't stir down.] Boil one minute, stirring constantly.   Add sugar and stir well.  Bring to hard boil again stirring constantly.  Boil one minute.   Ladle into jars and cover with clean lids and rings.  Process for canning.

This jam is very acidic and is very safe for canning.  Makes about 5 cups.

If you don't want to use apple juice concentrate, you can use 2 cups of applesauce instead.   And if you want to use fresh apples, then peel and core 2 apples and cook them until soft.  Then make the jam. 


Tuesday, August 26, 2014

Elaeagnus [Autumn Olive] Peach Jam

As I mentioned in my last post, it's elaeagnus season. [The common name is autumn olive, but there is nothing remotely olive-y about these.]  Pick them when they are dark red and softening up.  They should fall off the clusters easily when they are ripe.

This year I realized that elaeagnus are really the hoosier equivalent of cranberries in tartness and that they'd probably be pretty darn good in mixed fruit jams, just like cranberry juice is beloved in mixed fruit juices.   I decided to start there.

It's easy to find cran-apple and cran-raspberry juice mixes at the store, so I put those combinations on my Mixed Fruit Elaeagnus Jam To Make list right away.  Then I saw a recipe for Cranberry Peach Jam somewhere [sorry, can't remember where...!] and thought I should try that one, too. 

And I did.   And it was marvelous.   The elaeagnus berries have a sort of spicy undertone and the finished jam has the flavor of a gently spiced peach jam with the extra oomph of the tart elaeagnus, too.   We loved it!

I mixed the elaeagnus half and half with the other fruit - you can adjust proportions as you wish.   One thing to remember - don't skimp on the sugar with elaeagnus.  It's tart!   I have found that using equal parts sugar and elaeagnus makes for an excellent jam.  I also add in half as much sugar as extra fruit for a jam that is sweet without being candy.   Here's what I did for the Elaeagnus Peach Jam.  

Elaeagnus [Autumn olive] Peach Jam
www.rurification.com

2 cups elaeagnus [autumn olive] pulp [for directions on getting the pulp, see this post]
2 cups chopped peaches
3 tablespoons low sugar pectin
3 cups sugar 

Combine elaeagnus, peaches and pectin in a large pot. Bring to a hard boil [one that you can't stir down.] Boil one minute, stirring constantly.   Add sugar and stir well.  Bring to hard boil again stirring constantly.  Boil one minute.   Ladle into jars and cover with clean lids and rings.  Process for canning.

This jam is very acidic and is very safe for canning.  Makes about 5 cups.

Stay tuned for the recipes for Elaeagnus Apple Jam and Elaeagnus Raspberry Jam later this week.


Sunday, August 24, 2014

Autumn Olive Season

Our Elaeagnus [pronounced Elly Agnus] berries are ripening all over the place.   The ones at the top of the hill ripen faster than the ones in other places and it's a good year for them so the three of us grabbed buckets and spent a happy half hour harvesting. 

Really ripe berries will just fall off the clusters into your buckets.    Those are the sweetest ones. 

Once you get the berries, you can cook them up and sieve the seeds out [see link above] and then make fabulous stuff with the pulp.    Yum!

You need to know a couple of things about these berries.

1.  They're tart!   Don't skimp on the sugar.   If you're making up your own recipes, then you need enough sugar for the grey-ish juice to turn red.   If you don't have enough sugar, you'll still see sort of a gray juice hanging around near the top.   Add just enough sugar for that to go away.   I generally use as much sugar as I have elaeagnus pulp in the recipe. 

2.  They vary on how much pectin is in them from year to year.   The first year I made jam with them, I used pectin and it made a super hard jam.   The next year I didn't use pectin and it was perfect.   Last year I made jam with no pectin and it's still runny.   This year I used less pectin than normal and got a good jam, not too hard.     You can use a greater percentage of unripe berries to increase the pectin, but then you'd better use more sugar [see #1.]

Here's last year's recipe for Elaeagnus Orange Ginger Jam.  I have a recipe with pectin and a recipe without. 

I've been experimenting this year, so stay tuned for recipes for these awesome mixed fruit jams with elaeagnus, coming up in the next week. 

[UPDATE:   Here are the links to these recipes]

Elaeagnus (Autumn Olive) Peach Jam
Elaeagnus (Autumn Olive) Apple Jam
Elaeagnus (Autumn Olive) Raspberry Jam

They are all delicious combinations and have passed the family taste test with rave reviews.   Who knew these wild berries would be so versatile?!


Wednesday, August 20, 2014

Our Favorite Barbeque Sauce

I love barbeque sauce.   Sweet and sticky meat is the best meat of all.   I love it.

So I was thrilled when I got a slab of ribs for cheap...well, cheaper than usual... and wanted to have it with some homemade barbeque sauce and then Claire hopped on my Pinterest food board and found this recipe for Brown Sugar Barbecue Sauce.   We tried it and loved it.  

Tip, via my fabulous sister:   Wrap the ribs in foil and cook them on low in your crockpot all day.   By dinnertime, the meat will be falling off the bones and all you have to do is slather it with sauce and pop it in the broiler to caramelize the sauce a bit. To. Die. For.  Or you can serve the sauce on the side.   Or both!     The same technique works for frozen chops as well.   Easy squeezy!

I love this sauce so much that I multiplied the recipe by a lot and canned it so we'd always have it on hand.   Here is the expanded recipe.  Enough for your own pantry and gifts as well.

Robin's Favorite Barbeque Sauce
www.rurification.com

7 1/2 cups brown sugar
6 1/2 cups ketchup
1/2 cup molasses
1 cup apple cider vinegar
1/4 cup worcestershire sauce
3 rounded tablespoons mustard powder
3 tablespoons salt
3 tablespoons paprika [smoked paprika is really good, too!]
3 tablespoons black pepper
1 tablespoon chili powder
1 tablespoon garlic powder  or 1 entire head of garlic, peeled and minced
1 tablespoon onion powder  or 2 onions, minced
1 teaspoon red pepper flakes


Mix all ingredients together in a large pot and bring to boil.   Ladle into clean jars; cover with lids and rings and process for canning. 

Makes 8 pints of sauce.  Perfect for giving as gifts. 


Tuesday, April 15, 2014

Hot Cross Buns


It's Easter soon!    Yay!   I'm not a big fan of baskets of candy, or hard boiled eggs, but I love hot cross buns.  

Love them!

And they're easy to make, too, which is good because otherwise, forget it.   I'm sure you feel that way, too.  


Robin's Hot Cross Buns
www.rurification.com
  • 6 ½ C flour
  • 3 tsp cardamom or cinnamon or pumpkin pie spice
  • 1 tsp sea or kosher salt
  • 1-2 ¼ C mixed dried fruit, chopped:  cherries, citrus, currants, raisins, craisins, apricots, etc. 


Mix all of that together in a large bowl [big enough to mix all the dough in]  leaving a well in the center and put it in the oven to warm up.   Use the lowest oven setting.   


  • ½ C butter
  • 2 C milk
  • 1 C sugar
  • 5 tsp yeast


Melt butter.  Take off heat.   Add milk.   The milk should warm up to skin temp quickly in the pan.   In another bowl, mix the dry yeast and the sugar well.   Add the sugar and yeast to the milk/butter mix and stir well.   Let sit until yeast dissolves.  

  • 2 large eggs lightly beaten.


When the flour mixture is good and warm and the yeast is dissolved in the milk,  pour the yeast mix and the eggs in the flour mix.  Roll to mix using a large spoon or your hands.   Roll until all the flour is incorporated into the dough.   If the dough is too sticky, add a bit more flour.   If it is too dry, add  warm [not hot] water 1 tsp at a time until it is right.     Handle the dough as little as possible for tender bread.  


Cover bowl with damp cloth.  Let rise until double.


Pull dough out on floured surface.   Divide into 24 balls.   Set balls on greased baking pan close together but not touching.   


Let rise 30-45 minutes until doubled and touching.   Pre-heat oven to 500° F.


Egg Glaze: 
  • 1 large egg, beaten
  • 1 Tb milk
Cut surface of rolls in cross, brush with egg glaze. 

Traditionally the cross is put on before baking.  That's what I did.  OR  you can leave the topping off and put icing crosses on after they’re baked and cooled.  

Pre-baking Topping:

  • ¼ C flour
  • 1 T sugar
  • 3-4 T water
Mix well in bowl.   Spoon or pipe onto cross.   Put in oven and turn the temp down to 400°.   Bake 15-20 minutes until golden brown.

Post-baking-and-cooling
Icing:

  • 1/2 cup confectioners' sugar
  • 1/4 teaspoon vanilla extract
  • 2 teaspoons milk

Wednesday, April 2, 2014

Kumquats

Confession.   I think kumquats are adorable.

A. Dor. A. Ble.

So I've been wanting to preserve some for a long time.   Just 'cause they're cute.

Even though I didn't know what they actually tasted like. 

Especially when I found a few links to some kumquat jam recipes at Food in Jars. [halfway down the link list in that post.]   Seriously beautiful food. 

So, when I found these tiny ones at Trader Joe's up in Indy last weekend, I grabbed a box, then came home and preserved a very small batch - just one pint jar - with honey and vanilla.

I'm going to just come right out and say this:  Kumquats are weird. 

The peels are the sweet fruity part and the insides are sour.   Very sour.   They're sort of an inside out marmalade experience - you know, the citrus, sour, bitter mashup.   They need sugar and lots of it.

Here's how I preserved these beauties:

Kumquat Preserves
www.rurification.com

12 oz. box of kumquats, washed, with stem bits removed.
1/2 cup water
1/2 cup honey
1/2 cup sugar
1 vanilla bean, sliced so the seeds are exposed

Bring to boil, then reduce heat to simmer.  Let simmer until peels are transparent - about an hour.

It made just one pint.

Notes:    I was hoping that they'd keep their shape, and they probably would have if I hadn't cooked them so long.

I cooked them so long because that's the best way to candy those peels.  The longer they cook in sugar water, the better they taste.

They're still pretty puckery.   You could leave out the water and add another 1/4 - 1/2 cup of honey and probably get a nice and very balanced preserve.  Next time I find some of these, I'm going to try that. 


Wednesday, March 5, 2014

Corn Bread Pudding with Leftover Cornbread

We love our cornbread here and fix it quite often.  There is nothing better, hot out of the oven, with butter and honey.    Or jam.   

I like sweeter cornbread.   OK, it's basically cake.    Eric likes the regular stuff and especially loves it baked in a cast iron skillet with bacon grease in the bottom.    Heaven.

Occasionally there is a leftover day old piece or two that is just a bit too dry to really enjoy.   My dad used to crumble it up and put it in a glass,  adding a few chopped onions, then fill it up with buttermilk and eat it with a spoon.  He was raised on a cotton farm in Arkansas.  They were poor and nothing went to waste.  Plus, the man loved his southern cooking. 

We don't let ours go to waste either.   We had a couple of big pieces left over from the last batch, so I crumbled them up and made this luscious cornbread pudding.  

It's a savory version with lots of herbs, cheese and extra corn.  [We used what we froze last summer.]  All cooked up in a warm custard.  It was so fantastic we had it for breakfast the next day, too.   

It would be divine with a few strips of crisp bacon crumbled into it, too!

Corn Bread Pudding with Leftover Cornbread
www.rurification.com

4 eggs
2 cups milk
1 tsp thyme 
1/2 teaspoon crushed rosemary 
1/2 teaspoon garlic salt  
2 cups cheese 
2 cups corn kernels [canned [drained], frozen, whatever]
3 cups cornbread crumbs 
4 strips bacon, crisp and crumbled [optional]

Beat eggs well, add milk and herbs and salt.  Stir in cheese. Stir in corn and cornbread. Pour into 8 inch casserole dish. Bake 350 for 50-60 minutes or until it doesn't jiggle and a knife in the center
comes out clean.


Related Posts Plugin for WordPress, Blogger...