Showing posts with label sweet potatoes. Show all posts

Tuesday, March 18, 2014

How to Root Your Own Sweet Potato Starts

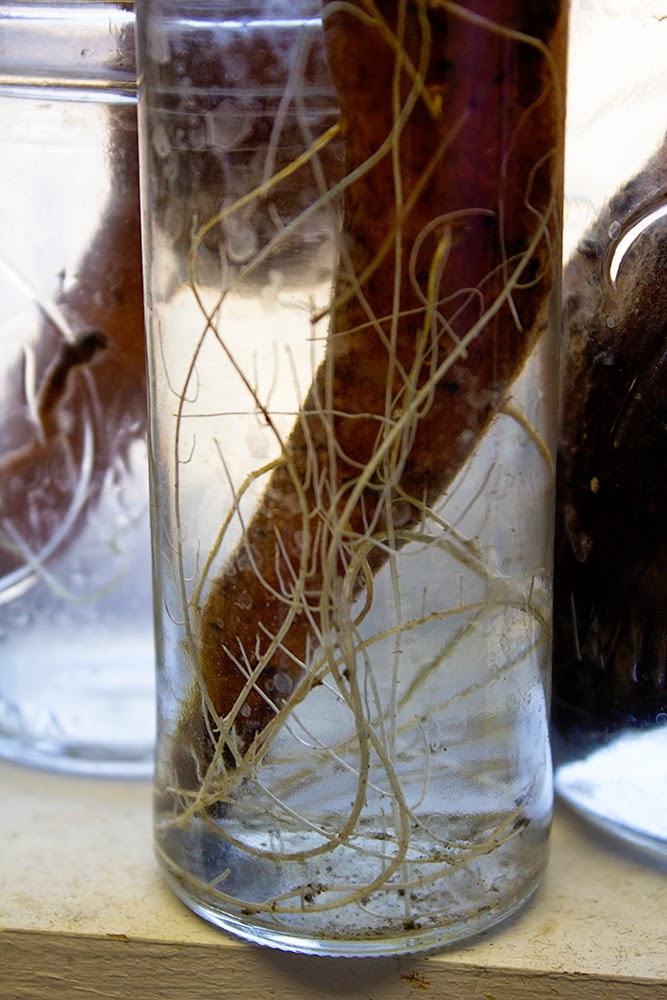
This is the time of year to start your sweet potatoes.   It's easier than you think.

You need: sweet potatoes, water and jars.

Put the sweet potatoes in the jars.  Fill the jars with water.  Put them in the window. Let them root.


They'll send out roots like these.   The warmer they are, the faster they'll root.

I've had mine in a window and it has not been warm.  The roots have been slow to show, but they're all rooting.  As soon as it warms up, they'll show a lot more action.  


They'll shoot up leaves like these.


And in June [in zone 5], you can stick them in the ground.    I cut them up so that each start has leaves and roots.

Sweet potatoes love warm. Wait until after the last spring frost to even think about planting them. 

Monday, August 12, 2013

Sweet Potato Flower


I've grown sweet potatoes a lot of times, but they never bloomed before.   I think these bloomed because they were extras and I put them in planters and then fertilized them a bit.    They seem to like the fertilizer.

At any rate, that flower is pretty darn cute.  Click the pic for a knock your socks off close up.   I love that color.

Wednesday, June 5, 2013

Sweet Potatoes Ready to Plant


Those sweet potato starts really took off when the weather got warm.   Remember that - sweet potatoes like heat!

If you start them early, then keep them where it's warm and give them plenty of water.   
I put ours in the ground a couple of a weeks ago along with a few slips purchased from the store.    These have stayed much happier than the slips.  This is how I'm doing them from now on:
  • Cut them in half and submerge in a jar of water with the end sticking out.  
  • Let it stay where it's bright and warm. 
  • When they have roots and leaves, plant them.
If I laid them on their sides in water, then I'd probably get roots all along the bottom and leaves on the top.  Then, I'd be able to cut them in to 3 or 4 starts per potato and they'd go further.   I'm not sure how to do that in a way that wouldn't take a lot of counter space, which is at a premium here.    I'll keep thinking about it.

Wednesday, May 8, 2013

Sweet Potato Starts Update


It's working!!  I've got actual leaves on the sweet potatoes!

I started some of them in bulb vases, some in jars and some of them in an ice cream bucket.  

Weeks ago.


 I read somewhere that small pieces start best.

That is totally wrong.  Totally.   The bigger the hunk, the better. 

It took the small stuff in the bucket For. Ever to get going.


The big hunks in the vases took their time, but once they got going, they really got going.


I've got roots coming on those now.    Those tiny white roots are the signs of Sweet Potato Victory!

The ones I put whole in jars shot out roots right away within just a couple of days.

Days.    DAYS!    Not weeks. 


Soooo, next year, if I want to start them slowly, I'll cut them in half and start them that way.   If I want to start them late and need them to start fast, then I'll drop them in a wide-mouth jar, fill it half full of water and let them go to town.

I love all these little stems!  Eventually they'll all have little rootlets at the base of each stem.  When it's time to plant them, I can carefully twist off each stem with the root and stick them in the ground. 

Sweet potato happiness.

Friday, March 29, 2013

Sweet Potato Starts


It's always a scramble around here to find sweet potato starts.    For me the problem is that I'm ready to plant sweet potatoes long before it's a good time to plant them.  

You have to wait until well AFTER the frost date.

Really.

You have to wait.

Trust me.

And then wait some more.

And by then, everything else has been planted and there's a lot of other work to do and I've forgotten to keep my eyes open for slips.    And then they're gone!

So I've been thinking for a long time about growing my own.   But I heard somewhere that it was hard.    So I kept putting it off.

Then, one day last week, Lily brought me a few sweet potatoes out of the pantry [which stays around 50 degrees all winter] and said - 'Look at these.  They're sprouting!'

So I guess it's not so hard to sprout them after all.    I mean, they did it all by themselves.   In a dark box in a cold pantry.  

Which is just as nature intended.    Duh.  

I found a couple of sites with descriptions on what to do next.   There are a few different approaches.   Check them out:

http://www.outlawgarden.com/2012/04/25/grow-your-own-sweet-potatoes/

http://www.diynetwork.com/how-to/how-to-plant-and-grow-sweet-potatoes/index.html

http://www.mnn.com/your-home/organic-farming-gardening/stories/how-to-grow-sweet-potatoes

http://www.waldeneffect.org/blog/Growing_sweet_potato_slips_in_gravel/


I think I'm going to do mine the way Outlaw Garden does hers [first link above].   I'll keep you posted.

Monday, October 29, 2012

Glazed Sweet Potatoes

Over the next few months, I'll be showing you a bunch of things you can do with a jar of jam.   Or glaze.   Or chutney.   Or whatever.

This is an easy recipe for sweet potatoes using the Apple Thyme Sage glaze that I showed you how to make a couple of weeks ago, that even my picky eater liked. 

All you do is peel your sweet potatoes and slice them into rounds.  Spray an oven safe dish and put the sweet potatoes in it.   Pour the glaze on them and stir them up.  Bake and serve.

I cooked these covered at 350 for an hour.   Divine!   

Eric cooks them at 425 covered for a half hour, then uncovers them until they're crispy on the edges.   Divine, divine, divine!

If you use the thicker glaze, like what I showed you in the recipe for Apple Rosemary Mint glaze, then just mix a big spoonful of the jam with a roughly equal amount of water.   It will have clumps.  Ignore them.   Pour over the potatoes and bake.  

Sunday, October 21, 2012

Sweet Potato Harvest

It took us a while to find sweet potato starts this year, but we finally found some at Bloomingfood's, thanks to a tip from another gardening friend.  [Thank you!!]    While I was calling around, I discovered that May's Greenhouse will put you on an order list, so if you're in the Bloomington, Indiana area and want sweet potatoes, call May's in March and get on their list.  They'll save sweet potato starts for you when they come in. 

We had good luck with our starts this year and ended up with a really nice harvest.     You want to harvest sweet potatoes before the frost.   They like cool nights - and I hear tell that they get sweeter with cooler weather, but any frost will nip the vines and once the vines are frozen, they'll start to rot and then the potatoes rot quickly, too.  

So, cover them for light frosts, and harvest before a hard frost.   If you happen to get caught by a surprise freeze, then take any frozen vines off right away.  That will prevent rot from getting to the roots for a while. 


We planted our starts well after the last frost date in May, in a 4' x 8' raised bed full of sand and chicken dirt.   The potatoes loved it and we had gorgeous vines all summer.

When it's time to harvest, cut off all the vines so you can see what you're doing and then brush the soil away from the roots so you can see what's what.

What you can see is just the beginning of what's under there.   There are potatoes in the center of that cluster that go down quite a bit deeper.


Lift them out carefully - the potatoes crack easily if you twist them.   

Look how big some of these clumps got!  That's Eric's hand lifting this clump out.

Just brush the soil off and let them dry.

In the end we got a half a big wheelbarrow full of sweet potatoes of all sizes.

We brushed them off again, then loaded them in boxes and put them in the back room to sit until we eat them.  

Delicious! 


Tuesday, May 15, 2012

New Garden Beds......again.

Just when I think I've finally got enough space in the veg garden, I go and decide that we're never going to be able to find sweet potato starts this year and I plant carrots and basil where the sweet potatoes would have gone.

And then a good friend calls to say that she found some sweet potato starts and hurry over there before they're gone.  

So we had to go get some because last year we didn't get any sweet potatoes and it would have been two whole years in a row without our own sweet potatoes and that wold have been bad.

The girls don't agree.

Whatever. 

So I looked at Eric and said, 'I think we need another bed.' and he didn't even flinch.   He said, 'Let's do it.' 

And I wanted to cry because I'm a little tired of digging and hauling gravel this year already.

Enough already!

So we called Quincy to get more gravel and sand because we had finished the last loads.  

Just FYI, there are over 7 tons of gravel and sand each when he delivers.   That means that we have moved 7 tons of gravel by hand since January.  And 7 tons of sand since last summer.  

By.  Hand. 

As in, one shovel full at a time.

I should be totally buff.

Anyway.  

The story is the same.    This is what it looked like before we started.   I didn't get a Before pic, because I was too busy digging already and I wanted to get it over with. 

First we have to decide where we want it, then we have to dig the grass out.   See all that grass to the front and left of the potato towers?     It had to go. 

I did it all in one 5 hour shift.  

Tip:  Take motrin before you start.   It helps.  

After I dug the grass out, I have to carve the clay down so it's smooth and the water drains right.

The grass in the center rectangle got covered by the sweet potato bed, some more geotextile and 12 inches of sand and chicken dirt.   I didn't bother digging it out. 


After we line the paths with geotextile to keep the weeds down, then we load the paths full of gravel.   Eric did the vast majority of gravel hauling.     Vast majority.  

And he loaded the bed full of sand and chicken dirt.

Then I planted the sweet potatoes.

Then we surrounded the whole blasted garden with deer fence to keep things out.  It works pretty darn well.  Too bad deer fence won't keep the weeds out.  

That pool ladder in the middle of the garden is an extra we had around so I put it to use to hold the sprinkler.    Works like a charm - easy to drag around and keeps the sprinkler high.  

The end.  


Related Posts Plugin for WordPress, Blogger...