Showing posts with label lemon. Show all posts

Saturday, March 22, 2014

More Lemon Honey Tea Stuff

Turns out we love the honey lemon tea concentrate that we made in the fall.    Especially with slices of fresh ginger dropped in the jars.  

Hello, sunshine!

I used an entire pint jar of the creamed honey we discovered in the pantry [see yesterday's post] and a bag of lemons.  I couldn't pour the honey, so I just spooned it in the jar between layers of lemons.   I got 2 1/2 quarts of lemony-honey goodness started.  It sat out for a few hours until the juices filled the jars, then I tucked them all in the fridge.

Tuesday, December 17, 2013

Lemon Upside-Down Cake

You know I had those Meyer lemons I told you about a few days ago, and I've been looking for something really tasty to make with them so I did a search and found a recipe for Lemon Upside Down Cake.

Hello, Gorgeous!

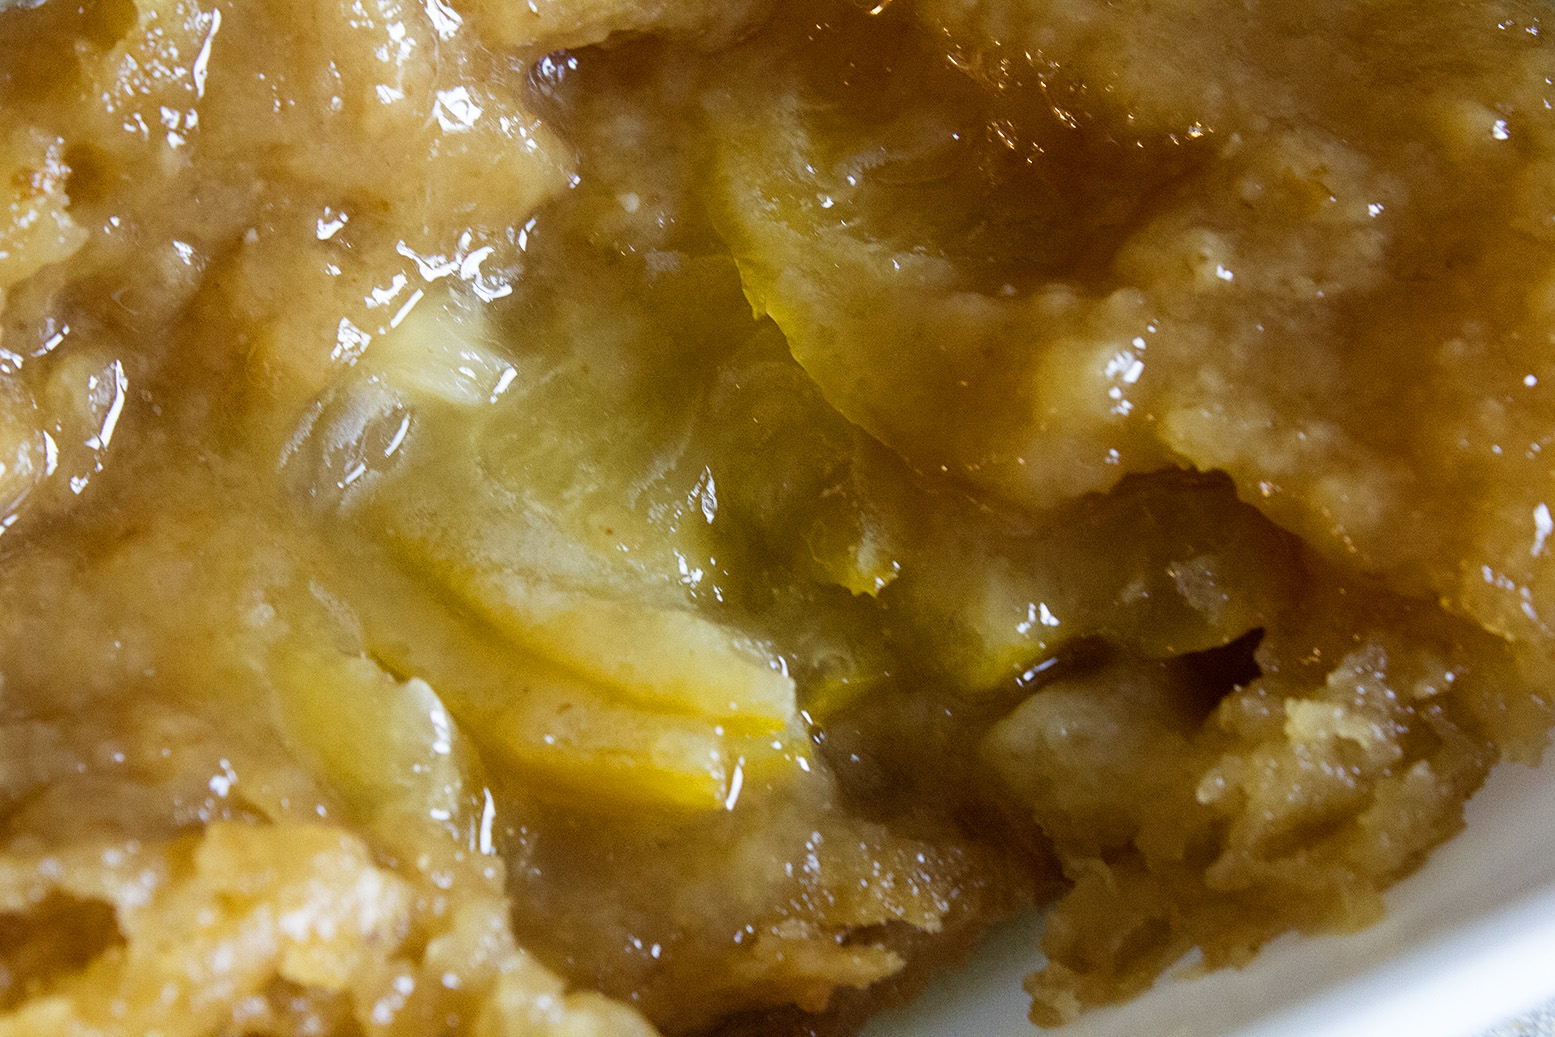
I tweaked the recipe a bit and my, oh my, was it delicious.   Sweet and sour with some smooth vanilla accents. 

We assembled and baked this in a cast iron pan, but if you don't have one, don't worry, you can use a large round cake pan or pie plate just as well.

Lemon Upside-Down Cake
www.rurification.com 
adapted from the recipe in the L.A. Times 7/16/13

  • 2-3 lemons (I used three and that was quite a lot.]
  • One-half cup plus 2 tablespoons (1 1/4 sticks) butter, divided
  • 3/4 cup packed light brown sugar
  • 1 1/2 cups flour
  • 1 1/2 teaspoons baking powder
  • 1/2 teaspoon salt
  • 1 vanilla bean, split
  • 3/4 cup sugar
  • 2 eggs
  • 1/2 cup milk
Cut the ends off the lemons, then slice them into very thin rounds. Remove seeds and set aside. Grate 1 teaspoon lemon peel from the lemon ends. Set aside the grated peel.

Melt four tablespoons of the butter in a 10-inch cast iron skillet. Brush the sides of skillet with a little of the melted butter. Add the brown sugar, stir it into the butter and spread it into an even layer.  It'll look grainy - that's OK.  Put the prettiest lemon slice smack dab in the center.  Arrange the rest of the lemon slices in overlapping circles to cover the bottom of the skillet.  Let the lemons and sugar continue to heat on low while you mix everything else up.   Keep an eye on it so the sugar doesn't start to burn.  [If you're using a regular cake or pie pan, then pre-heat the oven and melt the butter in the pan the oven.  Take it out to put the sugar and lemon slices in, then stick it back in the oven while you make the rest of the batter.]

Preheat oven to 350 degrees. Combine the flour, baking powder and salt in a bowl and set aside.

Cut up the remaining 6 tablespoons of butter into a mixing bowl. Scrape the seeds from the vanilla bean with the point of a knife onto the butter. I scraped them off the knife right onto the ends of the beaters on my mixer.  Beat the butter, scraping down the sides of the bowl, until creamy. Add the sugar and grated lemon peel and beat until light and fluffy.  This took me at least 5 minutes. When you can't stand it anymore, beat in the eggs, one at a time.

Once you've got the eggs in, things will get very light and fluffy.  Add half the flour mixture and beat until blended.  Add the milk and beat until blended, then add the remaining flour mixture and beat until blended.

Spread the batter by the spoonful over the lemons in the skillet to cover evenly. Then smooth it down neatly.   Bake 30 to 35 minutes, or until the cake is golden and the center tests done. Let the cake stand 5 minutes, then invert the skillet onto a platter. [It took two of us to do this.  We used a very large, flat platter.]  It will be oozy while hot, but will soak up some of the goo as it cools.  I spooned the rest of the goo still in the skillet over the inverted cake.  

Serving this is tricky - it's hard to cut through the lemon slices neatly.  If you want something that serves beautifully, then consider cutting the lemon slices in half moons before you start and arranging them so that they'll be easy to cut along when the cake is finished. 


I served this with a dollop of creme fraiche and was in lemon heaven.   Be warned! -- It's hard to stop with just one piece.  Or two.   Hide it from yourself if you don't want to eat it all at one sitting.


Thursday, September 12, 2013

Lemon Honey Tea Concentrate

I love all sorts of lemon pickles and preserves.   The top shelf of the fridge and sometimes the window sills are crowded with lemon pickles in various stages of fermentation and preservation

So I was kind of excited to see another type of lemon preserve over at the blog Twenty Two Pleasant.   [It's a lovely blog with some of the best photography I've seen in a blog.  It'd be worth your while to click around and look at her gorgeous pics.]

Twenty Two Pleasant made Lemon Honey Tea Concentrate after she saw it here and it was so beautiful and sounded so good that I had to try it, too.   All you do is slice up lemons, put them in a jar and pour honey over them.  If you like ginger as much as I do, you can add some thin slices of ginger to the mix, too.

After a time, the honey and lemons meld into a jam-like consistency which you can use as a lemon tea concentrate by putting a spoonful in a mug and then pouring hot water over it.    Easy squeezy.

Generally, lemon pickles take a few weeks to do their thing, so start now and be patient.    By the time cold weather hits, it'll be ready to dip into.  Honey is anti-bacterial and that combined with the high acidity in the lemons makes this an almost fool-proof preserve.   As the lemons do their thing, they'll start to float.   That's normal.  

You can bet that I'll have a few jars of this stuff around all winter long.   Mmmmm.

Tuesday, March 5, 2013

Pickled Limes

Last year I experimented with several ways to pickle lemons.     They were all fabulous and we use them all. 

This year I decided to do some pickled limes.    We used the easy Moroccan style method of pickling - just slice them up and put them in a jar with layers of salt in between.  Then squeeze lime juice over them all to fill it up and let it sit in a window for a few days to pickle.   

Pickled limes have been around for a long time.

James Lind, a Scottish surgeon, documented the use of citrus fruit to treat scurvy in 1753.   After several decades the British navy began requiring sailors to have a daily ration of citrus to prevent the disease.   Limes were more readily available than lemons, so they became the citrus of choice on ships.  Hence, the nickname 'Limey' for British sailors.    Wiki rumor has it that once it was found that lemons were a better treatment for scurvy, that fact was a closely guarded military secret.  A navy that used lemons was stronger than the British navy that used West Indian limes.  [No documentation of that rumor, but it's a great story.]

Limes were pickled to preserve them for long sea voyages.  But they were made and used at home, too.   Louisa May Alcott's book, Little Women refers to Amy's love of pickled limes that she purchased from the store.

Linda Zeidrich, who wrote my favorite pickling book The Joy of Pickling said this:
“There they were sold from glass jars on top of candy-store counters, and some families even bought them by the barrel. Because the import tariff for pickled limes was quite low – importers fought to keep them classed as neither fresh fruit nor pickle – children could buy them cheaply, often for a penny apiece. Kids chewed, sucked, and traded pickled limes at school (and not just a recess) for decades, making the limes the perennial bane of New England schoolteachers. Doctors tended to disapprove of the limes, too; in 1869 a Boston physician wrote that pickled limes were among the “unnatural and abominable” substances consumed by children with nutritional deficiencies.” Parents, however, seemed generally content for children to indulge themselves in the pickled-lime habit.
 Here's another site that talks about the history of pickled limes: Food Timeline  includes this recipe for pickled lemons from 1747:

"To pickel LEMONS.
Take twelve Lemons, scape the with a Piece of broken Glass, then cut them cross in two, four Parts down right, but not quite through, but that they will hang together; then up in as much Salt as they will hold, and rub then well, and strew them over with Salt. Let them lay in an earthen Dish for three days, and turn them every Day; then slit an Ounce of Ginger very think and salted for three Days, twelve Cloves of Garlick parboiled, and satled three Day, a small Handful of Mustard-seeds bruised, and searched through a hair-sieve, some red India Pepper, one to every Lemon; take your Lemons out of the salt, and squeeze them very gently, and put them into a Jar, with the Spice and Ingredients, and cover them with the best White Wine Vinegar. Stop them up very close, and in a Month's time they will fit to eat."
---The Art of Cookery Made Plain and Easy, Hannah Glasse, facsimile 1747 edition [Prospect Books:Devon] 1995 (p. 133) 

Sounds kind of good. I may have to try this with lemons and with limes.

Friday, February 22, 2013

Citrus Sugars

I showed you the citrus salts I made a couple of days ago. 

Well.

I made some citrus sugars at the same time.    Because if you're going to zest one lime, you might as well zest another.   And another.   And then a lemon or two or three while you're at it.   And then stir that zest into sugar and make yourself a jar of lemon sugar and then a jar of lime sugar.

They're so good. 

Have I said that before?


For the sugars, I decided to use a whole cup of sugar for every fruit I zested.    The flavors were more delicate that way.

Delicate is good.   Sweet and delicate is even better.

Here are some ways you can use these citrus sugars:
  • In drinks of all sorts - like tea!
  • Sprinkle on cookies
  • Sprinkle on muffins
  • Sprinkle on top of frosting for a citrusy sparkle.
  • A spoonful in a glass of  sparkling water is delish!
  • As a substitute for plain sugar in shortbread or spritz cookies. 
  • In puddings
  • Sprinkled over fruit kabobs
  • In candied sweet potatoes

Citrus Sugars
www.rurification.com
  •  zest of one fruit
  • 1 cup sugar
Mix the zest and sugar together in a jar.   Shake until well combined.   Will keep indefinitely.   But don't kid yourself - it's not going to last all that long.


Wednesday, February 20, 2013

Citrus Salts

I saw these over at Food in Jars and was instantly smitten.

Smitten, I tell you!

And since I've been making marmalade and stuff, I thought I'd give them a whirl. 

I made lemon salt and lime salt. They're so good.  

All you have to do is zest the fruit and mix it with salt.     I used the zest of 1 fruit and mixed it with a half cup of salt.

The zest makes the salt sort of damp, so I tried letting the zest dry out for a while to see if it made a difference.   It didn't.   The salts work great just like this - no fuss, no muss. 

Here are a few ways to use the salts:
  • adult drinks
  • grilled meats
  • skillet seafood and meat dishes [Loved it on pork.]
  • potatoes  [Lime salt on sweet potatoes!]
  • oven fried chicken
  • steamed vegetables 
  • popcorn
  • pasta

Citrus Salts
www.rurification.com
  • Zest of one lemon or lime
  • 1/2 cup salt
Shake the zest and salt together in a jar until well blended.   Enjoy!  They'll keep for a very long time and make great gifts!

Monday, January 28, 2013

Four Fruit Marmalade

Remember all that fruit I zested for you the other day?   I used it to make Four Fruit Marmalade.

I used grapefruit, oranges, blood oranges and meyer lemons.

It is dee-licious.

You should make some.


Four Fruit Marmalade
www.rurification.com

2 grapefruit, sectioned.  Zest one of them.
2 oranges, zested and sectioned.
2 blood oranges, zested and sectioned.
4 meyer lemons, zested and sectioned.
7 cups of sugar
1/2 tsp salt [to cut the bitter]

Do your zesting first.   Put the zest in a pot with 3 cups of water, bring it to a boil and let it boil happily until you have all the sectioning done.

I use a serrated grapefruit spoon for the sectioning.  Just cut the fruit in half and go at it.   Pull the seeds out as you find them.

I sectioned all the fruit into a bowl.   Between the fruit in the bowl and the liquid in the zest pot, there were roughly 7 cups of stuff.  That's why the 7 cups of sugar.   If you make a smaller batch, just remember that you want about the same amount of sugar as you have fruit stuff.

Put all the fruit stuff and the zest stuff in a good pot with a wide bottom.  Add the sugar and salt. Bring it all to a boil.  There's no pectin in this recipe, so you're going to have to boil it down until the gelling point - 220 degrees here in Indiana.   Check my Jam page [tab above] for the gelling points at higher altitudes.  

Let it boil hard.    Mine boiled until the foam started creeping up the sides of the pan.   That's normal.   You might stir it once in a while to make sure it's not sticking.

When you reach the gelling temp, turn off the heat, ladle into jars, put the lids on  and process 10 minutes for canning.   [See my Jam page, tab above, for more information on processing for canning.]

Note:  If you use a pot that's too small, the jam will start to brown before it reaches the gelling point.   The sugars will caramelize before enough liquid boils out so start out with a good big pot.  It's OK if your jam is way down in there because the pot seems too big.   It isn't too big.  It's efficient.   Efficient is good.
I made a little extra of this marmalade because, guess what!

Under Indiana law, I am allowed to sell my jam now as a Home Based Vendor.   This means I have to label things with a specific disclaimer and I have to do pH testing of every batch, but that's not a problem.

How do you like the front side of my labels?


Want the recipe for this Marmalade and a whole lot of other terrific jam recipes?   Check out my ebook:  A Simple Jar of Jam  at www.rurification.etsy.com.   You can preview the book by clicking the link on the sidebar.  Every purchase helps support this site.  Thank you!


Sunday, November 18, 2012

Sussex Pond Puddings - Hoosier Style

So, you know I had those two lemons that grew on my Meyer lemon tree.   A commenter suggested that I make Sussex Pond Puddings with them.   Since I'd never heard of them, I went looking and found this site with a great recipe for them.   The English Kitchen.  Fabu site, by the way.

Basically, Sussex Pond Pudding is a steamed pudding with a suet-type crust that is filled with butter, sugar and a whole lemon, then steamed for hours until the lemon is cooked.   The 'pond' is the melted filling that spills out when you open the pudding.  

The English Kitchen's recipe was in grams and called for suet.   Suet just isn't going to happen here, so I converted everything to cups and tried the recipe with butter and again with shortening instead of the suet in the crust. 

I had never made steamed pudding before, so this was all new territory.   I admit that I cut down on the butter in the filling because my arteries were slamming shut just thinking about all of the butter in this dish.  Also, I made individual puddings so we could play with different fillings.  [More on those later]. Finally, I steamed them in the oven instead of the stovetop because the individual ones wouldn't all fit in one pan. 


The dough was easy to make and easy to handle.   Cut out one quarter and save it for the top.   It's easy to press into shape for the top.


Press the rest into the ramekins.


Then fill and cover with the rest of the dough.  I ended up sealing the edges with a fork. 


Cover with parchment paper and tie it down.   Notice the pleats in the center.   I don't know if they worked, but that's the traditional way to do it.

I set the ramekins in a large baking pan, filled it with hot tap water halfway up the sides of the ramekins, put it in the oven at 350 and set the timer for 2 hours.  And then we waited.  

Two hours was a bit long - they got very brown.  Not too brown, but very brown.    I think 1 1/2 hours would be better.  


Then I inverted them into bowls and we dug in.

Wow.  


Wow!

Lemony, syrupy, sweet, buttery goodness oozing all over.  

Want to make some? 

You should make some.


Sussex Pond Pudding - Hoosier Style
www.rurification.com

Pastry  [Enough for three individual puddings or one large one.]
  • 1/2 cup flour
  • 1/2 cup fine bread crumbs
  • 1/2 tsp salt
  • 1/2 cup butter or shortening
  • 1/3 cup milk + a Tablespoon or so.
Combine the flour, bread crumbs and salt.  Cut in the butter or shortening until fine.   Add milk.  Stir together to form dough.   It will be soft.   

Divide dough into thirds.    Roll each into a round disk about 1/4 inch thick.   Cut out one quarter of the dough to save for the top.   Fit the rest of the dough into a cone shape and press it into the cup or ramekin.  Trim off excess dough and keep it for the top.   Fill the puddings.

Roll or press the remaining dough into circles for the tops of the puddings.   Seal, etc. as below.  

Filling for individual puddings:  
  • 1/2 lemon per individual pudding, sliced thinly
  • 1 1/2 Tablespoons butter, divided into thirds
  • 3 Tablespoons brown sugar
In the bottom of the pastry-lined ramekin, put 1 Tablespoon of butter and 1Tablespoon of brown sugar.  Stack the lemon slices and top with 2 Tablespoons brown sugar and 1/2 Tablespoon butter.  Cover with pastry.  Seal edges.   Cover with parchment paper and tie it down.  

Heat oven to 350 degrees.  Place puddings in large baking pan and fill with water until it comes halfway up the ramekins.   Bake for 1 1/2 hours or until brown on top. 

When done, remove parchment paper, slide a knife around the edge to make sure it's loose and invert the pudding onto a plate or bowl.    Don't let them cool too much or the bottom sticks.   If you need to make these ahead, then when you're ready to serve, microwave them to warm them up [hot!] so that the bottom will come out of the cup.  

These are great with cream.

Sunday, November 11, 2012

Ripe Lemons

I have a lemon tree that I've been babying for a couple of years. 

It bloomed.

It produced a lot of tiny green lemons.

All of them fell off except the two at the very tippy top.

As they got bigger, the top tipped.

They stayed green forever.  For.  Ever.

They finally turned yellow.

Now I'm trying to decide what to do with them.

Suggestions?

Friday, November 2, 2012

Old Fashioned Southern Style Lemon Ginger [Pumpkin] Marmalade


I'll cut to the chase here.

What makes this old fashioned and southern style is the liberal use of pumpkin slices. In the south, this recipe is called Pumpkin Chips.    I've also found it called Pumpkin Marmalade and Pumpkin Pickle and since it really is more like marmalade than anything else, that's the name I chose.

Yep.

First, let me make this clear.   This jam does not taste like pumpkin pie or anything remotely like it.   I did some blind taste testing with picky eaters  and they did not taste the pumpkin - even after I told them there was pumpkin in it.   The strongest flavor is lemon, then the ginger.   The pumpkin gives it a much lighter texture and less 'in your face citrus peel' flavor so that if you're on the fence about marmalade, but don't hate it, you'll love this jam.   I love this jam!   [Marmalade haters didn't like it because it tastes like marmalade.]

I know it's a reach.   But here's the deal.  Most people have firmly associated pumpkin with pumpkin pie spice.   It doesn't have to be that way.   Pumpkin is delicious without cinnamon, allspice and cloves.

I also loved this jam because the recipe is easy to adjust to the amount of pumpkin you have available - either a little or a lot.   So if you have one pumpkin but you want to make a pie and some marmalade, you can, very easily.  

I also loved this jam because I have a terrible time getting my marmalade to jell without using pectin.  This jam jelled perfectly.   Perfectly!!   With no pectin.   And it was easy. 

I started with two recipes that I found this summer:   Pumpkin Chips in Steve Dowdney's book, Putting Up: A Year-Round Guide to Canning in the Southern Tradition and Pumpkin Ginger Marmalade, from Judith Choate's book, Gourmet Preserves.  

Steve's recipe called for twice as many lemons and half as much sugar as Judith's. I went with Steve's proportions.  Judith added ginger to her marmalade and I decided to use ginger in this recipe, too. 

Divine.

This is a slow jam.   It needs to sit overnight before you start cooking it.  Then it takes a while to cook the next day and it needs to be watched.  Plan accordingly.

Four cups of chips will yield about 2 pints of jam.   Decide how much jam you want before you start. 

Cut the top off your pumpkin - like a jack-o-lantern.  Do the same thing with the bottom. That'll keep it still while you're cutting the middle.     Slice the middle into 1 inch wide 'spears' from north pole to south pole.   Peel each spear and take the seeds off.   Run the spears through the cutting/slicing attachment on your food processor, or cut them by hand into very very thin slices [short-ways] across each spear. 

Measure your chips frequently.  Stop making chips when you have enough for jam.    The rest of the pumpkin can be roasted or steamed for pies or pumpkin butter or muffins or cheesecake or something else with cinnamon, allspice and cloves.   [Take the seeds off before you roast, but you don't have to peel it if you're going to roast it.  After you roast it, you can scrape the flesh off the peel with a spoon.  Easy.]

Once you have your chips, then use these proportions to make your marmalade.

Old Fashioned Southern Style Lemon Ginger [Pumpkin] Marmalade
from www.rurification.com
  • 4 cups pumpkin chips
  • 3 lemons
  • 2 cups white sugar
  • 1 Tablespoon fresh grated or minced ginger [or minced candied ginger]
Wash the lemons well.  Juice the lemons.  Set aside the rinds to use later.  Put the pumpkin chips, lemon juice, ginger and sugar in a pot to sit overnight.   Stir well and then leave it alone until the next day.

In the meantime, go back to your lemon rinds.   With a spoon, pull out the seeds and discard them.   Chop up the rinds into small pieces [the size you won't mind eating in marmalade].  Put the rinds into a small pot and cover with water.   Boil for 20 minutes.    Drain and discard the water.   Keep the rinds.  Put those in the fridge until tomorrow. 

When you come back to the jam in the morning, stir the pumpkin and juices well again to help finish dissolving the sugar.    It'll be super juicy.

Put the pumpkin pot on the stove and add the cooked pieces of lemon rind to it.   Bring it to a boil, then reduce the heat and cook it until the pumpkin chips become translucent.    It might take an hour or more to cook it until translucent.   The higher the temp, the faster it cooks, but your goal isn't to get it done fast.   It's to get the sugar cooked into the pumpkin and lemon.   Don't rush it.   I cooked mine at a low-medium temp  [3 or 4 on a scale of 1-10 on my electric stove.]

When the chips are translucent, strain them out and set them aside.   This is to prevent them from overcooking and becoming mush while it finishes.    I used a big slotted spoon and put them in a colander over a bowl.    The extra liquid that drained into the bowl as I was getting the chips out, I put back into the pot.

Bring the liquid to a hard rolling boil - the kind of boil where foam creeps up the sides of the pot.   Stir constantly!   Use a long handled spoon.   Boil it until it gets to 213 degrees or until it gets thick but before it starts to darken.   Keep an eye on it.   If you don't have a thermometer, then put a small bowl or plate in the freezer for a few minutes.   Dribble a bit of jam on the cold plate and see if it wrinkles when it chills.    It will also start to double drip or sheet off the spoon when it's jelled. 

When the liquid is thick, then add the chips back to the pot.  Bring to a boil and then it's done.   Ladle into jars.  Steve Dowdney says this is a sugar saturated, high acid jam that is very safe to can.   Yield:  2 pints of jam for every 4 cups of chips that you started with.

I made this in a single batch with 16 cups of chips, 12 lemons and 8 cups of sugar.   It worked brilliantly!    The bigger your batch,  the wider the pot needs to be.   You want as much jam on the bottom of the pot at one time as you can get.  


Want the recipe for this Marmalade and a whole lot of other terrific jam recipes?   Check out my ebook:  A Simple Jar of Jam  at www.rurification.etsy.com.   You can preview the book by clicking the link on the sidebar.  Every purchase helps support this site.  Thank you!


Saturday, August 18, 2012

Double Lemonade Jelly


Sometimes, I like a citrus jelly that isn't quite as over the top as marmalade.  

Don't get me wrong, I love marmalade.   I really love marmalade.   But marmalade is a bit labor intensive. 

Plus, it's hot out.  

Plus, I'm busy.  

Plus, lemonade sounds good. 

Plus I have that lemon verbena simple syrup that I can use in jelly.  

Plus, I have my cute little zester and a couple of lemons hanging around. 

What to do, what to do, what to do....

Double Lemonade Jelly.  

It's lighter, brighter and easier than marmalade,  but just as fun.

Plus, it has those cute little confetti strips of zest in it and I love those!

Double Lemonade Jelly
  • 2 cups cold water
  • zest and juice of 1 lemon
  • 1/3 cup [rounded] Dutch Jell All Natural Lite pectin
  • 1 cup lemon verbena simple syrup
Dissolve the pectin in the cold water in a pot with the lemon juice and zest.  Bring to a boil.  Stir constantly and bring to a full rolling boil that you can't stir down.  Boil hard for 1 minute.  Add the simple syrup.  Bring back to a full rolling boil and boil for one minute.  Ladle into clean dry jars.  Process for canning.   Makes 1 1/2 - 2 pints. 

Notes:  Invest in a zester that you like.   They're not very expensive and they'll save you oodles of time and aggravation.  

You can use more sugar in this recipe if you like.  Try adding 1 cup of white sugar to the recipe if you want it sweeter.

Friday, July 13, 2012

Strawberry Lemon Lavender Honey Jam


Jam and bread are two of my favorite things in the whole world.

Right up there with old barns.

And cemeteries.

And gardens.

Yep. That's where you'll find jam and bread on my list.  Right there at the top.

One thing I don't like in jam is too much sugar.   I like it to be more fruit flavor than sweet flavor.   It's jam, not candy.    I usually use 1/2 as much sugar as fruit in my recipes and I'm working hard on ways to use sweeteners other than sugar.

Like maple syrup.  [Peach Maple Cardamom Jam, Peach Maple Jam, Pear Maple Jam]

And honey.  I've been thinking a lot about honey in jam.

The trick with honey is to not let the flavor of the honey overwhelm the flavor of the fruit.   I decided to play.

While I was playing, I made this jam:  Strawberry Lemon Lavender Honey Jam.

It's beautiful.   And really really good!  The honey deepened the color of the berries into a deep dark red. 

Strawberry Lemon Lavender Honey Jam
  • 1 lemon, zest and juice
  • 4 cups sliced strawberries
  • 3 T Dutch Jell All Natural Lite pectin
  • 12 heads of lavender, tied in a bundle.
  • 1 1/2 cups mild honey
Put the lemon juice, lemon zest, berries, lavender and pectin in a pot.  [You can stir with the lavender bundle.]  Bring to hard rolling boil.  Boil for 1 minute.  Remove the lavender bundle.  Add honey.  Bring to rolling boil and boil for 1 minute.  Ladle into jars.  

Notes:  If you don't want the odd lavender flower falling off into the jam, you can strip the flowers off and put them in a tea ball to steep in the jam as it cooks.   I found it easier to just use the bundle to stir with as much as I could, then I switched to a spoon when I needed a stronger stirrer.  

The jam isn't too sweet, especially with all that lemon.   If you want it to be sweeter, you can add more honey, or sugar if you don't want the honey to take over. 

This jam also mellows with time.  What flavor might seem overwhelming when cooking will tone down after the jam sits for a few days.  


Related Posts Plugin for WordPress, Blogger...