Showing posts with label herbs. Show all posts

Thursday, June 6, 2019

Lavender

©Robin Edmundson, 'Lavender-547', watercolor, 9 x 6 inches.
Matted and framed to 10 x 8 inches.  $95.

These summer florals make me so happy.  It's a great way to practice capturing the essence of a plant. I love all the herbs, but lavender makes me happy on a cellular level.   

Our lavender is pretty happy.  There were a few plants that suffered greatly from the affection of the dog.  Turns out that Pepper loves sleeping on lavender. [Who can blame her?]    Several of our bushes were crushed and had to be pruned way back, but they are mostly recovering and we're trying to find a way to protect them from her attention again this year.  


Saturday, September 27, 2014

Pineapple Sage


Every few years I plant a pineapple sage.   I love them.   They smell good and those flowers just make me happy.

I get one bloom in the spring when I plant and then the blasted things go quiet.    They grow and grow and get huge, but no more flowers, and then BAM in September, right before the first frosts, they start blooming big time.


And for a couple of weeks, it is covered with flowers and the hummingbirds feast and all is right with the herb garden. 

Thursday, May 15, 2014

Goldenseal


I had never seen this flower around here before this year and was surprised to find that it was goldenseal - one of the most popular herbal medicines around.   

The Latin is Hydrastis canadensis and its other common names include orangeroot and yellow puccoon.   It forms colonies at the edge of the woods. 


The medicinal claims range from its effectiveness at reducing bacteria in the gut, to being used as a treatment for cancer.   One of the active constituents is berberine, which can have unfortunate effects when used with other medications. 

If you use goldenseal, make sure you do your research to know if it will interact badly with other medications and make sure to tell your doctor when you get any prescriptions. 

Saturday, March 29, 2014

Companion Plants, Part 2: Herb Companions

Yesterday I gave you a couple of terrific links to lists of vegetables that grow well together.  Today I've got links that talk about companion planting herbs and vegetables.   Herbs have the added benefit of repelling certain insect pests as well.

If you're a rank beginner, here's a basic list of 11 herbs to help your garden:  http://www.motherearthliving.com/in-the-garden/companion-planting-herbs-to-help-your-garden-grow.aspx#axzz2wyeOtpvv

Here's a list of herbs and the insects they repel.   Read the whole article - but the insect/herb chart is at the bottom: http://www.homeherbgardenanswers.com/cottage-garden-plants/  

I really liked this list of herbs and companions by Darlene Widirstky from http://www.n8ture.com/herbalcompanion.html

Here's a mixed list of herbs and vegetables put out by Wasatch Community Gardens:  http://wasatchgardens.org/files/resource/attachment/Beginning%20Organic%20Gardening%20Resources_1.pdf

And another mixed list of herbs and vegetables put out by Earl May:  https://www.earlmay.com/media/cms/companionplantschart_25D154AE91635.jpg

If you spend some time with this, you'll see that everyone has a slightly different take on it and you may even find some flat out contradictory information.   Don't worry about it.  Just take your best shot and enjoy growing your own food.


Saturday, July 27, 2013

Nasturtiums


I love nasturtiums [pronounced nas-TER-shums].

I love the yellow ones and the orange ones and the dark dark red ones.   I like the regular leaves and the dark leaves and the spotty leaves.


I like them viney and I like them short.  I like them planted with sweet potato vines.


And they're good on salads.   They have a peppery zing, so be prepared.

Wash the leaves and flowers carefully and toss them on a sandwich.


Or mix up some cream cheese with enough sour cream or yogurt to make it easily spreadable and pipe it inside the flowers for a summer appetizer.

Mmmm.

Wednesday, July 17, 2013

Lady's Bedstraw - An Herb to Know

Years ago I collected herbs in the garden.  Then this one tried to take over.  So I dug it up and planted it on a hill where it had to compete with grass and brambles.   It's still happy, but we're not in danger of it singing, 'Feed me, Seymour!'

It's lady's bedstraw, Galium verum.  It's a dual duty herb, used as a natural flea repellent and as a dye plant. 

It has tall beautiful, honey scented flowers - 24-30" tall depending on how happy it is.   The roots form a dense creeping mat and the leaves are a spiky version of typical galium leaves. 

It was dried and stuffed into mattresses traditionally, hence the common name - Lady's Bedstraw.    

This is one natural dye we never tried to use because it's a bit seasonal.   The roots have to be dug up at just the right time for the best color.  Then they have to be chopped finely. Here's a great write up from someone who has tried it.

Monday, July 8, 2013

Herbal Vinegars

We use herbal vinegars for all sorts of dressings and sauces.   I usually have a half dozen bottles of all sorts hanging around in the pantry.

And then we ran out.   All at once.    They tell me we've been eating a lot of salad lately and when you eat salad, you eat dressing - at least I do - and it's easy to zoom through a lot of vinegar. 

So I sat down and made a bunch more vinegars.

Here's how it works.  Pay attention.  It's really complicated.

Step 1.  Gather your herbs and wash them.
Step 2.  Put the herbs in jar or bottle.
Step 3.  Pour vinegar over them.
Step 4.  Put lids on.

OK.   I totally lied to you about how complicated it is.   It's easy.

Super easy.

Super.  Dooper.  Easy. 

Easy, I tell you. 

Go make some.  

What kind of vinegar?    Any kind of vinegar.   Start with plain white vinegar if you're new to this.  It's cheapest and easiest to find.

What herb combinations?   I know this part can get overwhelming, so here is a list of some of the combinations that I like.

Italian:   thyme, oregano, garlic, rosemary, basil
Provencal:  thyme, sage, rosemary, chive, garlic
Fennel:  fennel, chive
Chive:  chive flowers [It's pink!!]
Basil:  red basil or green basil.  [Red basil makes a glorious pink vinegar!]
Dill-Garlic:  dill leaves and flowers, garlic cloves.   A bit of lemon peel is great in this vinegar, too.

Go make some. 

Tuesday, January 22, 2013

Garlic Chives

It's time to plan your spring garden and start making those lists of things to add.  My favorite January activity is making the garden wish lists.

Here's an herb that we love having in the garden.

Garlic chives:  Allium tuberosum.

You can use the leaves all year long, like regular chives.  It blooms white in late summer and spreads like crazy.  It's a beautiful filler in the herb garden.  


Alliums grow from bulbs and they include everything in the onion family.    The leaves and flowers are edible.    

They have star shaped florets at the top of a stalk that comes up from the bulb.   

Garlic chives grow easily from seeds or from divisions of clumps of bulbs from an established patch like this one.  

This patch in the corner of my lower herb garden started as a single plant.   Now we have garlic chives in the neighboring beds, too.    They're easy to pull out where you don't' want them.    We prefer to let them wander. 

Saturday, December 29, 2012

Euell Gibbons

Yeah, I know it dates me.    Euell used to be a big name way back in the 19.....uh....ahem.

Way back when.

Here's his bio from Wiki.

He wrote a series of back to nature type books called, Stalking the ......  [fill in the blank], plus a couple of others: 

Stalking the Wild Asparagus (1962)
Stalking the Blue-Eyed Scallop (1964)
Stalking the Healthful Herbs (1966)
Stalking the Good Life (1966)
Beachcomber's Handbook (1967)
A Wild Way To Eat (1967) for the Hurricane Island Outward Bound School
Stalking the Faraway Places (1973)

Here's where you can get  his books

I learn a lot every time I pick up one of these books.   They are marvelous collections of lore and how-to.    Look for them - open one up and read through a section.    They're fun!

If you're looking for a gift for someone who's into self sufficiency, I highly recommend these books.  

Saturday, October 13, 2012

Orange Basil Garlic Glaze


So,  yesterday we started talking about glazes.   Remember?

Today I want to talk about another option you have when you're making glazes.  It's the plain juice vs. juice concentrate option. 

You can make fabulous glazes with regular old fruit juice or with concentrated fruit juice - like the frozen stuff.

Which means, you can use it straight out of the frozen juice can.   I don't think it gets much easier than that.  In fact, the hardest part of the whole process is opening those frozen juice cans in the first place.

I just don't think you should have to use pliers to get to your juice, is all I'm saying.

When you use concentrate, the flavor is much more intense.  That's a good thing.   This recipe has plenty of sugar and herbs to compensate for the extra kapow of concentrated orange flavor. 

A note about the garlic and basil.   They're really really good in jam this way.   In fact, you can add a bit of ginger, too for a totally knock your socks off glaze for chicken.

For more terrific recipes like this one, check out my book - A Simple Jar of Jam.   Follow the links in the sidebar for a preview and to purchase the ebook from our Etsy shop.  

Orange Garlic Basil Glaze
www.rurification.com
  • 2 cups orange juice or orange juice concentrate
  • 2 Tablespoons Ball Low Sugar pectin [optional – use if you want jam instead of a syrupy glaze]
  • 4 cloves garlic sliced in half long ways 
  • 1 cup basil leaves or sprigs. 
  • 1 inch ginger root, sliced [optional]
  • 3 cups sugar
Combine juice, pectin [if making jam] and herbs in pot. Bring to boil. Boil one minute. Add sugar. Return to boil. Boil one minute. Remove herbs. Ladle into jars.

Friday, October 12, 2012

Apple Thyme Sage Glaze

Glazes.   I've been thinking a lot about glazes.    

Basically, they're jam or jelly that you put on meat during cooking.   Meat and jam, can you get any more awesome than that?

Plus, PLUS, glazes are a multitasking food - you can put glazes on fruit, too, for tarts and stuff.   I love tarts and stuff. 

SO,  you have lots of options.  I love options.

And speaking of options, you have even more options when you make your own glazes.

Options like:  Do I want thick glaze like jam, or thin glaze like syrup?   

And:  Do I want to use plain old juice or juice concentrate?

I know.   The possibility are endless.   I love endless possibilities.

But what I like the very best about glazes are the awesome combinations of fruit and savory herbs.

Here's a thin glaze that you can make with plain old juice and easy to find herbs.   Over the next couple of days, we'll talk about the other options and I'll give you some more fabulous recipes.  


Apple Sage Thyme Glaze
  • 1 1/2 cups apple juice, apple cider or apple juice concentrate
  • 2 sprigs sage [3 inches each]
  • 3 sprigs thyme [4 inches each]
  • 2 cups sugar
Combine juice, sugar and herbs in pot. Bring to boil. Remove herbs. Ladle into jars.

Note: This glaze is a syrup that easily pours over your meat. You can use this technique instead of using pectin to make jam with any of the juice/herb combinations that I'll show you later, too.

This is a great glaze for pork and chicken. 

Monday, September 17, 2012

Fall Gardening

It's time to plant the fall garden.    Mostly I plant things that I can surround with a cold frame later, but this year I wanted some extra cilantro so in August I planted two rows of it.

And it sat.

And sat.

And never came up. 

And then in rained.

And rained.

And rained.

And this is what happened. 

Finally.   

Monday, August 27, 2012

Basil

I kind of overdid it on the basil this year.   Last year I only planted one row and it didn't do great.  This year I planted three and it turns out that basil loved the heat and the daily watering.   I have loads of basil.

Loads, I tell you.

This is a pic of our second picking, but we've done one more since.   I expect at least one more before frost.    That's a seven gallon tote that it's in.   That's a lot of basil.

There will be plenty of pesto in the freezer this year.   Here's a link to how I make the pesto.

In the tote there, I have Italian Sweet Basil, and Opal Basil and some Thai Lemon Basil.     It's easy to find seeds for those at your local hardware type store.  

This year, since I planted basil all over the place, I learned a few more things about what it likes.  
  • Basil likes heat and wet and well drained.   It loves very sandy soil.  
  • If you direct sow the seeds, then make sure to water them every day to keep them damp until they sprout.    It's true.   If you don't water them, they probably won't sprout and if they do sprout, then it'll take a couple of weeks or more before you see them.   If you do water them every day, then they come up in just a few days.  [Note, this is only true if you have very well drained soil.  If you have heavy wet soil, then the rules are completely different.  My advice is to dig a lot of sand in.]
  • Basil much prefers soil that has some manure in it.    The leaves and plants are much bigger in the beds where I turned in some manure this year.  
  • Don't bother planting basil early in the season.   It turns brown if the temp gets below 40 and then it will be forever stunted.  For. Ever.   Wait until the middle of June to plant it and you'll still have plenty of time to make loads of pesto all season.   I planted the last batch of seeds at the beginning of July and I'll still get three harvests.
  • When I cut the basil, I cut it just above the bottom sets of leaves. After it's cut, the plant will branch off at the base of those leaves and produce another nice harvest for you. 


Tuesday, August 14, 2012

Simple Syrups in Jam

Here's the thing about summer.  It's busy.  Crazy, stupid busy.

There's no such thing as summer vacation around here.   We have the mowing and the garden and the berries and the mowing and the building and the working and the mowing and the garden and the canning and the jams and the garden and the herbs and the mowing and ....

You get the idea. 

Anise hyssop
I get all these great herbs just at the wrong time for me to do anything with them.  The herbs are ready in June and July and I may not have time to make jam with them until maybe six weeks later.   
They don't do so well in the fridge for six weeks.   Or in a vase.   I could dry them, but that's a lot of work itself and somehow things just taste better if you can use the fresh herbs.  


Lemon verbena
And so here's the thing about herbs for jam.    You can capture that fresh flavor and hang onto it for a few months by making simple syrups with the herbs.   You can water or steam bath the syrup in jars to seal it up and then you can use it in January if you want to and it will still be fabulous.  


Bay
I made three kinds of simple syrup this year:  anise hyssop, lemon verbena and bay.   I made jam with each of them and you are going to love it! 

But first, I need to tell you how I made the simple syrups.

It's simple.   That's why they're called simple syrups. 

Simple Herb Syrups
  • 1 cup water
  • 1 cup sugar
  • 1 cup herb leaves
Combine everything in a small pot.  Stir until the sugar is dissolved. Bring to a boil. Strain the herbs out.  Put in a jar and seal if you want to keep it indefinitely.   These will keep nicely on your counter for a few days, or in the fridge for a few weeks if you don't want to seal them. 

They're so pretty!

Here's the bonus!  

You can use these to flavor all kinds of stuff, like cakes and pies and trifles and as meat glazes or over fruit in tarts.   Yep. 

You can use them straight over ice cream or in drinks, too. 


Saturday, November 26, 2011

Easy Herbs for Pork

Here is another meat rub that we love, love, love.

It's my very favorite way to fix pork shoulder chops or even a larger pork roast.

As I did with the Chicken Rub recipe, I've given you a single use version and a bulk version.

Enjoy!

P.S.  Don't freak out about the mustard thing.   It won't taste like you poured French's yellow all over it.  Trust me!    It's not really spicy at all.    Try it once before you pass judgement.

Pork Rub - single use
  • 2 teaspoons salt
  • 1 Tablespoon  mustard powder
  • 2 teaspoons rosemary powder


Pork Rub - bulk
  • 1 1/2 cups salt
  • 2 cups mustard powder
  • 1 1/2 cups rosemary powder

Stir it up well and rub it on the meat.    Don't worry too much about the proportions.   It'll taste great!

Friday, November 25, 2011

Easy Herbs for Chicken

I love this herb mix.    Whenever we bake a chicken, we cover it in this stuff.   We also put a couple of spoons full into our chicken stock.   Yum!

It's quick.   It's easy.  It doesn't call for exotic ingredients.

Whew.  I'm so glad.   I can't deal with exotic right now.

I've given you two recipes - one for a single use on chicken or in soup and one that's a bulk recipe.   

Chicken Rub - Single Chicken
  • 1 Tablespoon dried crushed rosemary
  • 1 Tablespoon dried thyme leaves
  • 1/2 Tablespoon [1 1/2 tsp] salt

Chicken Rub - Bulk recipe
  • 4 oz dried thyme leaves
  • 4 oz dried crushed rosemary
  • 1 cup salt
Stir it all up and use it on chicken [or turkey!] or in soup.  You can make these without the salt.    Don't worry if the proportions aren't exactly right.   Everything will still taste good.  

To put it on a chicken, pour the herb mix in your hand and rub it all over the chicken.   You can try to sprinkle it, but it doesn't stick all that well unless you get up close and personal.

Saturday, July 30, 2011

Pesto

It's pesto time.

Pesto tastes like early misty sunrises and hot humid walks in the fields.    It makes me happy just thinking about it.

I make pesto with these basic ingredients.  
  • basil  [4 cups or so]
  • pistachios [1 cup or so, shelled]
  • olive oil  [1/4 cup or so]
  • garlic [3 cloves or so]
  • parmesan cheese [1/2 cup or so]
  • parsley [just a touch]
Put it all in a food processor and process until smooth.   

I never make it the same way twice because I never measure.   It's always good.  

Note:  I do not use pine nuts.   I don't really like them very much.   I love pistachios and they have enough salt to help cut the bitter.

Salt cuts bitter.   Did you know that? 

It's true.   Some people put salt in their coffee to cut the bitter.   I don't drink coffee, so I put salt in my pesto to cut the bitter. 

Rumor has it that the best, smoothest pesto happens when you use a mortar and pestle to grind it up.    I will never know because I have no intention of using a mortar and pestle to grind up as much pesto as we eat in a year.

We make pesto all summer and put the extra in jars to freeze.  We eat it on pasta, on green beans, on squash, on tomatoes, on mozzarella cheese and just plain with a spoon. 

Just plain with a spoon is my favorite.

Monday, July 25, 2011

Lavender Sachets

Remember when we made lavender wands?  

The thing about lavender wands is that you have to make them pretty soon after you pick the lavender and it's still soft and pliable.

Pliable is good. 

We like pliable.

After pliable comes dry.   Dry is not pliable.   Dry is stiff and brittle. 

Dry is what happens when you pick the lavender to make the lavender wands and then get distracted by real life stuff like changing diapers, going to work, cleaning the house, taking care of Grandma, writing letters to your representatives,  making pickles, going to the vet, sleeping for a few hours every night, etc.

Yeah, that sleeping business really gets in the way, I tell ya.    While you're sleeping, the lavender is leaving the land of pliable and heading at warp speed into the land of dry.  

It's pretty near impossible to make lavender wands with dry lavender. 

Never fear!  All is not lost!    You can use that lavender to make lavender sachets!

This is what you need:
  • Paper.  Pretty paper!
  • Double-sided tape
  • Lavender
  • Paper cutter or scissors
We used old scrapbooking papers that I knew I wouldn't use for scrapping, but would look fabu full of lavender in my drawer.

Cut the 12x12 ones in half.   Leave the 8.5 x 11 as is.   Fold them all lengthwise.

See where the fold is?   On one side of the fold, put tape across the top, one edge and bottom.   You don't have to use much.  

See?

Now, put a small bunch of lavender in the sachet - a dozen stems or so.

See how mine in the photo are too long?   I just cut the ends off.   They were dry and brittle and I could just bend and twist to get them off.  

Now, fold the other side of the paper over the lavender and stick it together. 

Voila!    A lavender sachet.   With rescued lavender!  Aren't you clever!

I made mine with bits of tape so there are open spaces along the edges.  That means that bits of lavender might fall out.    Mine are in the bottom of my drawers so I don't have a problem with that.    If you want secure edges, make sure you tape all along the top, edge and bottom so there won't be any openings for lavender bits to fall out of. 

They smell good immediately.  My scarf collection loves these.

So do my sheets.  

So do my holiday towels.  

And my t-shirts.    

And my kids' drawers.

You can also punch a hole in the top, thread a ribbon through it and hang it on a hangar in your nice clothes.   It would make you happy every time you opened your closet. 

Thursday, June 30, 2011

Lavender Wands

I need more magic in my life.   

Mostly I need a magic wand.    I want a magic wand that I can wave to rid our property of all of the blasted multiflora roses.  And the autumn olive.   And the poison ivy.   And that I can wave to mow the lawn.    And bush hog 10 or so acres of brambles.  And make my mudroom bigger on the inside, like the Weasley's tent.  And wind skeins.   And finish a dozen house and property projects that have been lingering for far too long around here. 

If I had a wand that would do all that, then I'd have more time to blog.   And weed.   And cook.   And bake.  And can.   And dye.  

It's not that I don't want to do my work.   It's that I have too much work to do.  

I need a wand! 

Sigh.

In the absence of the Magic type wands, I've made some Lavender type wands. 

And since I know you need a wand or two or ten, here's how:

What you need:
  • Lavender with long stems in bundles of 9 or 11 or any odd number that you want.   I like 9.     I try to pick my lavender just when the first blooms on the plant begin to open and before the bees really find it.   You'll see good color on the buds and they'll smell fabulous. 
  • Ribbon.   I like using 1/4" satin, but I've seen some folks use the 1/8".   I like the 1/4" because it weaves around very quickly.
  • Scissors
Here's the step by step:
1.  Cut your lavender with as long a stem as possible.   My favorite lavender plant for this is Impress Purple.   Super long stems!  Clean off the leaves and little bitty flowers on the lower stem if necessary.

2.  Cut about a yard of 1/4" ribbon [It might take 1.5 yds of the 1/8" since you have to wind it around a lot more.]


3.  Tie the stems in a bundle just under the flower heads.   Leave a tail of about 8 inches or so on one side.   The other side will be a lot longer.   Pull tight and tie a square knot.


4.  Turn the whole thing upside down and bend the stems down over the ribbon tie - all around the flower head.   You're making a stem cage around the flowers.

5.  Leave the short side of the ribbon in the center with the flower heads.  You'll need it later to tie off with.  


6. With the long ribbon, start weaving over and under the stems all around the flower heads.  Push the ribbon up snug around the heads next to the previous rows of ribbon.   Once in a while, a little flower will try to pop out.   Loosen the ribbon if you need to so you can tuck and keep the buds inside. Then pull the ribbon snug around the head and continue around.

Work all the way around and down the flower head bundle until you cover the last flower.


7.   When you have covered the last flower, do one more row around, then pull the short ribbon out of the center and wind the ends around and them tightly around the stems.  


Voila!   

Let air dry in a place with good air circulation. 


 What can you do with these?
  • Drop one in a drawer to use for a sachet.   
  • Put several in a vase.  
  • Leave a long loop in your last tie and loop it over a hanger in your closet.  
  • Tuck them in with your sheets.   
  • Wave the wand three times clockwise and it will clean your house for you.

OK.   I'm really not too sure about that last one.


Wednesday, May 18, 2011

Chive Vinegar

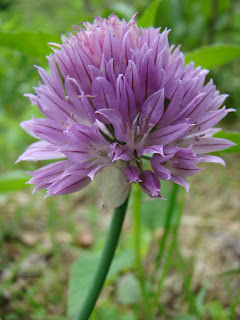
It's chive time.    They're among the first of my herbs to pop up and start blooming.

Everyone knows how to harvest the green leaves.   You chop them up and use them wherever you need a hint of onion flavor.

The flowers have a lovely onion-y flavor, too. 

Plus, they're pink.   Pink things just taste better.  Ask K2.

My favorite thing to do with chive flowers is make chive vinegar.  I use my homemade white wine vinegar.


Isn't it beautiful?

Occasionally, you can catch me just staring at the jar.  It's so pretty.

To make chive vinegar, all you have to do is put the flowers in a jar of vinegar and let it steep in the sun for a week or so.   The vinegar turns a lovely shade of pink.  Eventually, the flowers lose their color and you can strain them out. 

If your chives flower only sporadically during the season, don't worry.  You can add the flowers as you find them.  When you find a flower, pop it into the jar.  Take the old faded ones out when you need to.  

Chive vinegar is my favorite to use in salad dressings.   I try to make as much as I can during the year.
Related Posts Plugin for WordPress, Blogger...